Roomba Replacement Parts Quality Checklist for Fit, Durability, and Red-Flag Avoidance
Roomba replacement parts quality checks help evaluate replacement components before purchase by focusing on fit, durability cues, and red flags. The checklist addresses part quality verification rather than seller choice or repair workflows.
Three evaluation axes—fit, durability, and red flags—apply to any Roomba replacement part. Durability can be indicated by material feel, edge finish, and structural rigidity. Red flags include visible asymmetry, rough seams, or inconsistent shape. Since checks differ by part type and Roomba generation, the usefulness of each criterion depends on your robot's series and typical cleaning load.
Quality baseline for Roomba replacement parts: what matters and what does not
Quality in Roomba replacement parts means correct fit, stable performance, and predictable wear. Fit ensures the part seats properly without gaps or looseness, stable performance means consistent cleaning behavior cycle after cycle, and predictable wear means the part degrades at a known rate rather than failing early or unevenly.
Each Roomba part has specific quality attributes that can be observed or inspected. For debris collectors (rollers), material consistency matters: a rubber compound that is too soft may deform quickly, causing louder operation and reduced debris pickup. Side brushes that lose their shape early often leave edges uncleaned. Filter media density and construction influence how long the filter traps particles before clogging. These attributes produce observable conditions such as noise, missed spots, or error messages.
Effects depend on the model and part type, so checking fit and build before installation is a reliable way to assess most parts.
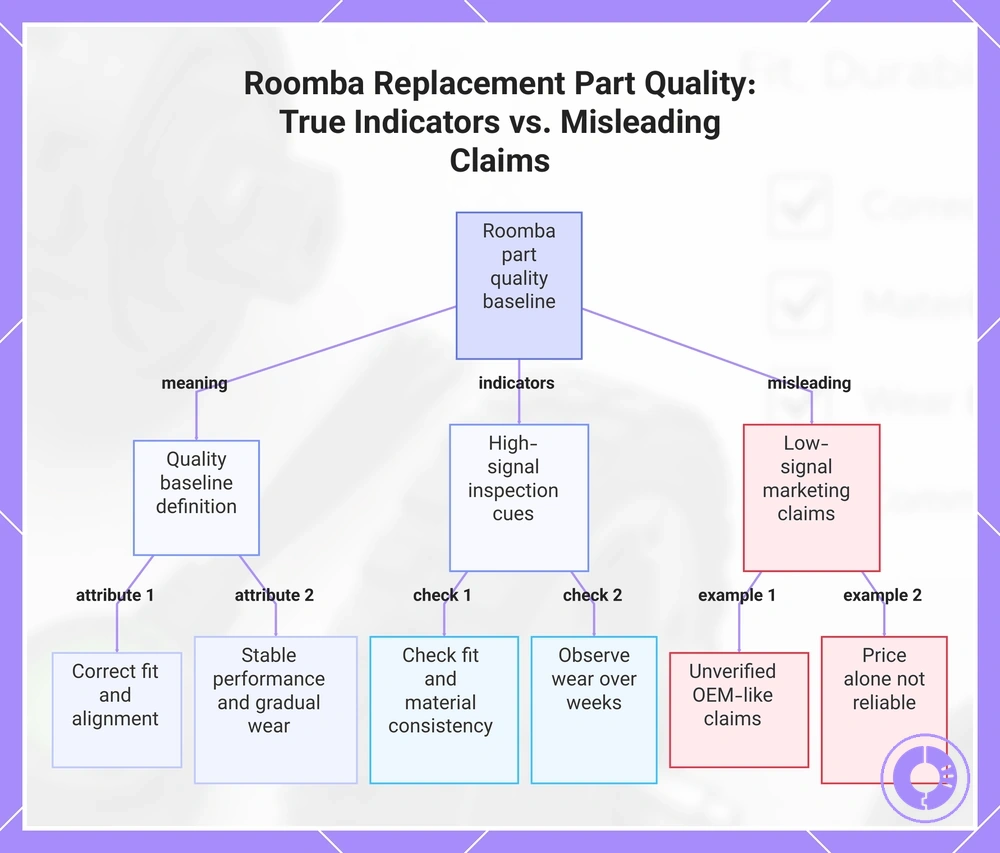
A higher price or claims like “OEM-like” do not guarantee better quality. These are marketing claims unless verified by direct inspection of fit, material feel, and wear behavior. Price alone does not prove fit or durability; many off-brand parts meet the same baseline when chosen carefully.
High-signal quality cues
- Debris collectors that snap into place without forcing and have consistent rubber firmness along the entire roller
- Side brushes that maintain their curved shape after removal and do not droop or bend permanently
- Filter media that appears dense and uniform, with no loose fibers or thin spots
- Parts that fit the mounting points exactly, with no rattling or misalignment during operation
- Wear that occurs gradually over weeks rather than showing cracks, tears, or deformation after a few uses
Low-signal marketing claims
- “Genuine-like” or “OEM quality” without any observable verification of materials or dimensions
- Price alone as an indicator of durability (some inexpensive parts meet the same baseline, while some costly ones do not)
- Labels claiming “washable” filters without specifying the filter media type
- Packaging that mimics iRobot design but does not guarantee identical internal construction
This chart shows the key quality attributes of Roomba replacement parts and distinguishes reliable inspection cues from deceptive marketing claims.
Compatibility and fit validation before buying: model match, interfaces, and tolerance reality
To prevent wrong-fit purchases, start by validating model match, interfaces, and tolerance before buying. Fit checks act as the first decision gate because a part that does not match the model, interfaces, or tolerances may not function correctly no matter how well built it is. Fit first, then durability.
Many replacement parts claim to fit multiple models, but interface details such as connector type, mounting point location, and clearance vary by series and revision. A mismatch in any of these attributes can lead to intermittent power loss, rubbing, or failed engagement. To avoid these outcomes, use a criteria-based approach, such as a compatibility checklist, to check each interface attribute against your specific Roomba model and part type.
The annotated image below shows connector alignment, mounting points, and clearance cues for identifying fit-critical points.
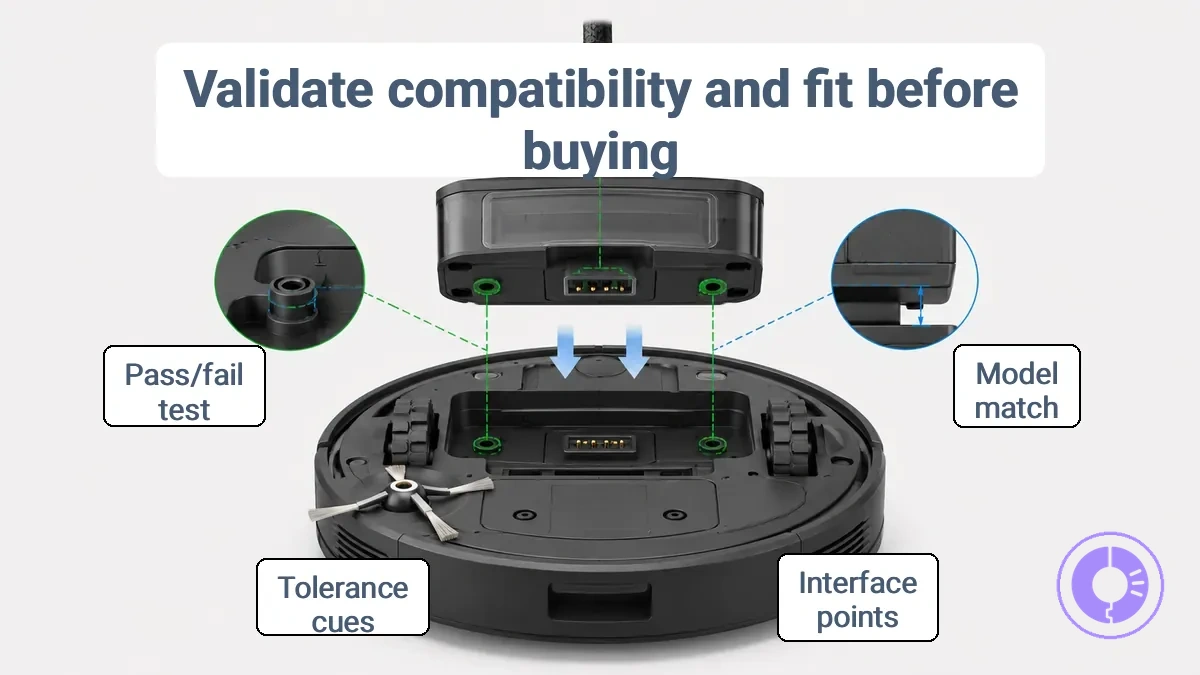
Use this checklist to validate fit before purchase. Items are grouped by the three key layers: model match, interface points, and tolerance cues.
Model match
- Verify the part number and series compatibility. A part from a different revision may have different internal mounting.
- Confirm the model family (e.g., 500, 600, 800) because connector shapes often change between generations.
- Treat descriptions such as 'fits many models' without specific series as a red flag.
Interface points
- Check the connector type (e.g., ribbon vs. wire) and whether it matches your model's socket.
- Ensure mounting points align with the chassis holes and clips. A misalignment can cause rattling or incomplete seating.
- Verify that sensor windows, if present, line up with the model's optical path.
Tolerance cues
- Look for clearance around moving parts. Insufficient clearance can cause rubbing and premature wear.
- Wiggle room in connectors may lead to intermittent connection.
- Use a pass/fail test: if the part does not seat without force, it probably does not fit.
Why 'fits many models' fails
- Such claims often ignore interface differences like connector pinout variations or mounting bracket shapes.
- A part that works in one series may require modification in another, which defeats the purpose of a direct replacement.
- Without tolerance specs, a part that seems compatible may wobble or bind when installed.
Model identifiers and part numbers that prevent wrong-fit purchases
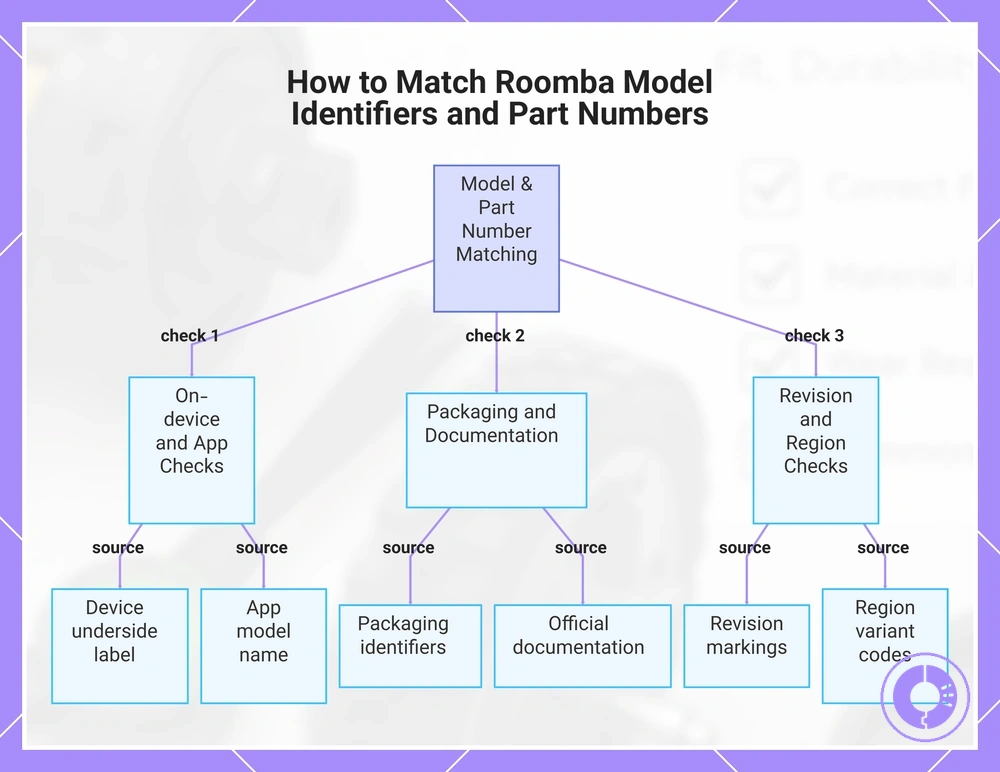
Confirm the Roomba series and exact part identifier before judging part quality. The model identifier (series) and part number must match: a correct part number for the wrong series, or a part number that looks similar but belongs to a different revision, can cause a part that does not seat correctly or fails to function, wasting time and money. Revision differences or region variants can change fit outcomes even when the series appears the same.
- Device label: check the underside or battery compartment of your Roomba for the printed model identifier and original part numbers.
- App model name: the iRobot HOME app often displays the exact model identifier under robot settings.
- Packaging identifiers: if you still have the original box or replacement part packaging, the part number and compatible series are usually listed.
- Documented part references: official support pages or user manuals provide verified part numbers mapped to specific series identifiers.
- Revision markings: a small letter or number after the part number (e.g., Rev A) indicates a revision that may affect fitment.
- Region variant codes: parts manufactured for different markets may carry a suffix or different reference code; cross-check this against your unit's origin.
This chart outlines the key verification steps to ensure a Roomba part number and model identifier match, preventing incorrect fitment and wasted time.
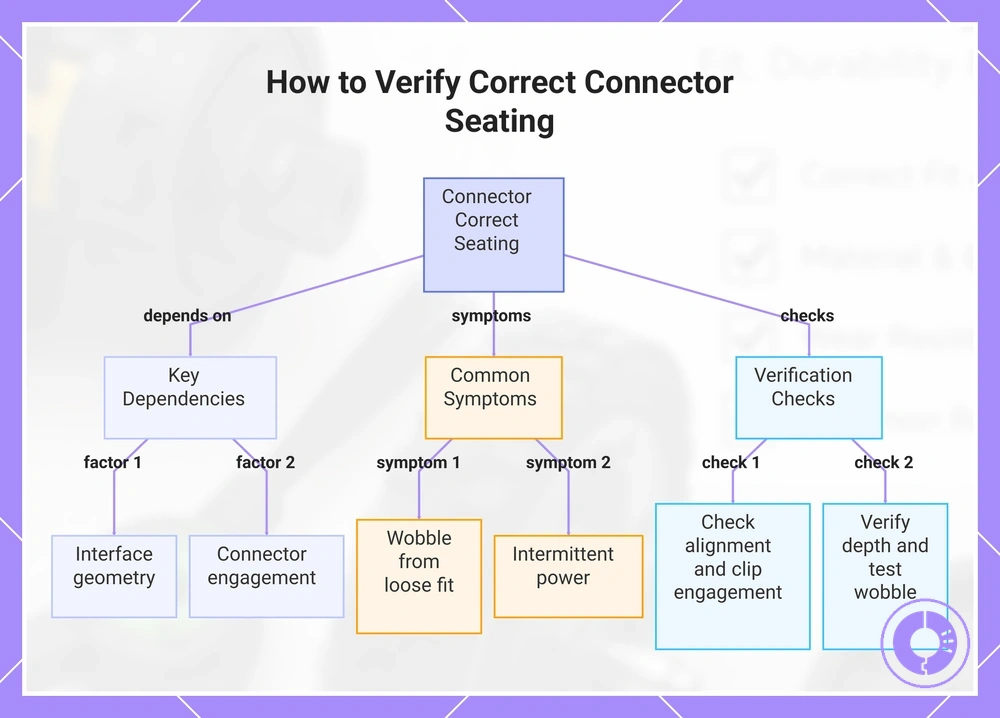
Attachment points and connectors that determine correct seating and stable operation
Correct seating depends on interface geometry and connector engagement, not on similar-looking photos. A connector that appears to match may still fail to lock or align properly.
Incomplete engagement can cause wobble, intermittent power, or rubbing even if the part seems to fit. These issues often trace back to poor alignment, insufficient clip tension, or incorrect connector depth.
- Check that the connector aligns squarely with the mounting point.
- Confirm that the clip or latch engages fully and produces an audible click or tactile feedback.
- Verify that the connector seats to the correct depth; a gap indicates incomplete insertion.
- Ensure that clip tension holds the connector firmly without excessive play.
- Inspect for any visible misalignment that could cause rubbing or noise during movement.
- Test for wobble by gently applying lateral force; the connection should remain rigid.
- If intermittent power occurs, recheck connector depth and lock engagement as a likely cause.
This chart shows the key factors for correct connector seating, common symptoms of poor engagement, and the essential checks to confirm proper fit.
Tolerance Red Flags You Can Detect Before Installation
Before installing, check for tolerance red flags like warping, uneven seams, loose pins, and inconsistent dimensions. This can help you avoid wasted effort and repeat failures. These signs suggest the part may be out of spec, but actual effects depend on the model and part type.
- Warping: A visible bend or twist that may prevent proper seating.
- Uneven seams: Gaps or mismatched edges point to symmetry issues that can cause misalignment after installation.
- Loose pins: Wiggle or shift when lightly pressed indicates poor dimensional consistency and may not maintain secure contact.
- Inconsistent dimensions: Slight differences in length, width, or thickness at matching points suggest a tolerance defect.
- Alignment issues: Holes, slots, or mounting points that do not line up when dry-fitting suggest a symmetry problem.
- Play at joints: Excessive movement or wobble in a hinge, pivot, or clip point often points to a fit that may be too loose.
- Rubbing: A component that contacts an adjacent surface during a test movement can signal warping or uneven seams.
- Out-of-spec contours: Curves or edges that deviate noticeably from the expected shape are red flags for functional fit.
- Cosmetic variations: Minor surface ripples, color differences, or texture changes that do not affect dimensions or contact points are usually harmless and not a tolerance defect.
- Functional defects: Warping, significant dimensional inconsistency, or misalignment that prevents proper seating can lead to performance problems and should be flagged.
Durability and build-quality cues: materials, molding, joints, and wear surfaces
Durability and build-quality cues on Roomba replacement parts—covering materials, molding, joints, and wear surfaces—help you predict how well parts will hold up under your floor conditions and usage. Actual service life depends on your floors, debris load, and run frequency.
Each replacement part category has durability attributes such as material resilience, seam integrity, joint reinforcement, and rotation smoothness. Observable conditions like warping, flash, play in joints, or uneven wear surfaces often correlate with likely wear outcomes. Accurate assessment requires distinguishing normal consumable wear from early structural failure signals.
Durability and build-quality cues are visible on the part surface; the annotated image highlights molding consistency, seam quality, and wear-surface indicators on a typical Roomba replacement part.
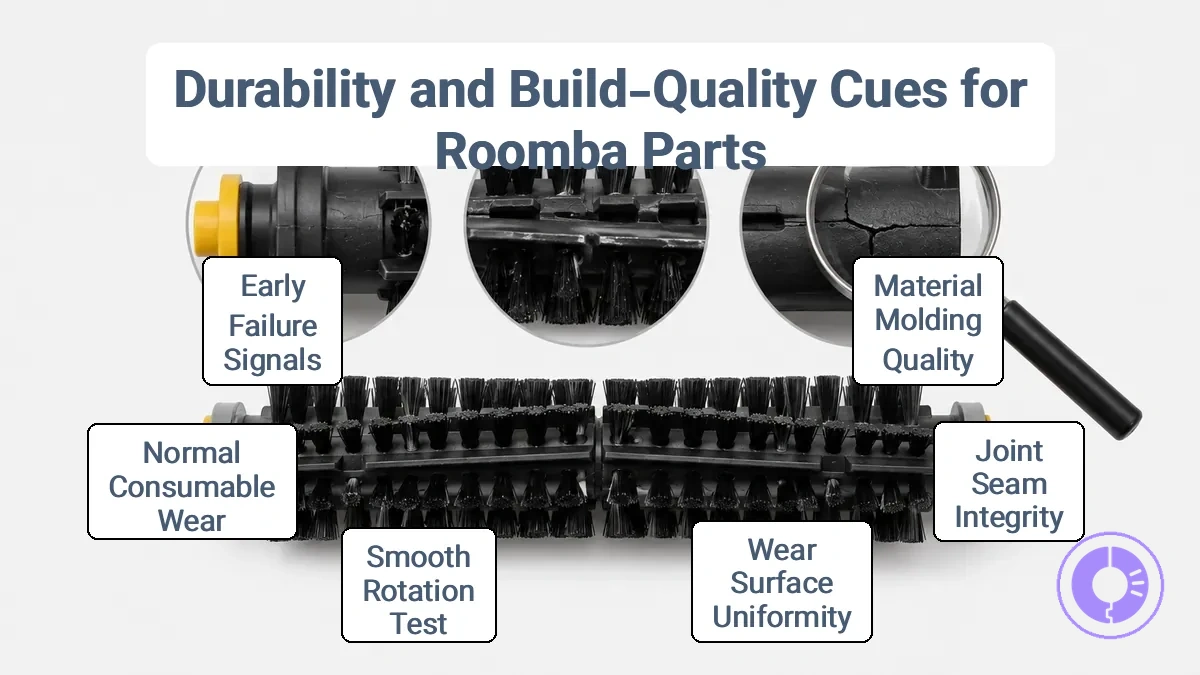
The checklist groups durability and build-quality cues by materials, joints, and wear surfaces.
- Materials & Molding
- Consistent surface finish — smooth, uniform appearance tends to indicate good mold quality; rough or uneven finish can suggest poor material flow or mold wear.
- No flash or excess material — flash along edges often points to worn mold shutoffs; can lead to early cracking or fit issues.
- No warping — a part that sits flat in the hand is less likely to deform under load; warped parts may cause binding or noise.
- No sink marks — depressions on thicker sections can weaken the part and reduce impact resistance.
- Joints & Seams
- Seam integrity — tight, well-aligned seams without gaps tend to indicate strong bonding; gaps or misalignment can allow debris ingress or loosen over time.
- Joint reinforcement — reinforced ribs or gussets at stress points add stiffness; parts lacking reinforcement may flex and crack sooner.
- No play or wobble — moving joints (like brush axle holes) should have minimal lateral play; excessive play can accelerate wear on mating surfaces.
- Wear Surfaces & Friction
- Smooth rotation — a part that rotates freely without grinding or noise suggests good bearing fit; roughness can indicate early wear or out-of-roundness.
- Uniform wear pattern — even wear across the contact surface is normal; uneven or localized wear often signals misalignment or a material defect.
- No surface cracking — cracks on treads or rollers are a red flag for early structural failure; they can spread quickly under load.
Criteria split: normal consumable wear vs. early failure signals
- Normal consumable wear: gradual surface smoothing, slight color change on treads, minor dust accumulation; part still functions as intended.
- Early structural failure signals: sudden cracking, persistent play in joints, warping that affects fit, or noise during rotation — these often indicate a material or molding defect and warrant earlier replacement.
Material and molding signals linked to cracking, warping, and loose seating
Material consistency and molding precision, referring to the uniformity and accuracy of a part's structure and shape, are common predictors of deformation and breakage. Visible cues on a part can indicate correct material processing or internal stresses. Recognizing these signals, which often appear before failure, helps assess part quality and anticipate issues. Acceptable feel and appearance depend on the part's function and the loads it will bear.
Inspection cues that may indicate risks of cracking, warping, or loose seating include:
- Brittle edges — a sharp, clean fracture surface may indicate material brittleness and may increase cracking risk.
- Stress marks — visible white or cloudy lines near bends or thin sections suggest internal stress that may lead to cracking or warping.
- Uneven thickness — variations in wall thickness may cause differential shrinkage and contribute to warping or loose seating.
- Flashing — thin excess material along the parting line may indicate poor mold closure and may create stress concentration points.
- Warping — visible curvature or twisting in the part may result from uneven cooling or material shrinkage, affecting fit and stability.
- Softness or hardness extremes — parts that feel too soft or too rigid may indicate material inconsistency and reduced durability.
- Crazing — fine superficial cracks on the surface may signal surface stress or material degradation, and may be precursors to deeper cracks.
Contact and friction zones where premature wear usually starts
Friction and contact zones on Roomba rollers, wheels, and brushes can start premature wear through their surface finish and alignment. This friction can create drag, noise, and gradual material loss that may reduce pickup performance. Heavy hair and dust buildup can amplify these effects, tightening acceptable wear thresholds.
- Roller surface finish – scuffing against debris can create roughness, adding noise and drag.
- Wheel tread edges – rubbing against floor guides due to misalignment may produce uneven wear and reduce traction.
- Brush bristle tips – prolonged contact with floors can lead to rounding and loss of pickup efficiency.
- Side brush pivot – wear in the rotation zone can increase rotation resistance, often causing intermittent spinning and noise.
- Filter sealing rim – friction against the housing can degrade the seal, reducing suction.
- Drive belt contact faces – scuffing on pulley surfaces can increase drag, rotation resistance, and slip.
- Normal polish vs. problem wear:
- Smooth, even polish across the contact zone indicates acceptable break-in.
- Gouges, scoring, or localized discoloration may indicate excessive wear that may require part replacement.
Component-by-component inspection checklist for the most replaced Roomba parts
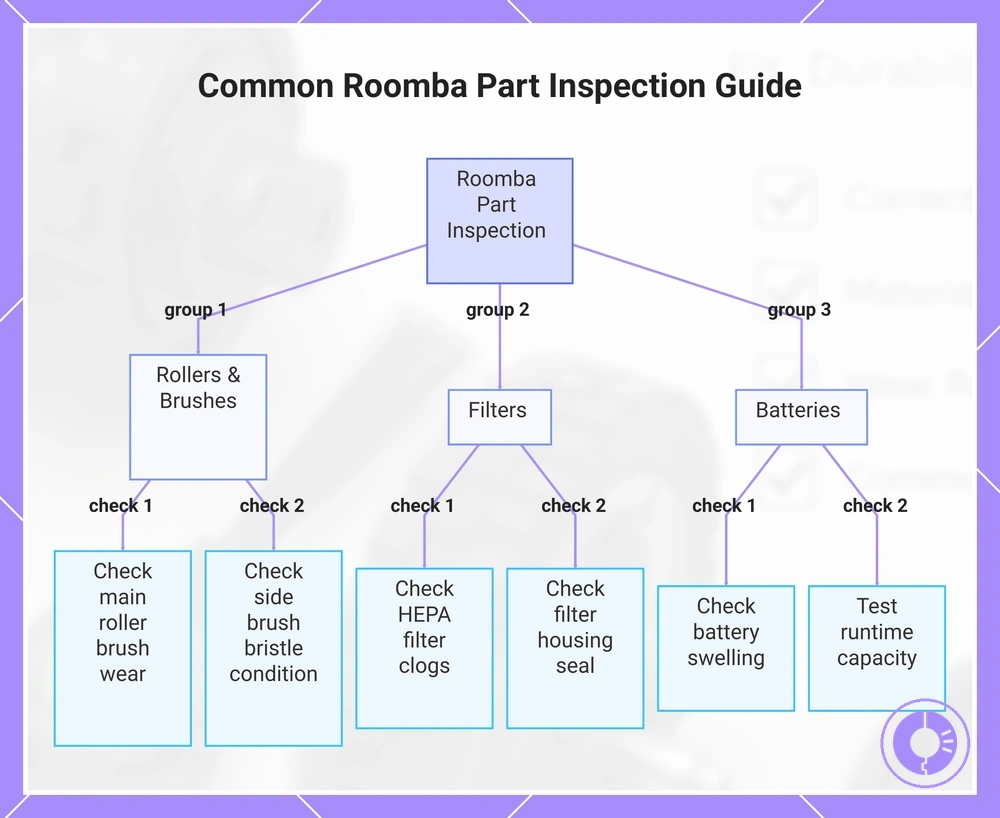
This component-by-component inspection checklist organizes the most replaced Roomba part types into four groups: rollers/brushes, filters, batteries, and wheel/side brush modules. Each group includes specific quality attributes, pass/fail cues, and the typical consequence of part failure.
Prioritize the component group that matches the symptom or risk you want to prevent. For a broader perspective on choosing between bulk kits and single parts, see the kit vs individual parts decision.
Rollers and brushes
- Check the main roller brush for visible wear, uneven bristles, or rubber deformation. Pass/fail cue: if the roller brush does not make full contact with the floor or leaves streaks, it may reduce cleaning efficiency. Consequence: often results in poor debris pickup on hard floors and carpets.
- Inspect side brushes for bent or curled bristles. Pass/fail cue: if the side brush does not spin freely or appears misshapen after transportation, it may not sweep debris into the vacuum path. Consequence: can leave debris along edges and corners.
- Examine the brush module for hair tangles or obstructions. Pass/fail cue: if the brush does not rotate smoothly when manually turned, debris may be caught inside. Consequence: typically leads to increased motor strain and potential burnout.
Filters
- Assess the HEPA filter for visible clogs, discoloration, or tears. Pass/fail cue: if the filter appears heavily coated with dust or has a musty odor, airflow may be restricted. Consequence: can cause reduced suction and lower overall cleaning performance.
- Feel the filter material for stiffness or brittleness. Pass/fail cue: a filter that no longer holds its shape may allow unfiltered air to pass through. Consequence: often results in fine dust escaping back into the room.
- Check the filter housing seal for cracks or gaps. Pass/fail cue: if the seal does not fit snugly, unfiltered air can bypass the filter. Consequence: may lead to motor damage from debris ingress.
Batteries
- Inspect the battery casing for swelling, leaks, or bulging. Pass/fail cue: a swollen battery may not seat properly in the compartment and may cause the robot to shut down unexpectedly. Consequence: can damage the charging contacts or pose a safety risk.
- Test runtime: if run time is notably shorter than when new, the battery may be losing capacity. Pass/fail cue: consistently incomplete cleaning cycles. Consequence: usually requires a battery replacement to restore full operation.
- Check the battery connector wires for fraying or corrosion. Pass/fail cue: intermittent power loss during cleaning. Consequence: can prevent the robot from charging or completing a cycle.
Wheels and side-brush modules
- Inspect the two drive wheels for tread wear or uneven rotation. Pass/fail cue: if the robot wavers or drags during movement, wheel alignment may be compromised. Consequence: typically leads to navigation errors and stuck-on-obstacle errors.
- Check the front caster wheel for free rotation and debris buildup. Pass/fail cue: if the caster wheel does not spin smoothly or is stuck, the robot may have difficulty turning. Consequence: can cause the robot to get trapped in tight spaces.
- Examine the side-brush module mount for cracks or broken clips. Pass/fail cue: if the brush falls off frequently or wobbles, the mounting point may be damaged. Consequence: often results in the brush not functioning effectively, leaving debris behind.
This chart organizes key inspection checks for the most replaced Roomba component groups: rollers/brushes, filters, and batteries.
Rollers and brush assemblies: rotation smoothness, end-cap behavior, and bristle consistency
Select a roller and brush assembly based on smooth rotation and consistent floor contact. Textures vary by series, so judge each assembly against its own stability and fit rather than comparing across models.
- Rotation resistance – Spin the roller by hand; it should turn freely without binding. High resistance can strain the motor, cause uneven wear, and increase noise.
- End-cap fit – Check that end-caps snap or slide into place without wobble. Loose caps can allow debris to bypass the brush and may increase noise.
- Bristle density – Look for even bristle coverage across the roller. Sparse patches can reduce pickup and may leave streaks.
- Balance – A balanced assembly rotates without wobble. Imbalance can lead to vibration, extra noise, and premature bearing wear.
- Bristle consistency – Bristles should be uniform in length and stiffness. Mixed lengths or bent bristles can cause chatter and missed debris.
- Seat check – After mounting, the assembly should sit flush against the housing. A raised edge indicates poor fit and can cause jams.
- Noise test – Run the robot briefly; a quiet, steady hum suggests good alignment. Rattling or grinding points to a loose or misaligned part.
Filters: seal contact, frame rigidity, and airflow-consistency cues
Filter quality depends more on sealing and airflow stability than on label claims. Performing regular filter fit and shape checks helps identify potential bypass points before they affect cleaning performance. Seal geometry and fit vary by Roomba model family and revision, so verify dimensions for your specific unit.
- Label claim: a filter may list high efficiency on the box.
- Observable seal/fit: if the seal perimeter has gaps or the frame flexes under pressure, bypass can occur and suction may drop.
- Inspect the filter seal perimeter for compression loss, tears, or uneven contact — gaps allow unfiltered air to bypass the media and reduce pickup.
- Check frame rigidity: a stiff frame holds its shape during airflow fluctuations, while a warped or soft frame creates fit gaps that compromise the seal.
- Verify pleat consistency: evenly spaced, intact pleats maintain steady airflow and delay clogging; crushed or collapsed pleats restrict airflow and accelerate dust loading.
- Look for fit gaps between the filter and the filter housing: even a small misalignment causes suction loss and allows debris to bypass the filter.
- Confirm the gasket material is intact and not flattened or cracked — a good gasket creates a positive seal that reduces leakage around the frame.
- Check that airflow direction arrows match the housing orientation: reversed placement causes the filter to act as a baffle rather than a capturing element.
Batteries: connector fit, realistic capacity signals, and early reliability checks
Fit stability and conservative specifications, not inflated capacity claims, define a reliable replacement battery. Early checks on connector alignment, housing fit, and labeling consistency help reduce the risk of shutdowns, short runtime, or overheating concern during the first few cycles. For a broader view of safe selection practices, see battery safety and reliability checks.
- Connector alignment: Check that the battery connector seats firmly without force. Poor alignment can cause intermittent power loss or arcing.
- Housing fit: Verify the battery housing fits the compartment without gaps or pressure points. A loose fit may lead to vibration damage; a tight fit can stress the casing.
- Labeling consistency: Confirm voltage, capacity, and polarity markings match the original. Mismatched labels often indicate a non-identical replacement.
- Terminal condition: Inspect terminals for corrosion, pitting, or bent pins. Damaged terminals can increase contact resistance and heat buildup.
- Early cycle behavior: Monitor the battery during the first three charge-discharge cycles. Sudden voltage drops or failure to hold charge suggest internal defects.
- Charge acceptance: Ensure the battery reaches full charge within the expected time. Slow charging may point to degraded cells or protection circuit issues.
- Temperature during use: Feel the battery and connector area after moderate use. Localized warmth is normal, but hot spots may indicate excessive resistance or a potential internal short risk.
Realistic signals vs. inflated claims
- Realistic signals: Stable voltage under load, consistent runtime across cycles, and secure mechanical fit.
- Inflated claims: Promises of significantly higher capacity than the original without a corresponding increase in physical size or weight.
Mismatch symptoms often appear within the first few cycles and should trigger reevaluation rather than continued use.
Wheel modules: tread quality, axle play, and alignment behavior under load
Wheel module traction and mechanical stability depend on tread quality, axle play, and alignment under load. Traction demands differ between rugs and worn hard floors, so acceptable thresholds for wear and play change.
- Tread quality: Check for uneven wear or glazing — worn tread reduces traction and can lead to slippage on smooth floors.
- Axle play: Gently rock the wheel side to side — excessive lateral play can cause wandering or circular movement.
- Bearing smoothness: Spin the wheel by hand — rough or noisy bearings suggest wear that may cause stalls or uneven motion.
- Alignment under load: Observe the wheel contact patch on a flat surface — misalignment often leads to dragging or diagonal trekking.
- Spring response: Compress and release the wheel — a sluggish spring reduces traction on uneven surfaces and may cause skipping.
- Straight tracking: Push the robot forward a short distance — consistent veering points to misalignment or excessive axle play causing drift.
- Carpet behavior: Note if the robot stalls frequently on thick rugs — worn tread or a stiff axle are typical causes.
Side Brushes and Small Consumables: Fastener Fit, Wobble, and Deformation Resistance
Side brush and consumable failures most often come from wobble, weak fasteners, or rapid deformation. Checking these three areas helps you spot early issues before cleaning performance drops. A brush that flexes and springs back is normally elastic, but one that stays bent has permanent deformation that can cause bristle shedding and missed edges.
- Check screw or clip engagement: a loose fastener allows the side brush to wobble during rotation, often causing missed edges and noise.
- Evaluate hub rigidity: excessive flex under light pressure may lead to deformation and premature bristle shedding.
- Inspect arm symmetry: uneven arms create imbalance, resulting in vibration and uneven cleaning patterns.
- Test spin stability: a smooth, wobble-free spin indicates good alignment; any wobble signals a problem that may worsen over time.
- Confirm fastener torque: overtightening can strip threads, while undertightening allows movement and looseness.
- Look for deformation signs: bent arms or distorted bristle clusters indicate permanent damage that often requires replacement.
- Assess material fatigue: repeated bending near the hub can cause cracks, leading to arm breakage over time.
Red flags that indicate low-quality Roomba parts: listing signals, packaging cues, and repeat-failure patterns
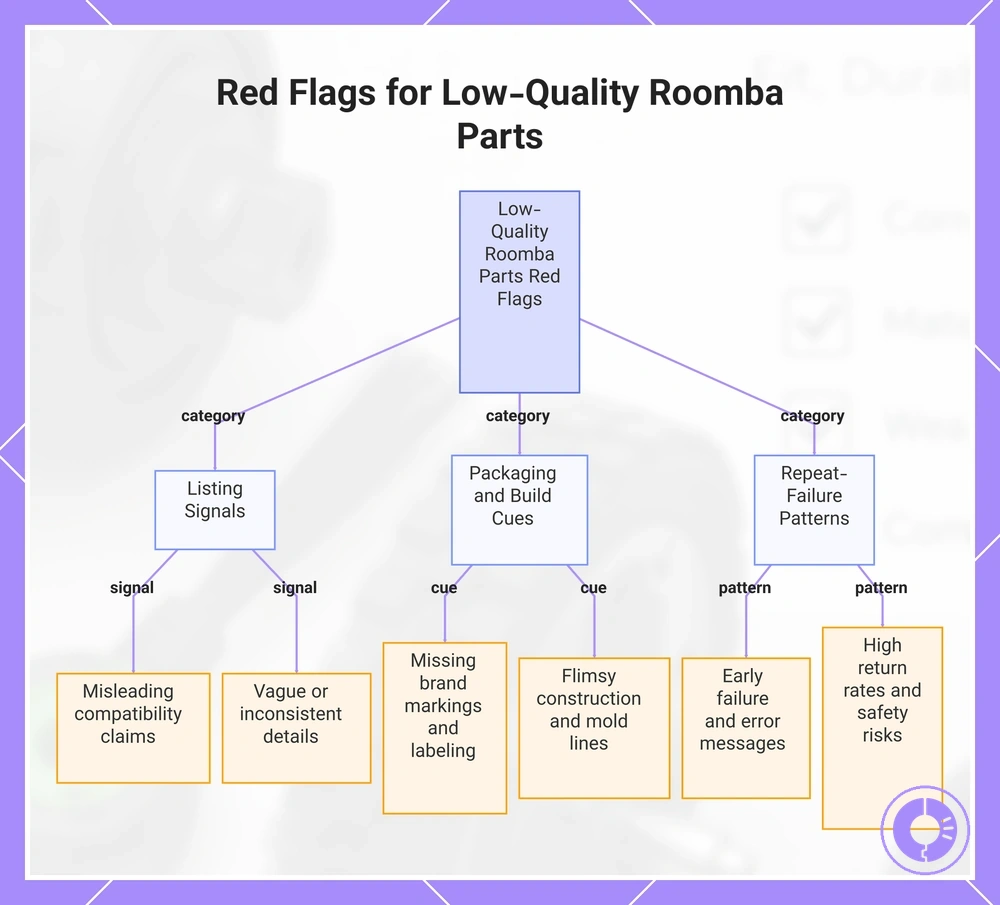
Red flags that indicate low-quality Roomba parts appear in three areas: listing signals, packaging and build cues, and repeat-failure patterns. Each signal alone does not confirm poor quality, but multiple signs increase the cumulative risk of receiving a part that fails early or does not fit correctly; legitimate third-party parts exist but require stricter verification when red flags are present. These red flags can be checked before and after purchase. A genuine vs third-party comparison helps distinguish reliable options from riskier ones.
- Listing signals
- Misleading compatibility claims that state 'fits many models' without specifying exact model numbers increase the risk of wrong fit.
- Vague listing descriptions that omit fit cues such as shape, dimensions, connector type, or mounting position can indicate a generic part that may require modifications.
- Inconsistent labeling between photos and text may signal a repackaged or mismatched component.
- Overly broad model lists that include models with different internal configurations suggest a one-size-fits-all approach that rarely fits correctly.
- Listings that copy-paste descriptions from multiple sources without coherent details indicate a lack of product knowledge.
- Unusually low prices for high-wear parts like brushes or filters can indicate different material quality.
- Frequently changing listing titles or photos may be an attempt to hide negative reviews or returns.
- Packaging and build cues
- Packaging that lacks the original brand markings or uses generic boxes may indicate a non-OEM part.
- Flimsy construction, such as thin plastic or loose connectors, is a common sign of lower material quality.
- Missing or poorly printed labeling, including inconsistent font or spelling errors, suggests substandard production.
- Lack of fit cues on the packaging itself reduces trust in the part's intended use.
- Visible mold lines, uneven seams, or burrs on plastic parts can point to cheaper manufacturing processes.
- Packaging that shows signs of being repackaged or opened before often means the part may not be new.
- Absence of any safety or compliance markings on the packaging or part itself increases risk of electrical or mechanical failure.
- Instructions that are generic or not specific to the model indicate that the part may not be designed for your Roomba.
- Repeat-failure patterns
- A pattern of early failure, multiple user reports of the same failure, or reviews mentioning performance loss or premature death indicate low durability.
- Frequent error messages after replacement, especially the same error repeating, can indicate poor fit or quality issues.
- Return rates that are high for a particular part type, though not always visible, suggest widespread issues.
- Short-circuit risks or overheating reports for aftermarket batteries or charging components are serious red flags.
- Repeat-failure under normal use conditions that does not occur with the original part strengthens the case for low quality.
- Claims – Promises of universal fit or premium quality are not reliable without verifiable fit cues and consistent labeling.
- Verifiable cues – Check packaging for model numbers, labeling consistency, and build quality. A genuine vs third-party comparison of these cues provides a more reliable basis for evaluation.
This chart categorizes the three main areas of red flags—listing signals, packaging cues, and repeat-failure patterns—to help you evaluate Roomba part quality.
Post-installation validation: early symptoms of bad fit, weak build, or performance loss
The first few runs after installing a replacement part can quickly confirm fit and performance. Early symptoms such as noise, rubbing, or stalls point to potential fit issues or tolerance problems that require no advanced tools to spot.
When a new part causes performance loss or unexpected behavior, incomplete seating is another possible cause. Mapping each symptom to a probable attribute failure helps you decide whether to keep, reseat, or return the part. This approach works for most Roomba models and part types, including rollers, brushes, filters, and wheels.
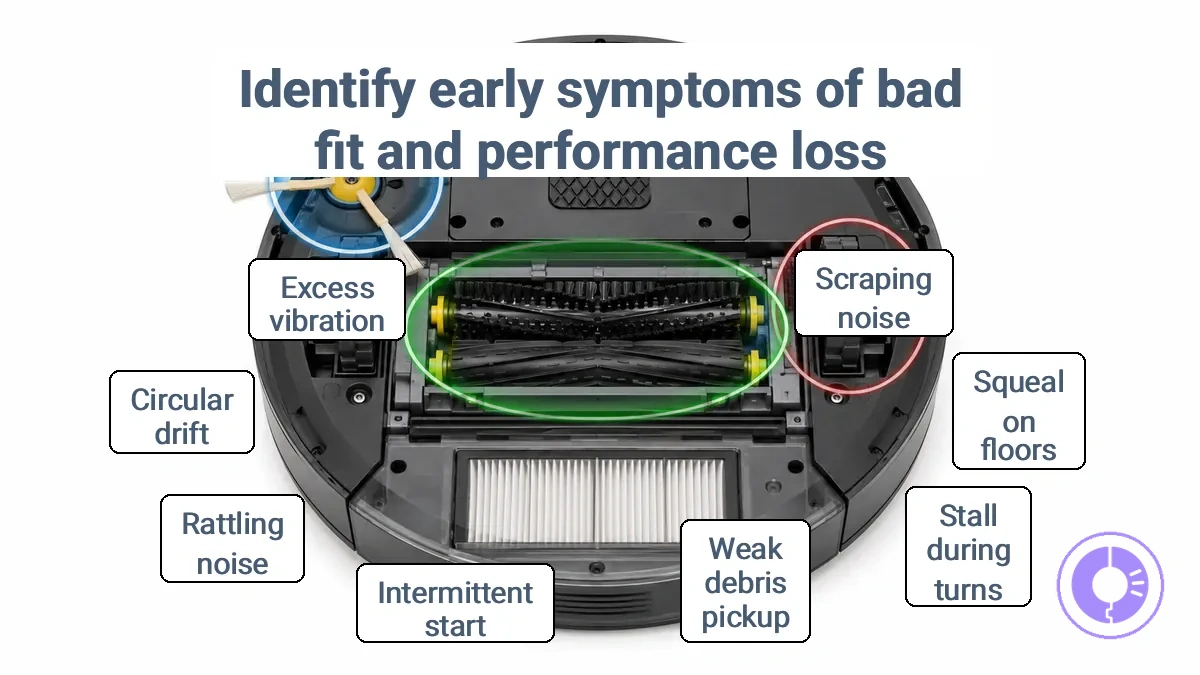
Post-installation validation relies on a simple symptom-to-cause mapping. The table links common early symptoms to likely attribute issues and suggests a quick confirmation check, without diving into full troubleshooting. For a broader selection of compatible parts, visit the Roomba replacement parts hub.
Post-installation validation helps locate where symptoms physically appear. The annotated image shows common interaction zones where fit or clearance problems first show up.
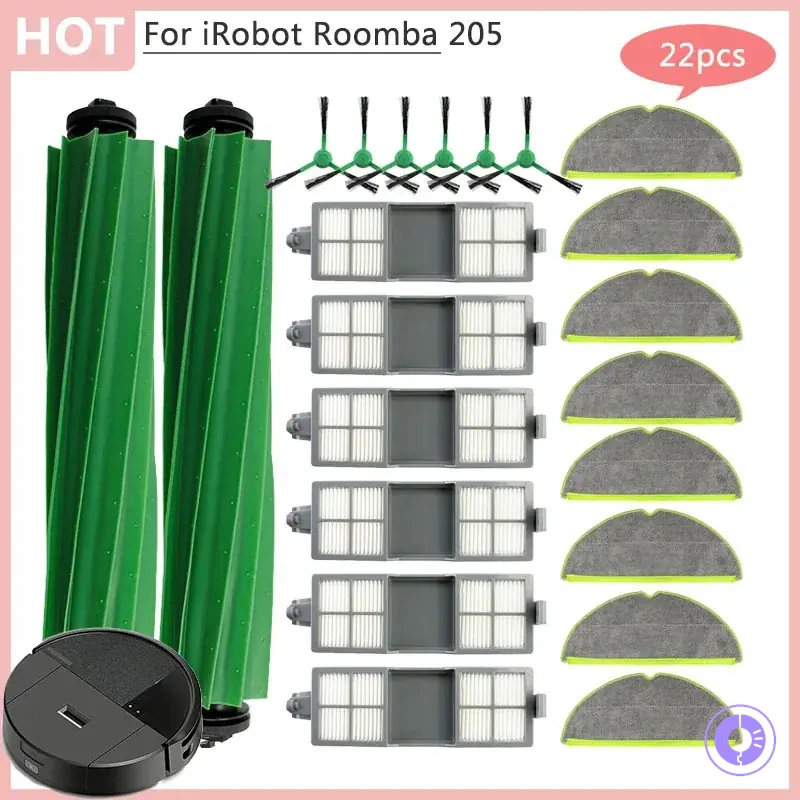
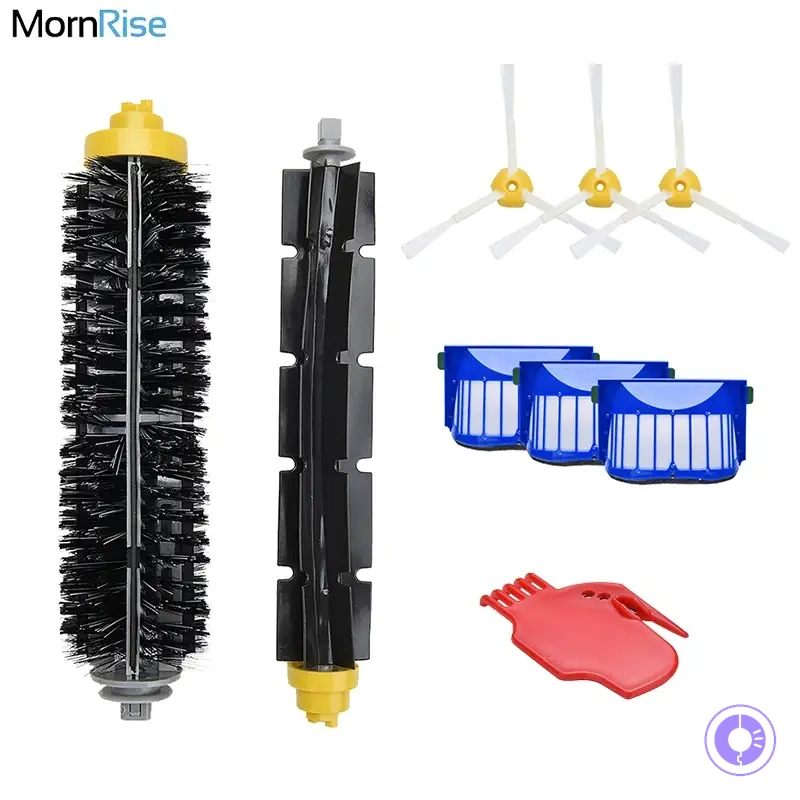
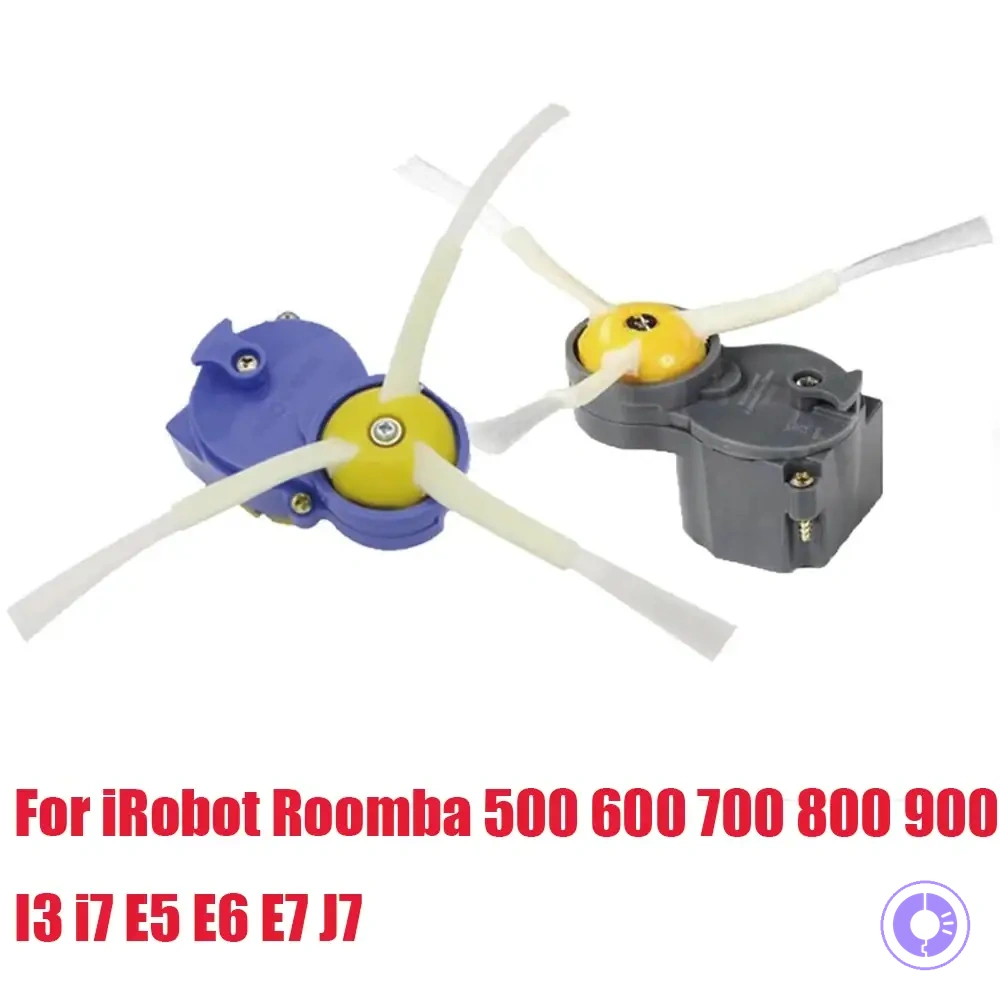
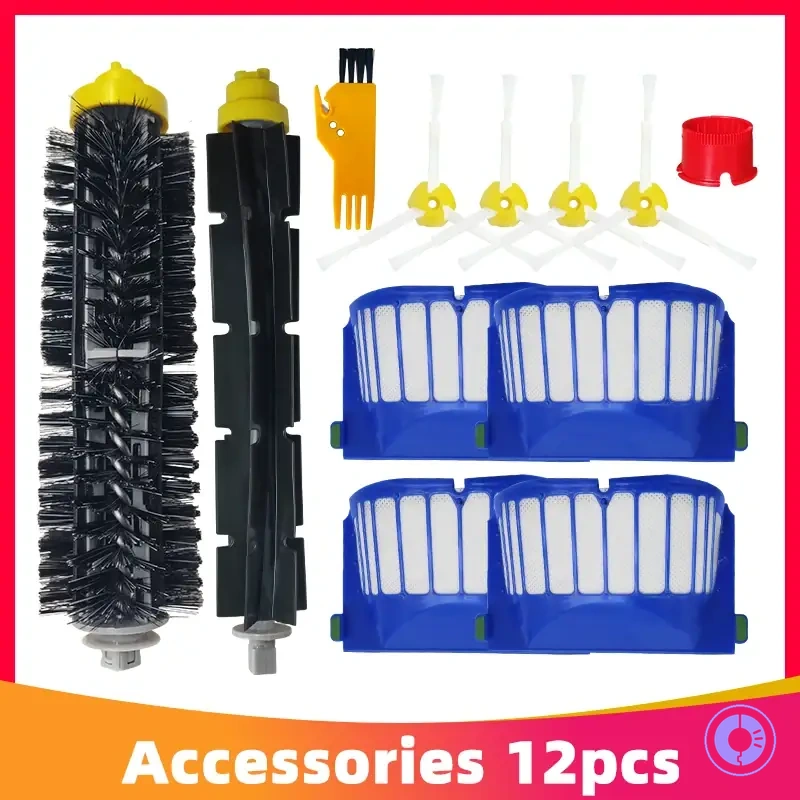
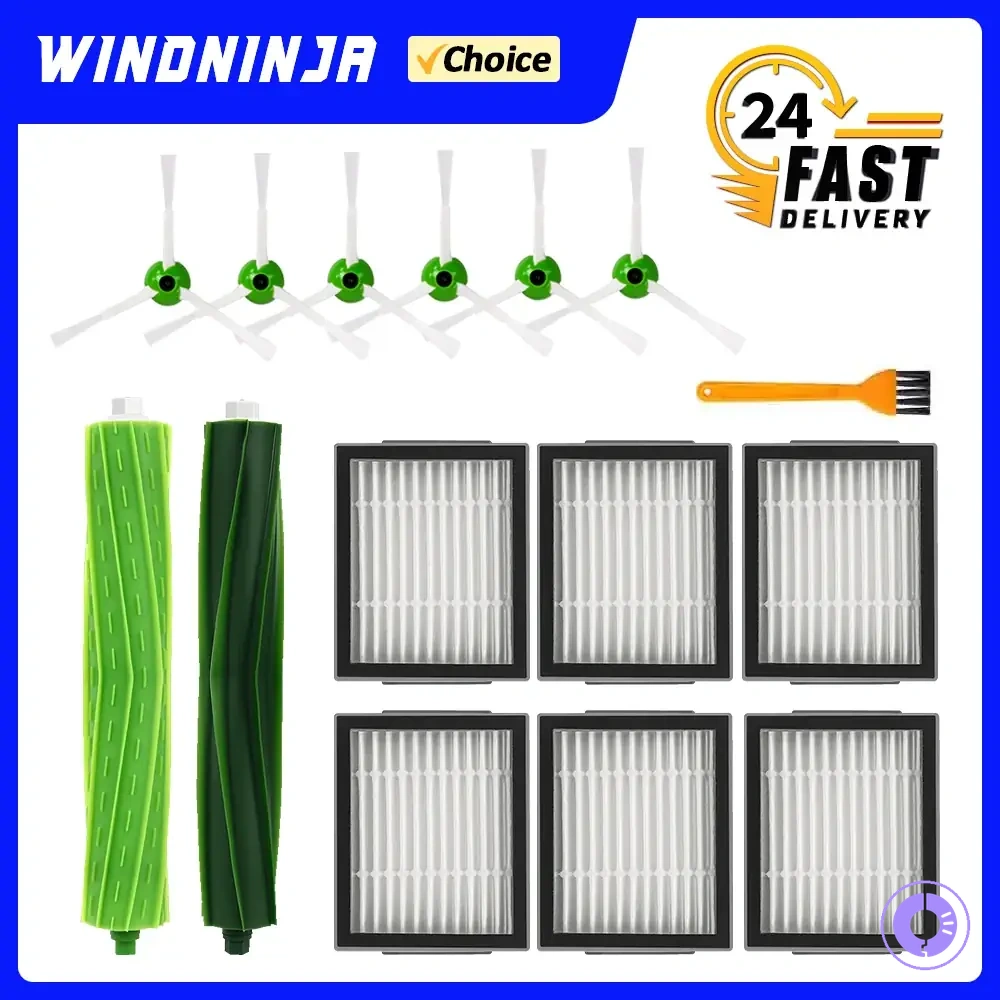
The products below are useful examples for comparing available options. Before buying, check that the compatibility criteria, key features, and product details match your needs.
| Symptom | Likely attribute issue | Quick check | What it suggests |
|---|---|---|---|
| Scraping or rubbing noise during movement | Roller or brush clearance too tight | Inspect roller end caps and brush housing for debris or misalignment | Part may need reseating or the housing may have debris |
| High-pitched squeal on hard floors | Side brush or wheel friction | Check side brush screw tightness and wheel module seating | Over-tightened or misaligned part; reseat and retest |
| Stalls or hesitation during turns | Wheel drag or rotation resistance | Spin each wheel by hand; check for binding or debris | Wheel module may be poorly seated or have internal friction |
| Weak pickup or debris left behind | Filter or brush not fully seated | Remove and reinstall filter; verify brush end caps click into place | Air gap or brush not engaging; reseat and retest |
| Intermittent starting and stopping | Battery contact or wheel encoder misalignment | Clean battery terminals; check wheel module alignment | Connection issue or encoder drag; reseat or replace |
| Loud rattling during operation | Loose part or missing retaining clip | Shake the robot gently; listen for loose components | Part not fully secured; reseat or replace retaining hardware |
| Robot moves in circles or drifts | Wheel module not level or brush deck misaligned | Inspect wheel module height and brush deck seating | Uneven contact with floor; reseat wheel or brush deck |
| Excessive vibration during cleaning | Brush or roller out of balance | Remove brush and roll on a flat surface; check for warping | Part may be warped or damaged; consider return |
If the symptom disappears after reseating the part, the issue was likely a fit or seating problem. If the symptom persists despite correct installation, the part may have a tolerance or material defect that suggests a return. Keep the part only when all symptoms are absent after a full cleaning cycle; reseat when the symptom points to alignment or debris; return when the symptom repeats after multiple reseating attempts or when the part shows visible damage.
Price-to-quality judgment: when “cheap” is acceptable and when it becomes a replacement trap
Cheap Roomba replacement parts are acceptable when tolerance sensitivity and moving interfaces are low, but part type determines the value trade-off.
Cost drivers such as tolerance sensitivity, moving interfaces, and material resilience define the risk profile of each replacement part. Parts that must align precisely or endure friction can carry higher failure cost if they deviate from spec. Tolerance sensitivity is the anchor for evaluating whether a cheap substitute increases replacement frequency or remains acceptable.
To apply this price-to-quality judgment systematically, the table groups common part types by tolerance sensitivity and failure cost, showing when a low-cost option can be acceptable and when it becomes a replacement trap.
| Part type | Cheap can be OK when | Cheap becomes a trap when | Likely outcome |
|---|---|---|---|
| Filter / dustbin (low tolerance sensitivity) | Fit tolerances are loose and no moving interfaces are involved. | Material degrades quickly, forcing frequent replacements. | Higher long-term cost from repeat purchases. |
| Side brush / wheel assembly (medium tolerance sensitivity) | You replace often enough to catch wear before misalignment. | Poor alignment causes premature motor strain or noise. | Failure cost rises from secondary damage. |
| Main brush roll (high tolerance sensitivity) | You verify fit and run-in period after installation. | Imbalance reduces cleaning efficiency and adds motor stress. | Performance loss and eventual motor noise. |
| Battery (very high tolerance sensitivity) | Cycle life matches your usage pattern. | Low-quality cells fail quickly, triggering repeated replacements. | Replacement trap: spending more over time than a durable pack costs. |
Components with moving interfaces or tight fit requirements often justify a mid-range option to reduce failure cost. The trap emerges when repeated cheap replacements cost more than a single durable part, but that outcome is not guaranteed for every scenario.
The products below are useful examples for comparing available options. Before buying, check that the compatibility criteria, key features, and product details match your needs.