Roomba Replacement Parts Types: Filters, Brushes, Rollers, Batteries, and Wheel Modules
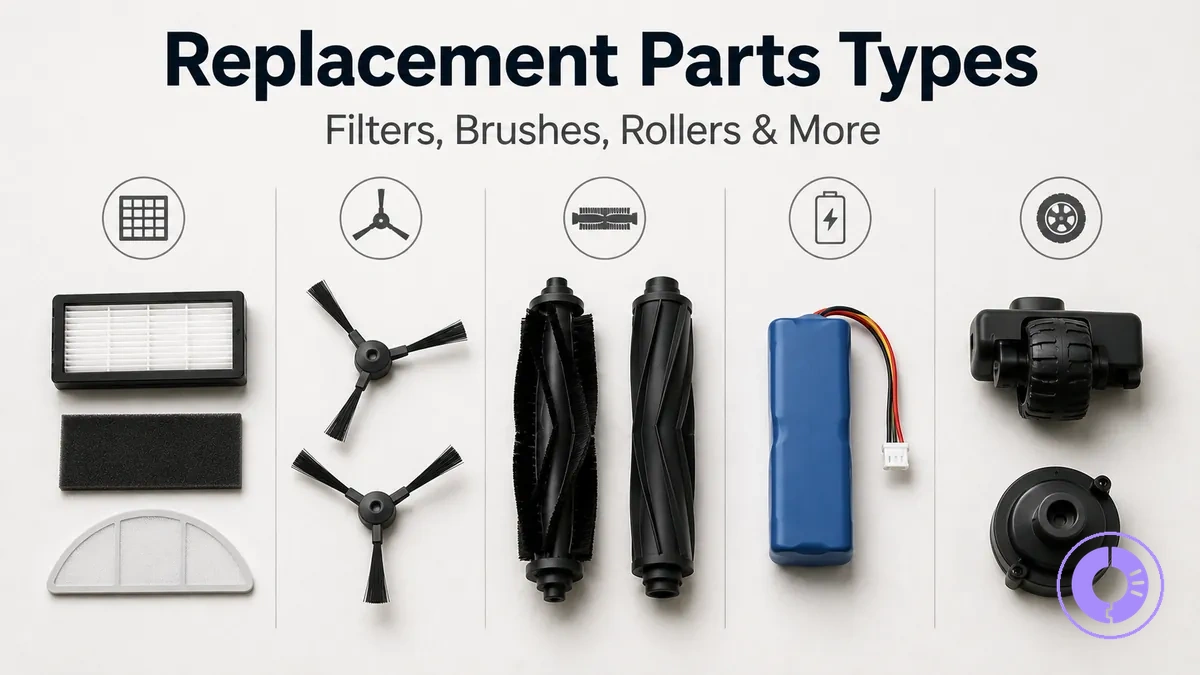
Roomba replacement parts types are the main categories of components that may need periodic replacement to maintain cleaning performance. The categories are:
- filters
- brushes and rollers
- batteries
- wheel modules
Each category groups parts with distinct functions and connection interfaces, so recognizing the type helps narrow compatibility when selecting a replacement. This page covers the type-level attributes of each category, while detailed replacement steps and deeper troubleshooting are handled on dedicated pages.
The part type can affect both fit risk and performance outcome, because each category uses a specific form factor and mounting interface and has characteristic wear or failure patterns. For example, a filter type may differ in shape and sealing method between series, and a brush or roller type can vary in material and attachment points. Choosing the correct part type is the first step to reliable operation, as types are defined by these interface points and wear patterns rather than by universal compatibility.
Replacement parts categories in a Roomba: what counts as a “type” and what each category changes
A Roomba replacement part type is a category defined by its interface connection and function. Unlike generic spare parts categories, Roomba types are tied to specific housing geometry, seal lip design, or connector style that vary between series.
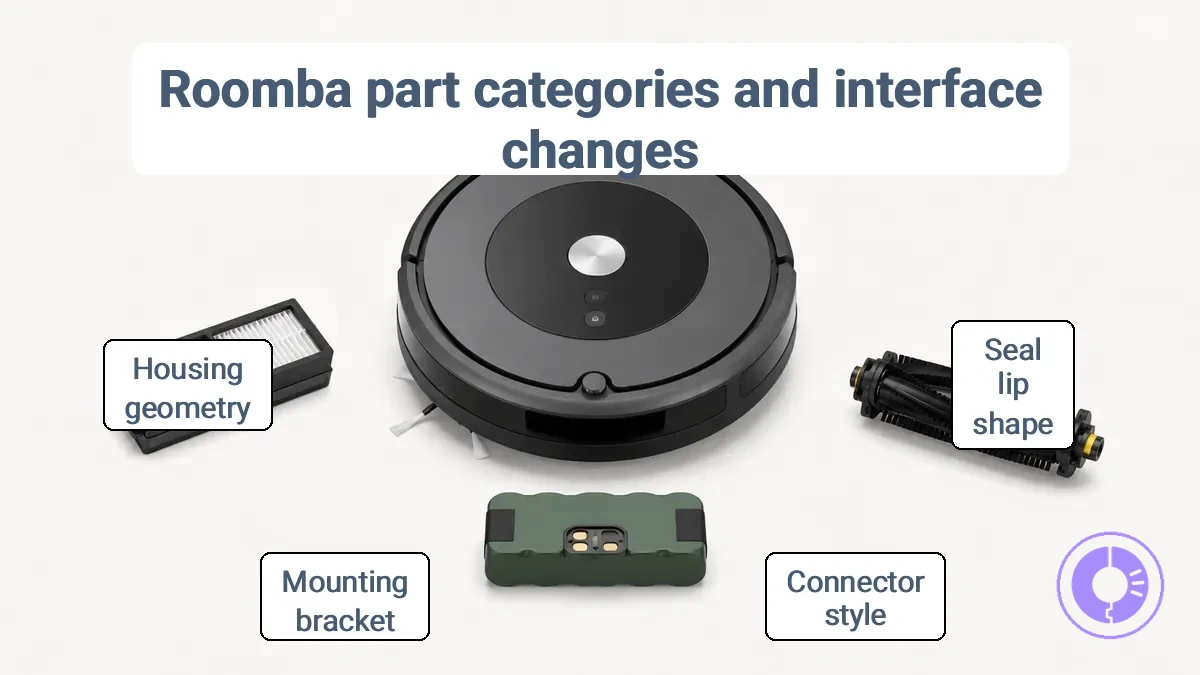
The category identifies which interface point matters and what may happen if the fit is wrong. The Roomba replacement parts hub provides more detail on compatible options across series.
For instance, a filter from a different series may look nearly identical, but a subtle difference in the seal lip shape can reduce airflow and hurt cleaning performance.
- Filters – seal lip shape and housing fit; a mismatched filter can allow dust to bypass, lowering filtration and possibly affecting motor life.
- Brushes – end‑cap system and brush length; the wrong brush may not sweep effectively or can get stuck during rotation.
- Batteries – connector style and voltage; an incompatible battery might not charge or can deliver insufficient run time.
- Wheels – mounting bracket and gear interface; a different wheel design often leads to uneven movement or poor navigation.
- Cleaning heads – housing geometry and brush‑roll attachment; a wrong head may not seal against the floor, reducing suction power.
- Dirt disposal bags – opening size and locking mechanism; an incorrect bag can leak dust or fail to stay attached.
- Cleaning pads – attachment hooks and shape; a pad that does not match the mop head may fall off during use, leaving streaks.
Filters as a replacement parts type: airflow function, form-factor variants, and fit-critical attributes
Filters capture airborne dust and debris before it reaches the motor and exhaust, making their fit critical to maintaining airflow and pickup. A poor fit can break the seal and allow unfiltered air to bypass the media, reducing suction and increasing dust leakage. In short, fit controls seal and airflow.
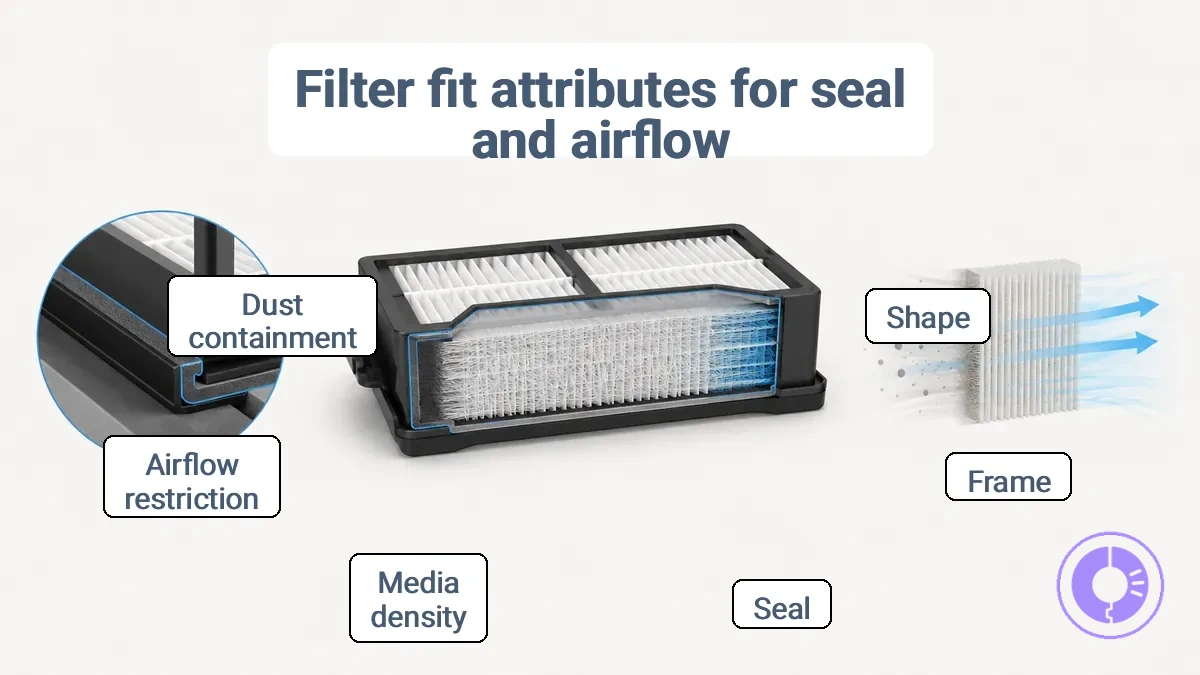
When choosing a replacement filter, key attributes are the frame shape, seal geometry, and media density that determines airflow restriction. Fit-first checks — such as verifying the frame contour and seal contact surface — typically matter more than performance expectations alone; for detailed guidance on choosing and replacing filters for specific models, see filters: choose and replace. For example, a denser media can capture finer particles but may increase airflow restriction, which can reduce suction power in certain series under heavy dust load. The key contrast is that two filters can appear identical yet one leaks because its frame lip, seal geometry, or bin interface does not align with the unit.
Before comparing offers, use the following checklist to verify fit-critical attributes that affect seal and airflow.
- Shape: Verify the filter contour matches the dust bin opening; a mismatch allows bypass.
- Frame: Check that the frame edge sits flush against the bin rim; warped or undersized frames break the seal.
- Seal: Confirm the gasket or foam lip contacts the bin surface evenly; gaps cause dust leakage.
- Media density: Higher density may trap finer particles but can restrict airflow; lower density may reduce restriction but let more dust pass.
- Airflow restriction: A filter too dense for the series motor can lower suction and pickup, reducing cleaning effectiveness.
- Dust containment: A loose seal allows particles to re-enter the room, defeating the filter’s purpose.
Brushes and Rollers as Replacement Parts: How the Cleaning System Is Divided and What Defines Each Type
Roomba brush and roller replacement parts fall into three types: side brush, main brush, and rollers. Each type is defined by contact design and interface — how the part touches the floor and connects to the module. The side brush uses flexible bristles to sweep debris from edges and corners toward the main brush. The main brush, often a combination of bristles and rubber, agitates and lifts debris. Rollers, typically rubber extractors, then pull debris into the suction path. Brushes and rollers here refer to Roomba cleaning parts, not painting tools.
Stiffer side brush bristles improve edge cleaning but may increase noise on hard floors. Softer bristles reduce noise but may leave debris near walls. Roller material—rubber versus bristle—influences pickup: rubber rollers handle fine dust well, while bristle rollers can capture larger particles. The end-cap and module interface determine fit; a mismatch can cause wobble, reduced pickup, or damage. The brushes and rollers: choose and replace guide helps you match attributes to your model. Misfit risk is highest when the end-cap shape or module locking mechanism differs from the original.
For homes with pets or long hair, tangles are a primary concern. Side brush bristles can wrap hair, increasing noise and reducing sweep efficiency. Rollers with rubber vanes resist tangles better than bristle rollers. In contrast, fine dust environments demand high pickup from the main brush and rollers. Prioritize attributes by debris profile: choose tangle-resistant designs for hair, and dense roller materials for dust.
The comparison below isolates how side brush and main brush/rollers differ across key attributes.
| Attribute | Side Brush vs Main Brush/Rollers |
|---|---|
| Contact design | Side brush uses bristles that sweep; main brush uses bristles and/or rubber; rollers use rubber extractors. |
| Material | Side brush bristles are typically nylon or polyester; main brush may combine nylon bristles with rubber fins; rollers are often silicone or rubber. |
| End-cap / module interface | Side brush attaches via a screw or snap; main brush and rollers use end-caps that lock into the module. |
| Common wear pattern | Side brush bristles splay or break; main brush bristles fray; rollers develop flat spots or cracks. |
| Effect on pickup | Side brush improves edge pickup; main brush and rollers influence overall debris lift and suction efficiency. |
| Effect on noise | Stiffer side brush bristles can increase noise; rubber rollers are quieter than bristle rollers. |
| Effect on edge reach | Side brush extends cleaning to walls and corners; main brush and rollers cover the central path. |
| Misfit risk | Wrong side brush length or bristle stiffness reduces edge cleaning; incorrect end-cap shape prevents proper module seating. |
Batteries as a replacement parts type: pack formats, runtime-related attributes, and safety boundaries
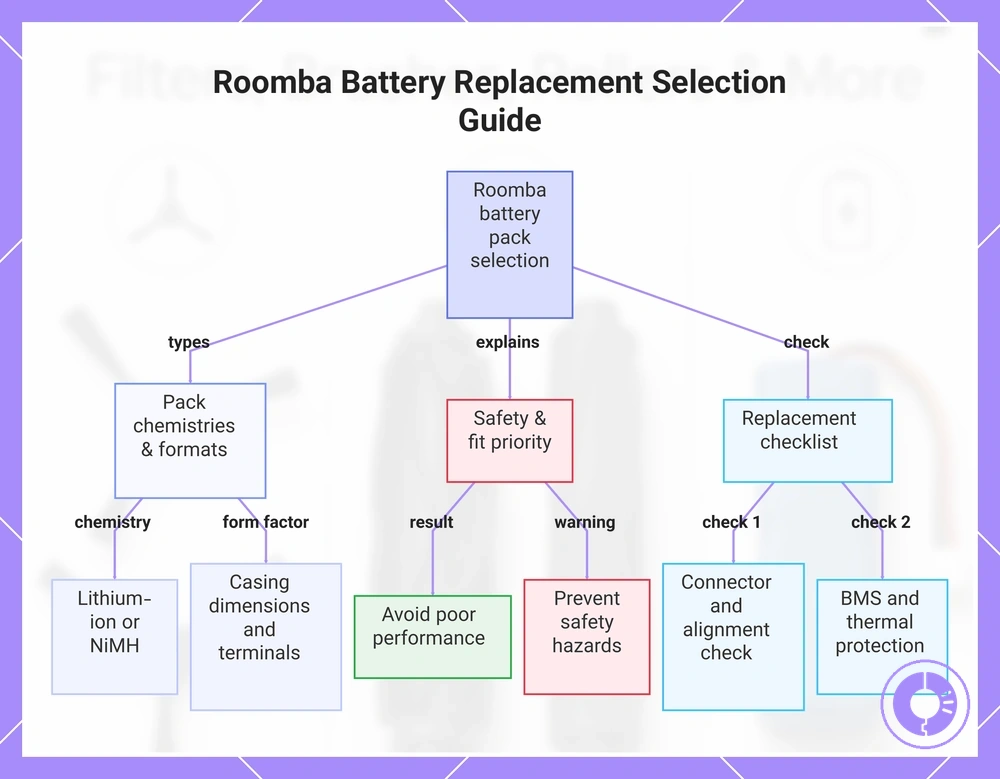
A battery pack for Roomba models comes in specific chemistries and form factors. Unlike general consumer battery lists that include alkaline or silver-oxide cells, common Roomba pack chemistries are lithium-ion and NiMH, each with distinct characteristics. Pack formats differ in casing shape, connector type, and contact alignment to ensure proper fit. When selecting a replacement, fit and safety outrank capacity claims because an incompatible pack can lead to poor performance or hazards.
Start by checking fit signals like connector and contact alignment. A battery pack should match the original casing dimensions and terminal layout to avoid intermittent connections. Capacity and aging influence runtime, but capacity alone does not guarantee reliable operation. Lithium-ion packs typically require a built-in Battery Management System (BMS) to monitor voltage and temperature, which helps reduce charging risks. Safety and reliability depend more on these protection features than on advertised capacity numbers. For detailed guidance on safe handling and replacement, see battery: choose and replace safely. Runtime and charging behavior can vary by series, usage, and battery age, so outcomes remain conditional.
To reduce wrong-order and safety risk, use this safety-and-fit checklist when evaluating replacement battery packs:
- Connector type matches the Roomba model's socket.
- Contact alignment and terminal spacing correspond to the original pack.
- Casing dimensions and mounting points fit the battery compartment.
- Battery pack includes overcharge and over-discharge protection (BMS).
- Chemistry (lithium-ion or NiMH) is consistent with the device's charging system.
- Capacity rating (mAh) is within the acceptable range for the model.
- Visual quality cues: no swelling, intact casing, clear labeling.
- Red flags: lack of safety certifications, unknown brand, absence of thermal protection.
This chart shows the key factors for choosing a replacement battery pack for Roomba, including pack types, safety priorities, and a compact checklist.
Wheels and wheel modules as replacement parts: traction, mobility outcomes, and what “wheel module” usually means
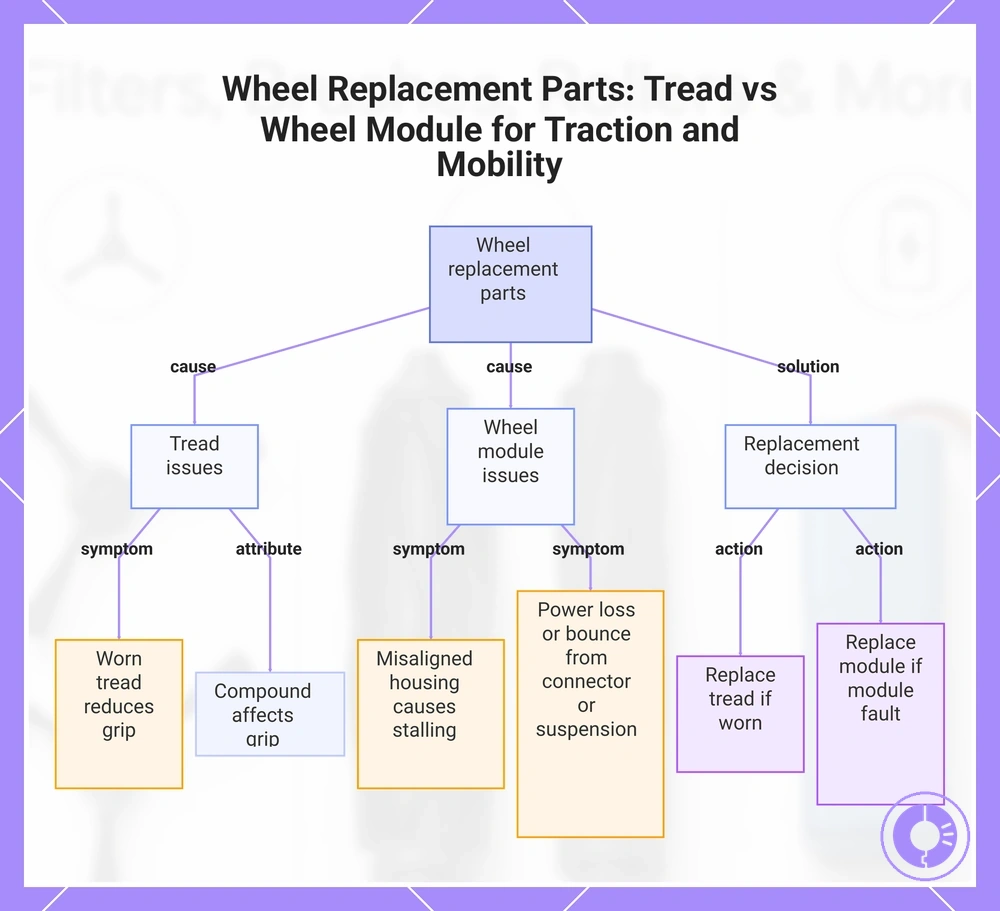
Wheel replacement parts that affect traction and mobility are the tread and the wheel module. The wheel module is the complete assembly that houses the motor, suspension, and connector, while the tread is the rubber surface that contacts the floor. Common search terms such as left/right wheel modules and caster wheel reflect typical user needs when diagnosing mobility issues. A worn tread may cause slipping, but a failing wheel module can lead to stalling.
Whether to replace the tread or the entire wheel module depends on the cause of poor traction or stalling.
When the robot slips on smooth surfaces and the tread looks smooth or cracked, a tread-only replacement may suffice. However, if the symptom includes intermittent stalling or poor tracking, the wheel module's housing, suspension, or connector may be at fault. The term wheel module often masks underlying tread wear or debris buildup as a driver of slipping or stalling; for more on this, refer to wheels: traction and mobility fixes.
The attribute-outcome pairs below show how wheel component characteristics affect mobility and help identify likely causes of poor traction, slipping, or stalling without diagnosing error codes.
- A drive wheel module with a worn tread often loses grip on smooth floors, especially when surface debris clogs the housing and reduces contact pressure.
- A left or right wheel module with a misaligned housing can cause uneven torque, leading to stalling during turns on carpeted surfaces.
- A caster wheel with restricted rotation may increase drag, resulting in poor traction on threshold transitions.
- A wheel module with an incompatible connector can cause intermittent power loss, which may cause the robot to stall unexpectedly.
- A wheel module with degraded suspension behavior may bounce on uneven floors, reducing traction and causing slip.
- A tread made of a hard compound can slip on polished surfaces, while a soft compound may collect debris and reduce grip over time.
This chart shows common wheel component faults affecting traction and mobility, and the replacement decision based on the symptom.
How to Choose the Right Replacement Parts Type: A Decision Path Based on Job-to-Be-Done and Constraints
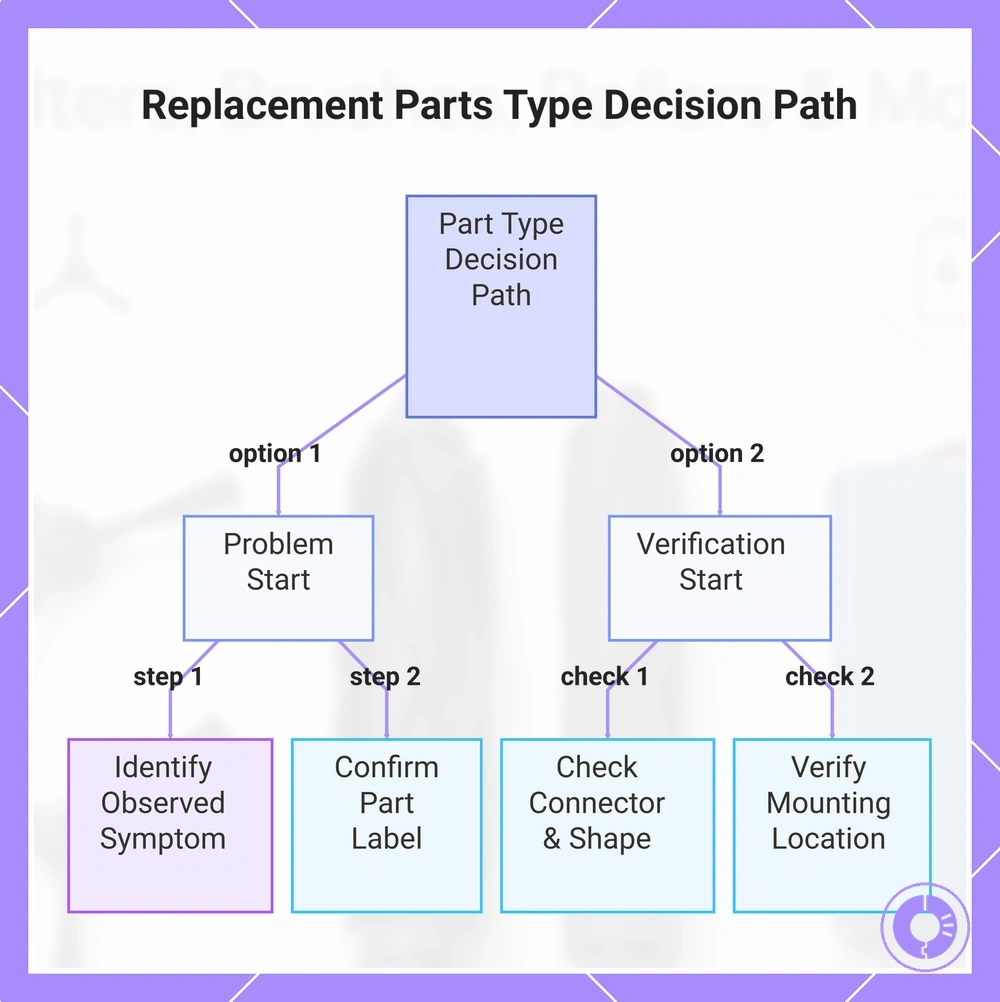
Choosing the right replacement parts type depends on identifying the job and constraints of your specific unit. Before comparing prices, determine the observed symptom or goal that prompted the replacement. To verify, use a diagram to identify a part and confirm its interface before you proceed. Verify the part type before moving to price comparison.
- Start from the problem: identify the observed symptom to define the job, then confirm the part type label.
- Start from what you can verify: check for mismatch by inspecting the physical connector.
- Check fit by comparing the replacement part's shape to the original mounting housing.
- Check the mounting location using a diagram to confirm the position.
- Avoid lookalike parts by verifying the connector shape.
- Run a compatibility check by matching the part label and housing.
- Confirm the part type by checking the interface connector.
When a performance issue arises, applying this decision path can help isolate the correct part type. To proceed, check compatibility first by verifying the interface and shape against your unit's specifications. Verify the part type before comparing prices.
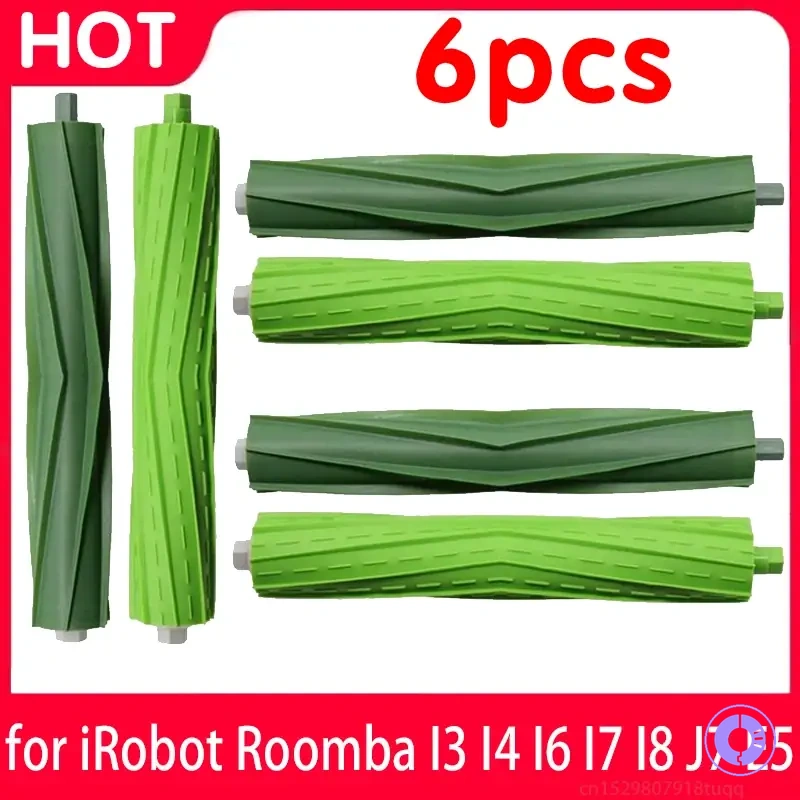
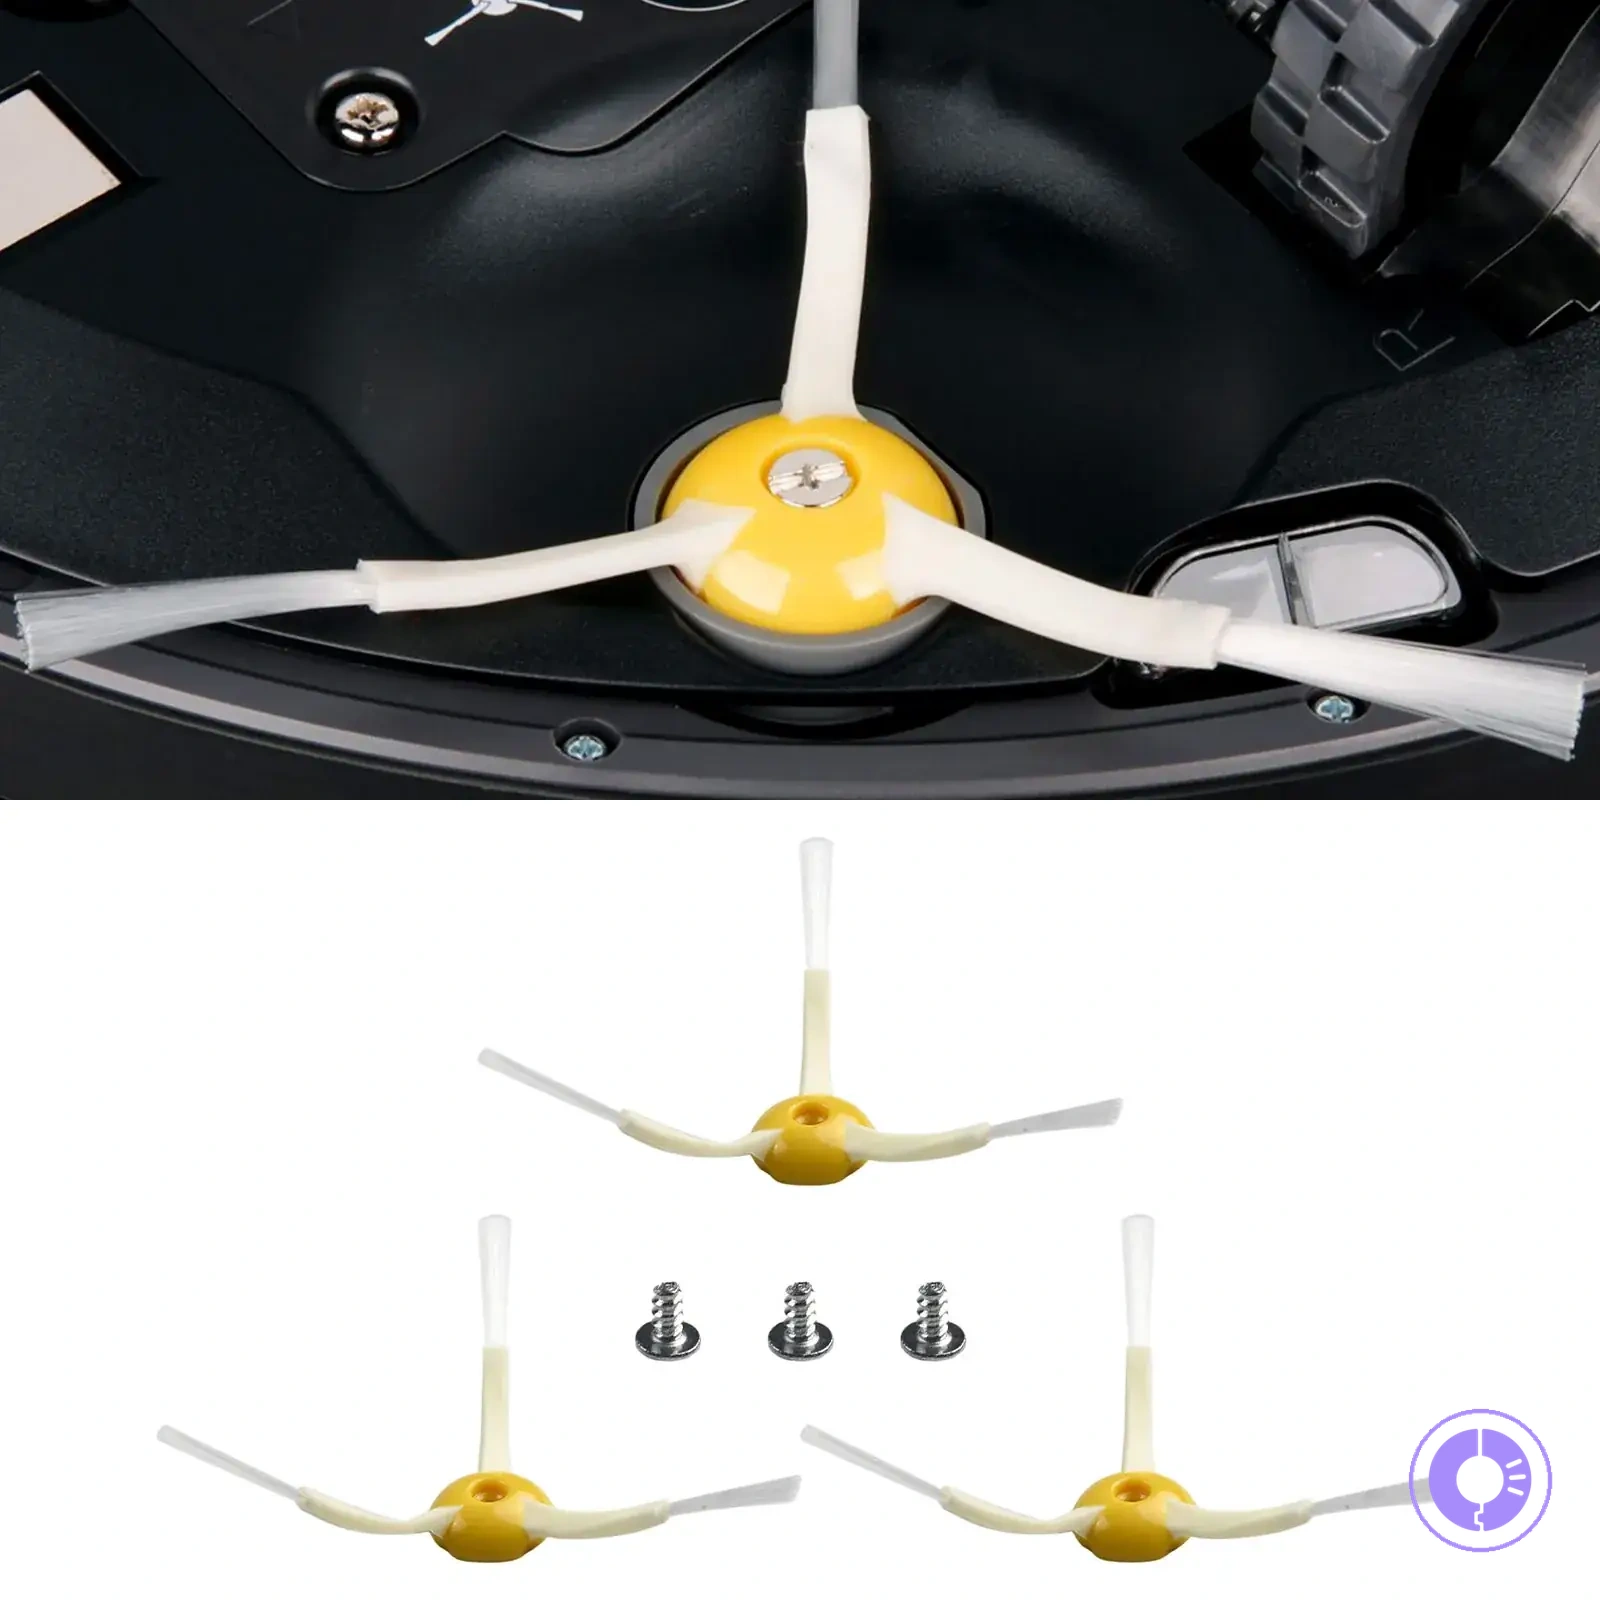
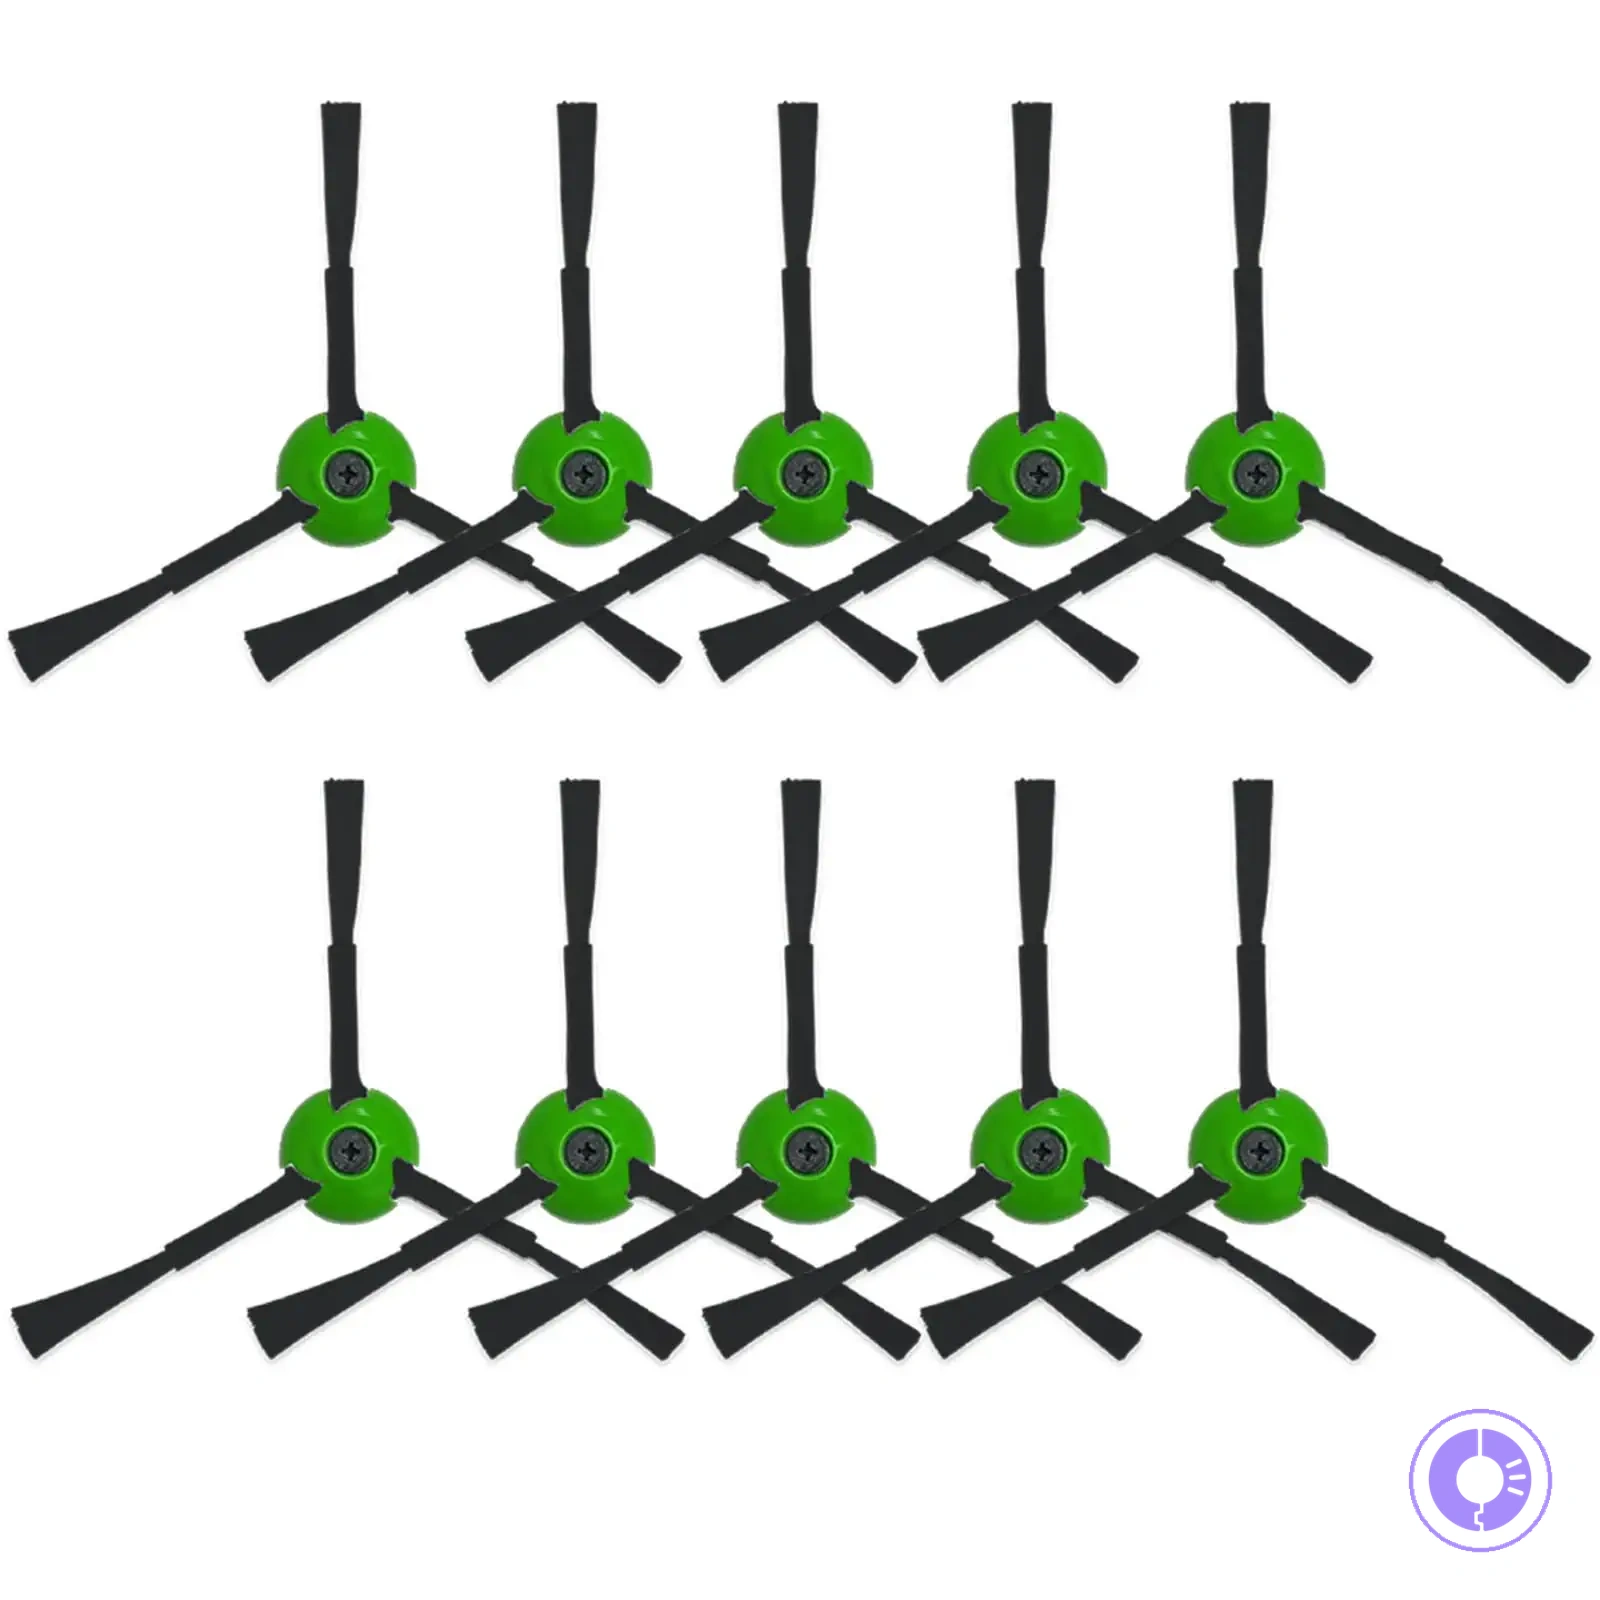
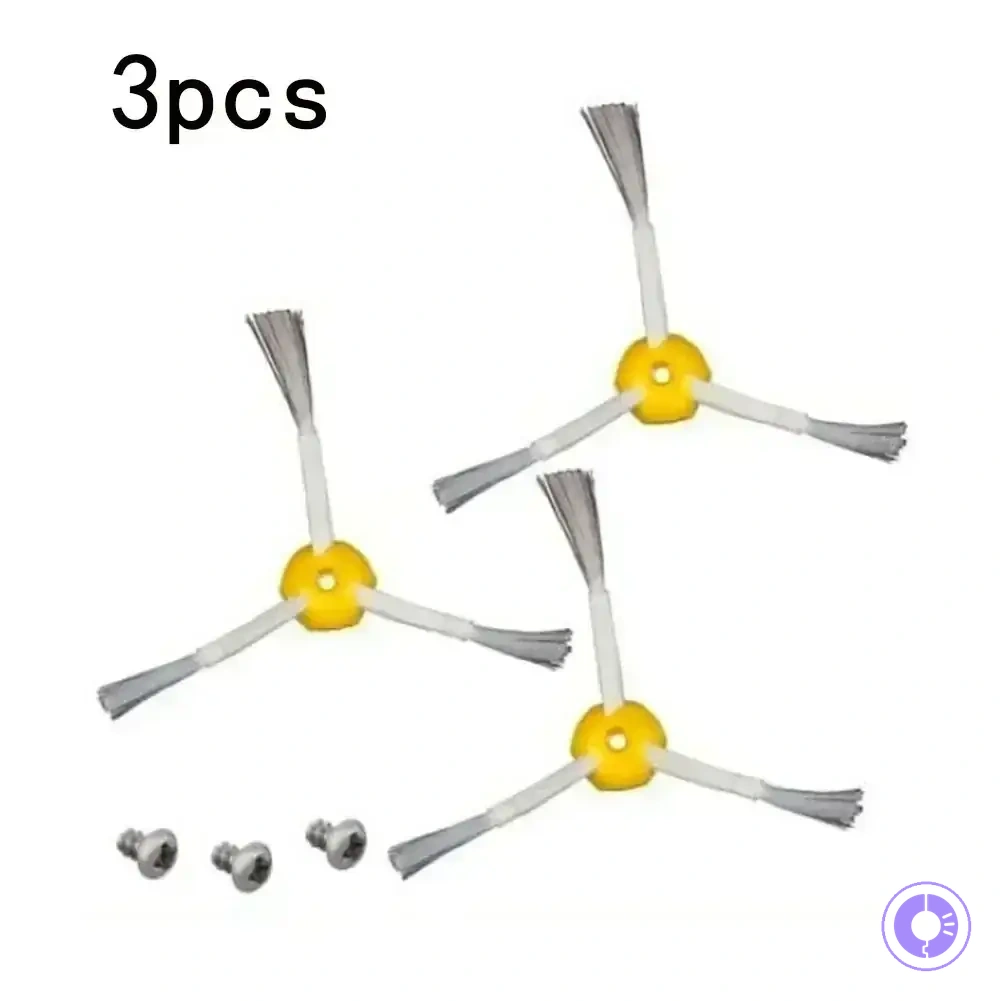
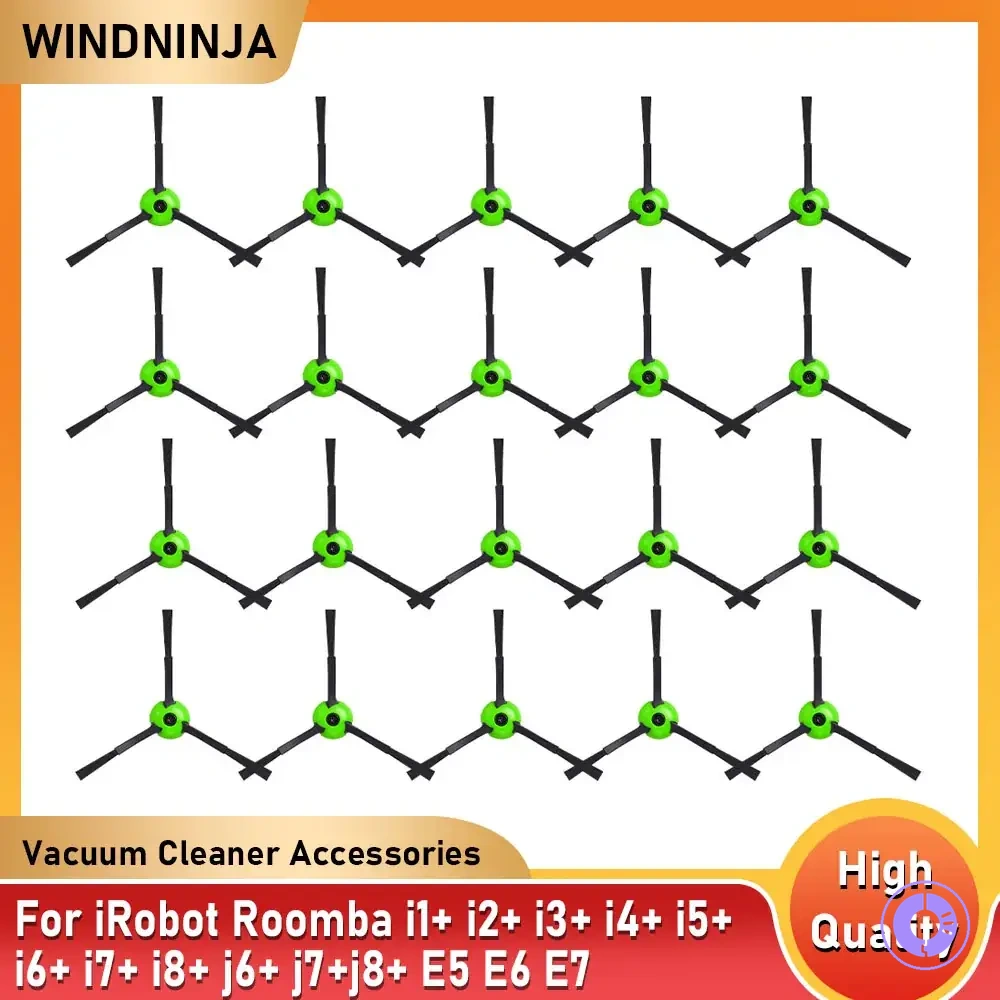
The products below are useful examples for comparing available options. Before buying, check that the compatibility criteria, key features, and product details match your needs.
This chart shows two starting approaches—problem-based and verification-based—for selecting the correct replacement part type before comparing prices.
Compatibility checks that prevent wrong orders: shared fit rules and category-specific mismatch patterns
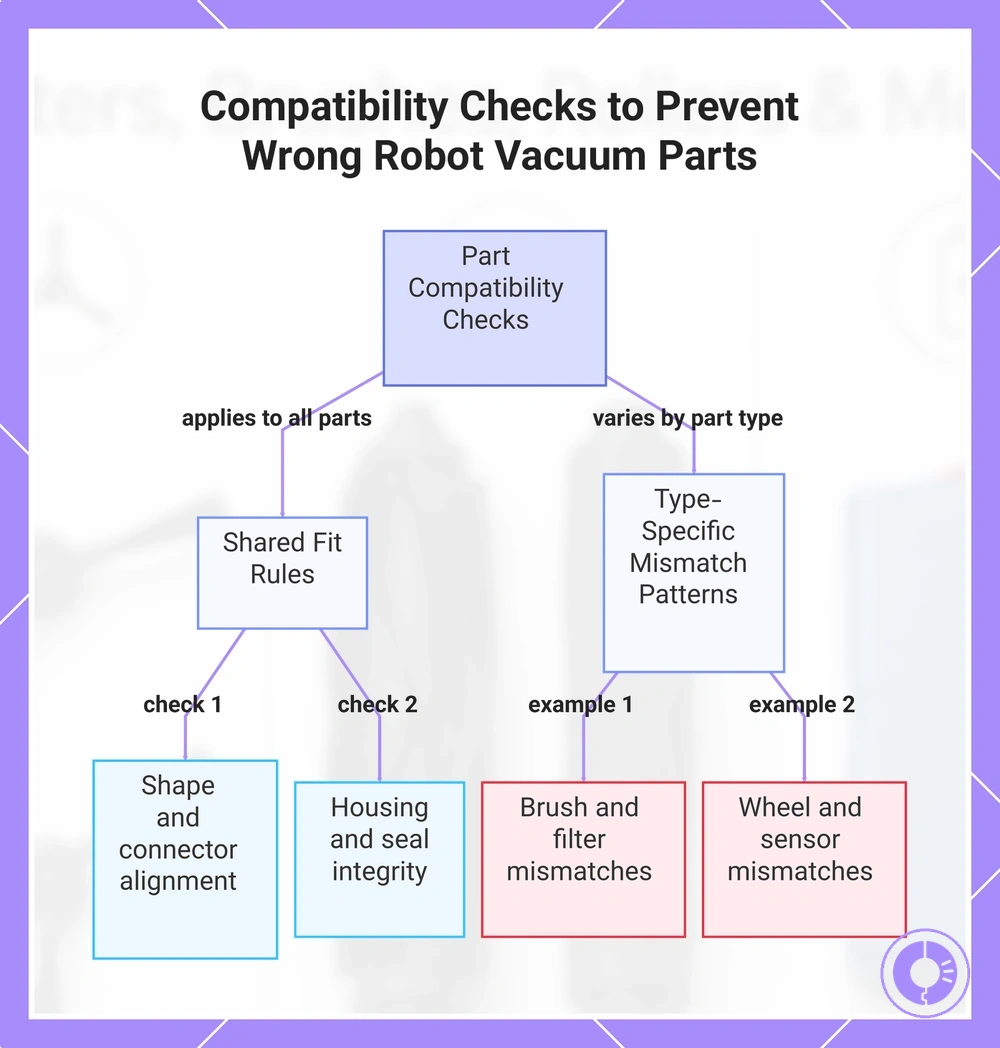
Preventing wrong orders means using a pass/fail filter that separates shared fit rules from type-specific mismatch traps. A lookalike part can look right but fail at the interface point; compatibility is a verification step. Run shared checks first, then type-specific traps.
Shared fit checks (apply to every part type)
- Check the shape against the original part. A shape mismatch often means the part cannot seat correctly, leading to no fit or abnormal behavior during operation.
- Check the connector type and alignment. A mismatched connector can prevent electrical contact or cause intermittent faults.
- Check that the housing dimensions match the mounting area. A housing that is too large or too small may not secure properly, leading to fast wear or movement during use.
- Inspect the end-cap system for compatibility. An incompatible end-cap can break the seal, causing leaks or debris ingress.
- Check the seal contact surface. A poor seal can cause leaks and accelerate wear on nearby components.
Type-specific mismatch patterns (check by part category)
- For brushes: check the brush end-cap shape and the drive connector. A mismatch can cause the brush to spin unevenly or not at all, leading to poor cleaning and abnormal noise.
- For filters: check the filter frame shape and the locking tabs. A misfit filter may not seal, letting unfiltered air bypass and reducing suction.
- For side brushes: check the screw hole alignment and the brush arm length. A wrong side brush can fail to reach corners or may scrape the floor, causing fast wear.
- For wheels: check the wheel housing depth and the axle connector. A mismatched wheel may not rotate freely, leading to jerky movement and abnormal behavior.
- For sensors: check the sensor housing shape and the wire connector. An incompatible sensor can give false readings or no signal, causing navigation errors.
- For batteries: check the terminal shape and the battery compartment size. A misfit battery may not charge or can cause intermittent power loss.
- For dustbin assemblies: check the dustbin shape and the latch mechanism. A poor fit can cause the bin to dislodge during operation, spilling debris.
- For bumpers: check the bumper shape and the spring clips. A mismatched bumper may not absorb impacts, leading to damage or abnormal noise.
Once fit is confirmed, quality and genuine-vs-third-party trade-offs matter only after the part passes these compatibility checks.
This chart shows the two main categories of compatibility checks: shared fit rules that apply to all parts and type-specific mismatch patterns for common part categories.
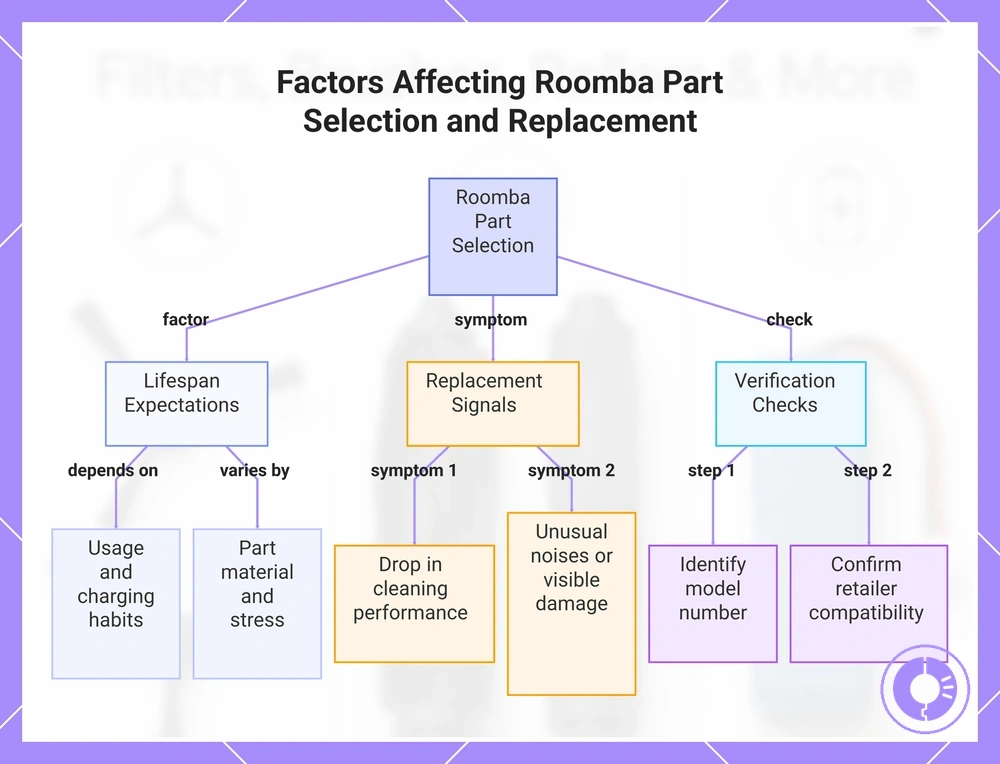
FAQs that influence part-type selection: lifespan expectations, replacement frequency signals, and quick verification questions
Question: How often should you replace a Roomba battery?
Answer: Battery replacement frequency depends on usage, charging habits, and the environment. Heavy use and frequent full discharges—like daily cleaning of large areas—can shorten battery life and mean you need to replace it sooner.
Question: What are the signs of wear that indicate a part needs replacement?
Answer: Common signs are a noticeable drop in cleaning performance, unusual noises, or visible damage. For brushes, check for frayed bristles or reduced rotation. If performance drops consistently, you likely need to replace that part.
Question: How can you verify that a replacement part is compatible with your Roomba?
Answer: Check your Roomba series and model number against the part specifications before ordering. Confirm that your series is listed as compatible by the retailer to avoid getting the wrong part.
Question: How do you tell which Roomba series you have?
Answer: Find the model number on the robot's underside or in the app—it identifies your Roomba series. Use that number when searching for parts to ensure a correct fit.
Question: Why do replacement intervals differ by environment and usage?
Answer: Replacement intervals depend on dust load, pet hair, floor type, and how often the robot runs. Carpets and pets tend to wear brushes and filters faster, while frequent daily runs accelerate wear on moving parts.
Question: How does usage affect how often you need to replace filters?
Answer: Filters need more frequent replacement in dusty or high-traffic areas. If a filter looks clogged or suction drops, replace it sooner. The exact interval depends on how much debris it collects.
Question: How does cleaning performance indicate that a part may need replacement?
Answer: A drop in cleaning performance often means a brush, filter, or battery is worn. Replacing the affected part typically restores normal cleaning function, while signs like tangled hair or clogged filter confirm the cause.
Question: Can lifespan vary between different part types within the same Roomba series?
Answer: Yes, lifespan varies by part type due to materials and operational stress; for example, brushes wear faster than side wheels or sensors. Age, charging behavior, and usage all affect part life.
This chart shows the main factors, symptoms, and verification steps to consider when selecting a replacement part for your Roomba.