
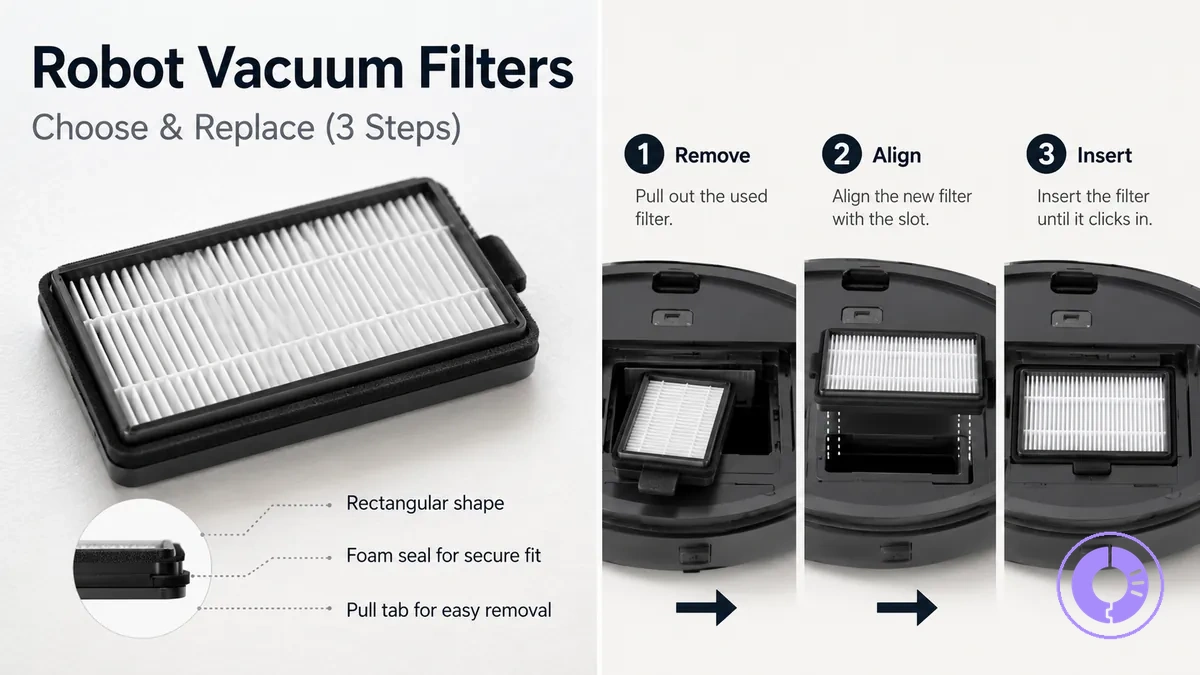
Roomba replacement filters: choosing the right fit and installing it correctly
Roomba replacement filters are model-specific consumable parts. Their fit into the filter housing determines how well the filter assembly seals and captures dust. Other replaceable parts such as brushes or bags are not discussed here.
In homes with heavy dust, shedding pets, or frequent cleaning, filters often need more frequent replacement. The replacement filter needs to match the Roomba model or series, since housing shape and frame dimensions differ between series.
When a filter does not seat correctly or the frame edge does not match the housing, gaps can form that may allow dust to bypass the filtration media. Such gaps can reduce airflow, cause the bin to clog faster, and lower cleaning results.
Roomba filter replacements in context: what the filter does and what is included in the filter assembly
A Roomba filter is the airflow-stage component that captures dust and fine debris in the cleaning system. It sits inside the bin area and directly affects airflow and dust containment. During installation, proper seating of the filter assembly prevents air leaks and maintains consistent dust capture.
Users often refer to the entire replaceable unit as a "filter," but a filter assembly actually includes the filtration media, a supporting frame, and a seal that seals against the bin cavity. Proper alignment of the frame and seal ensures a snug fit in the bin cavity and maintains airflow. The fit and sealing depend on the exact shape of the frame and housing in your specific model. For a full overview of what can be replaced, see the Roomba replacement parts hub.
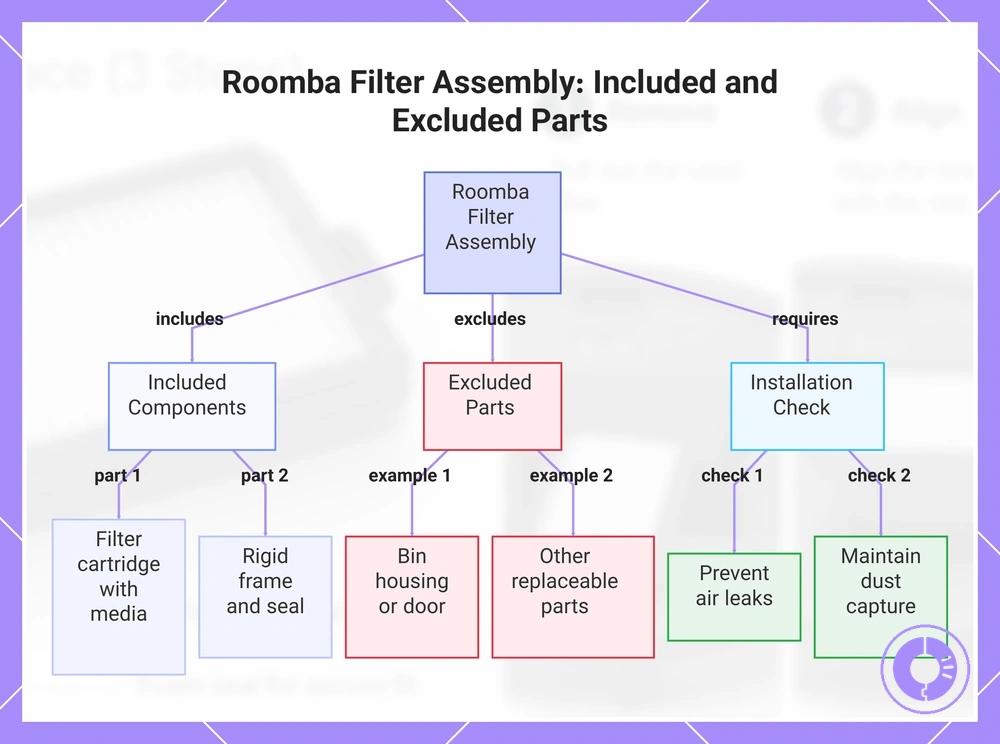
Here is a breakdown of what is typically included in a filter assembly and what is not:
- Typically included:
- filter cartridge with embedded filtration media
- rigid frame that maintains shape and fit
- pre-installed sealing strip or foam to block air leaks
- Not included (sold separately):
- the bin housing or door
- brushes, rollers, or side brushes
- self-emptying base disposable bags
Filters affect airflow and dust capture; they are not the same as other replaceable parts. For details on other part types to replace, see the corresponding section.
This chart shows the components included in a Roomba filter assembly, the parts sold separately, and a key installation check to prevent air leaks.
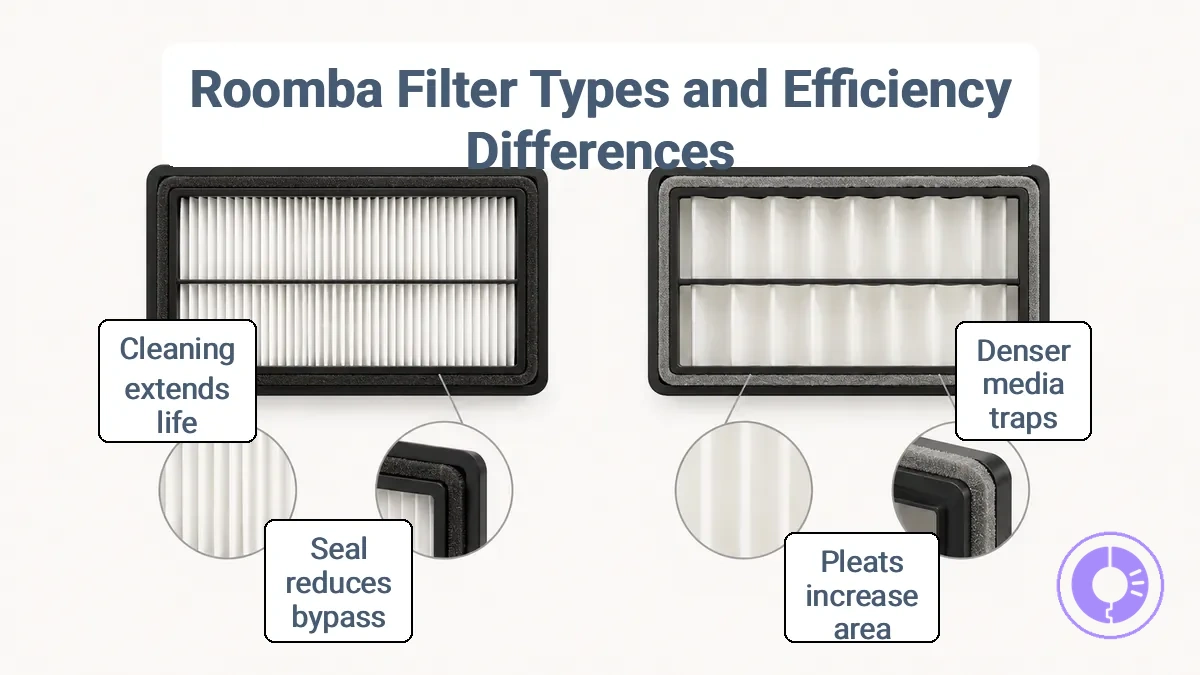
Roomba Replacement Filter Types and Efficiency Differences That Change Cleaning Results
Replacement filter types differ in media density, pleat count or surface area, and frame seal. These differences affect how the filter seats during installation and influence airflow and dust capture afterward. A denser media with more pleats generally traps smaller particles but can restrict airflow, while a looser design flows more freely but may let fine dust pass through.
Higher-efficiency filters often pick up more fine dust, but the added restriction can reduce pickup consistency on carpets and cause faster clogging, especially if the frame seal is not properly aligned during installation. Whether this trade-off becomes noticeable depends on the dust load and the Roomba model's airflow characteristics.
For example, in a household with mostly fine dust and light debris, a tighter media may be beneficial because the risk of early clogging is lower. In contrast, a home with mixed debris like pet hair and crumbs may need a filter with more open media to maintain consistent pickup without frequent cleaning.
- Capture vs. restriction: Higher-efficiency media captures more fine dust but increases airflow resistance, affecting clogging speed and pickup consistency.
- Surface area and pleats: More pleats increase surface area, which can delay clogging, but denser media can raise restriction.
- Frame seal: A tight seal reduces bypass and dust escape; a loose seal lets dust past the filter.
- Maintenance: Filters designed to be cleaned (tapped out) may extend usable life; washing is not recommended for most high-efficiency filters.
Standard vs high-efficiency replacement filters and when the upgrade matters
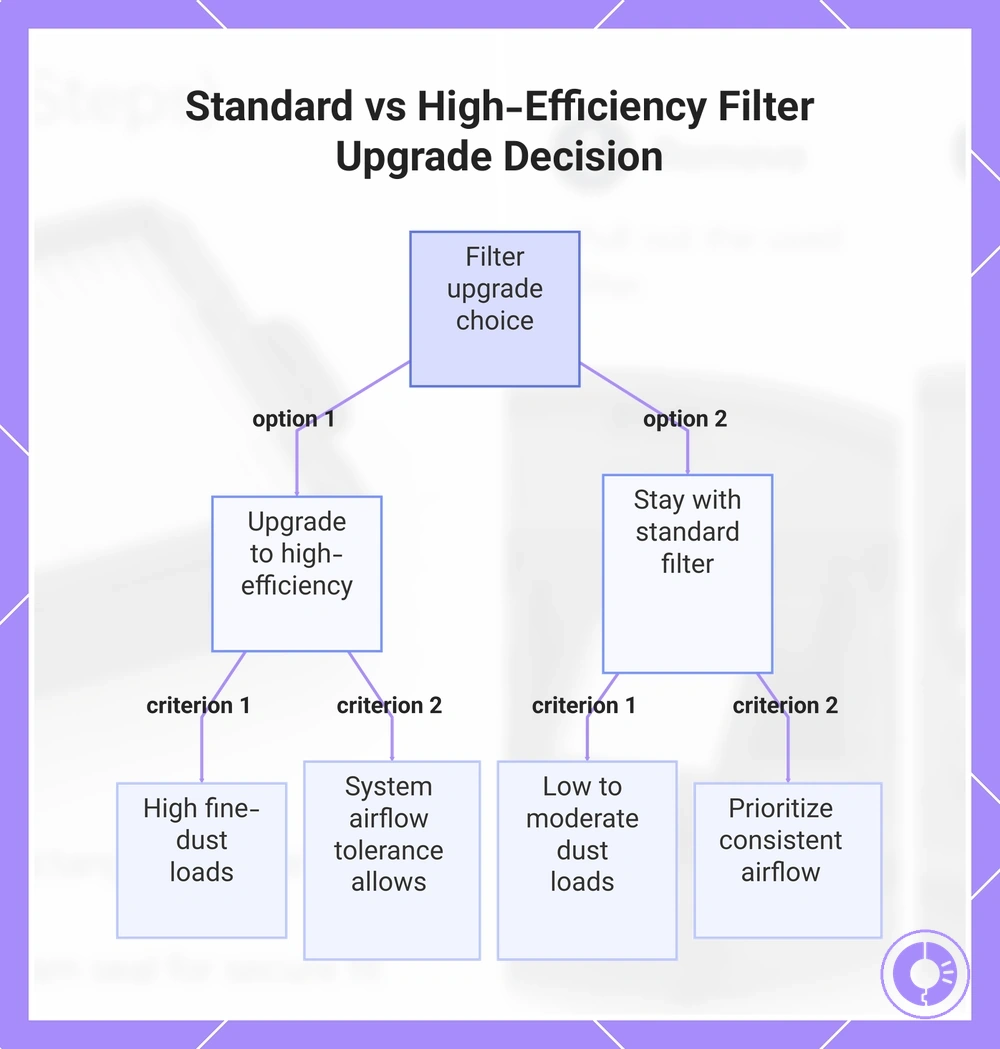
The choice between a standard filter and a high-efficiency filter depends primarily on the amount of fine dust your home generates and your system's tolerance to airflow restriction. The trade-off: higher efficiency captures more fine dust but increases the risk of airflow restriction and faster clogging, which can affect performance and maintenance intervals.
When the upgrade matters comes down to two criteria:
- Choose a high-efficiency filter when your home produces high fine-dust loads (e.g., from pets, renovations, or seasonal allergens) and your system’s airflow tolerance allows for the extra restriction without overheating or short-cycling.
- Choose a standard filter when you prioritize consistent airflow and lower maintenance frequency, and your dust load is low to moderate—the reduced fine-dust capture is then an acceptable trade-off.
For example, a home with multiple shedding pets and an HVAC system rated for higher MERV levels often benefits from the upgrade because the fine-dust capture outweighs the restriction risk. In contrast, a home with minimal dust sources and an older furnace with lower airflow tolerance is better off with a standard filter to avoid clogging-related strain and frequent replacements.
This chart shows the conditions for choosing between standard and high-efficiency replacement filters based on home dust load and system airflow tolerance.
Filter Frame and Media Construction Differences That Affect Sealing and Airflow
The rigidity of the filter frame and the geometry of its sealing edge affect seat quality and airflow direction. A stiff frame maintains consistent contact with the housing under airflow pressure, whereas a warped edge can break the seal and create bypass leaks that reduce suction and may let dust escape, typically resulting in a noticeable drop in cleaning performance.
Examine the filter’s edges and frame for warping or deformation. If the filter rocks or leaves a gap when seated, verify before installing.
Check these points to confirm sealing and airflow are not compromised:
- Frame sits flush with no visible gaps.
- Sealing edge is free of warping or bending.
- Edge geometry matches the housing channel or gasket.
- Media is not compressed or damaged at the edges.
A warped edge is a common defect that the checklist helps catch before installation.
This chart shows how frame rigidity and edge geometry influence sealing and airflow, and lists key checks to verify proper fit before installation.

Compatibility and Fit Verification Before Buying: Model Identification, Shape, and Frame Matching
Compatibility between a replacement filter and your Roomba depends on the specific model or series of your robot and how the filter's physical interface matches the housing. If the shape, contact points, or seal alignment do not match, the filter may not seat correctly, causing reduced airflow and filtration efficiency.
Shape and frame matching means checking that the filter outline aligns with the housing opening, the frame edges are clean and unwarped, and the contact points match the original filter.
The seal line—the continuous edge that presses against the housing—should be continuous to minimize air bypass.
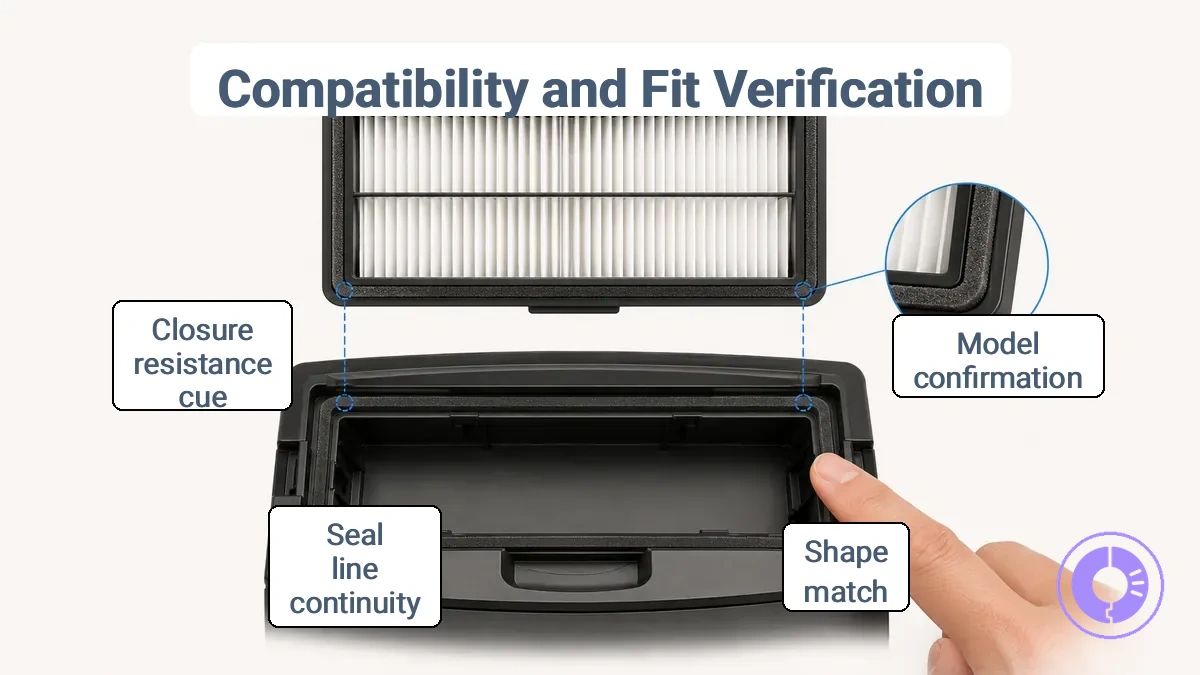
Compatibility and fit verification prevents you from buying a filter that is the wrong size or does not seal properly. Check each point below when evaluating a replacement filter:
- Model/series confirmation – Match the replacement filter to your Roomba's exact model or series number.
- Shape match – Compare the filter outline against the housing opening; the contour should match the housing opening.
- Frame edge condition – Inspect the filter's perimeter for cracks or warping that could prevent a flush fit.
- Contact points – Locate the areas where the filter touches the housing supports and verify they correspond to the original filter.
- Seal line continuity – Run your finger along the sealing edge to check for any break or gap.
- Closure resistance cue – After inserting, the filter should seat with a slight resistance when the cover or door is closed; a loose or forced fit indicates a mismatch.
The first checkpoint is model/series confirmation—without that step, the remaining physical checks may still fail to identify a mismatched filter.
Finding your Roomba model or series to avoid cross-model fit mistakes
Before buying replacement filters, check your Roomba model or series identifier on the device label, in the iRobot Home app, or in the product documentation. This helps you get the correct filter form factor and reduces fit errors and returns. Confirm before buying.
Follow these steps to find your Roomba model or series identifier quickly:
- Turn the Roomba over and check the label near the left wheel for the model number.
- Remove the dustbin and check the serial number sticker inside the dustbin compartment for the model or series identifier.
- Open the iRobot Home app and look for the model number, typically in the product information section.
- Refer to the original product box or manual if available.
- Write down the model number for reference.
Caution: Avoid confusing similar series names, such as the 600 and 900 series, which require different filter shapes. Regional label variants may also appear; verify against the serial number sticker rather than packaging.
Fit checkpoints: filter shape, frame contact points, and seal alignment
Correct fit depends on matching the filter shape to the frame, verifying that contact points sit flush, and ensuring continuous seal alignment around the entire perimeter. A continuous seal means no gaps remain between the filter edge and the housing, which helps prevent unfiltered air from bypassing the media. Use this checklist to confirm fit before and after installation.
These observable checks verify the compatibility checklist for filter fit criteria. If any item shows resistance, rocking, or a visible gap, stop and re-seat the filter before proceeding.
- Before install — shape and geometry: Compare the filter outline to the frame opening. The filter should drop in without forcing and match the frame contour.
- Before install — contact point alignment: Check that tabs, ridges, or locating features of the filter align with corresponding slots or ledges in the frame.
- Before install — seal surface condition: Inspect the foam or gasket strip for tears, compression marks, or debris that could break the seal.
- After install — flush seating: Run a finger along the filter edge. It should feel level with or slightly recessed from the frame surface, not protruding.
- After install — seal continuity: Look for light gaps between the filter and housing. A continuous seal shows no daylight along any side.
- After install — no rocking or movement: Gently press the center of the filter. It should not tilt, rock, or shift out of position.
- After install — airflow stability: Run the device and listen for whistling or irregular suction. Steady airflow and consistent pickup indicate the seal is intact.
Selection criteria for compatible filters: filtration, airflow, sealing, and durability trade-offs
A compatible replacement filter typically balances filtration with airflow and sealing quality for the home’s dust conditions. Four criteria — filtration, airflow, sealing, and durability — define the trade-offs, not absolutes.
Filtration and airflow interact: a denser filter media captures more particles but increases airflow restriction, leading to clogging and reduced cleaning consistency. Sealing quality affects whether air bypasses the media, allowing dust escape that undermines filtration. Durability, reflected in frame rigidity and media resistance to deformation, affects how long the filter maintains its fit and performance.
The table organizes these trade-offs by decision variables.
| Criterion | What to look for | What it affects | When it matters most |
|---|---|---|---|
| Filtration | Media density and pore structure | Particle capture rate; higher density increases restriction | Homes with fine dust or allergens |
| Airflow | Pressure drop rating at rated flow | Suction power and cleaning efficiency; high restriction reduces airflow | Homes with heavy debris or large floor areas |
| Sealing | Gasket material and housing contact surface | Bypass leakage; poor sealing lets dust escape unfiltered | Any home, but critical when filtration consistency is needed |
| Durability | Frame rigidity and media tear resistance | Filter lifespan and fit retention; deformation causes bypass or clogging | Homes with frequent cleaning cycles or abrasive debris |
Consider a home with high dust load from pets and outdoor exposure: a filter with moderate filtration, good sealing, and rigid frame balances demands by prioritizing airflow to reduce clogging and maintain cleaning consistency, though fine particles may pass. For mixed debris — fine dust plus occasional larger particles — a filter with higher filtration and a robust seal may be better, even if it requires more frequent maintenance.
When evaluating options, use a quality checklist for filters — media density, gasket condition, and frame stiffness — to guide the decision.
Multi-pack selection: quantity planning, storage conditions, and avoiding wasted replacements
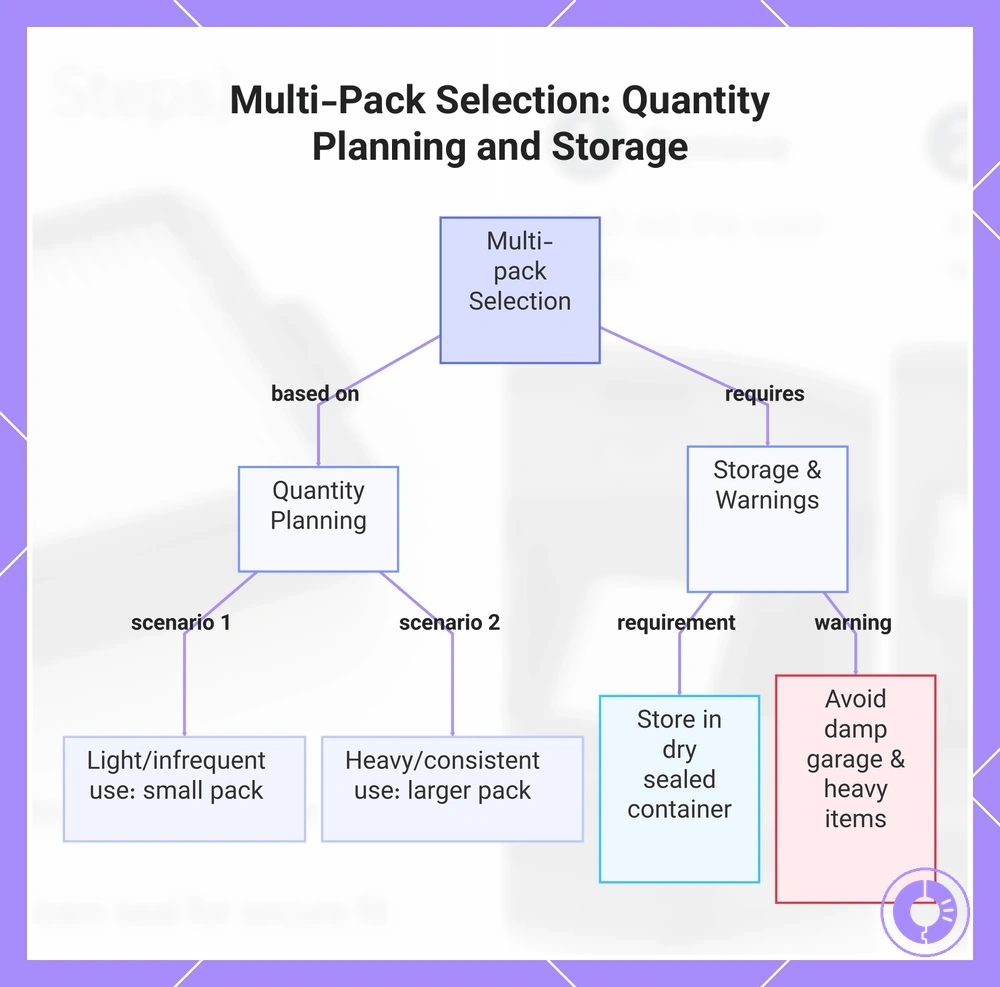
Multi-pack selection for installation depends on replacement cadence and safe storage rather than pack size alone. When filters degrade in storage or sit unused past their useful life, the savings from buying in quantity are lost. Plan by interval variability to match pack size to actual usage patterns.
Light dust load and infrequent use mean a smaller multi-pack often suffices for installation. Heavy usage or high-pet households may justify a larger quantity, but only if the replacement interval stays consistent to avoid installation delays. When conditions vary seasonally or by room, a medium pack can help avoid overbuying and ensure filters are available when installation is due.
Storage conditions directly affect filter life and installation readiness. Keep unused filters in a dry, sealed container away from moisture and crushing. Contamination from dust, humidity, or physical pressure can degrade the filter media before installation. A moisture or crush warning applies: even a sealed multi-pack can suffer damage if stored in a damp garage or under heavy items.
This chart shows how to choose the right multi-pack size based on usage patterns and how to store filters to prevent damage.
Installing a Roomba Replacement Filter Correctly: Removal, Seating, and Post-Install Checks
Correct installation requires clean removal, proper seating, and a final fit check to preserve the seal and airflow. Skipping any phase can cause bypass leaks or a drop in cleaning performance. Follow the steps in order.
Each phase prevents a different problem. Removing the old filter without spreading debris keeps the housing clear. Seating the new filter flush creates an airtight seal that directs airflow through the filter rather than around it. The final post-install check confirms the cover closes without resistance.
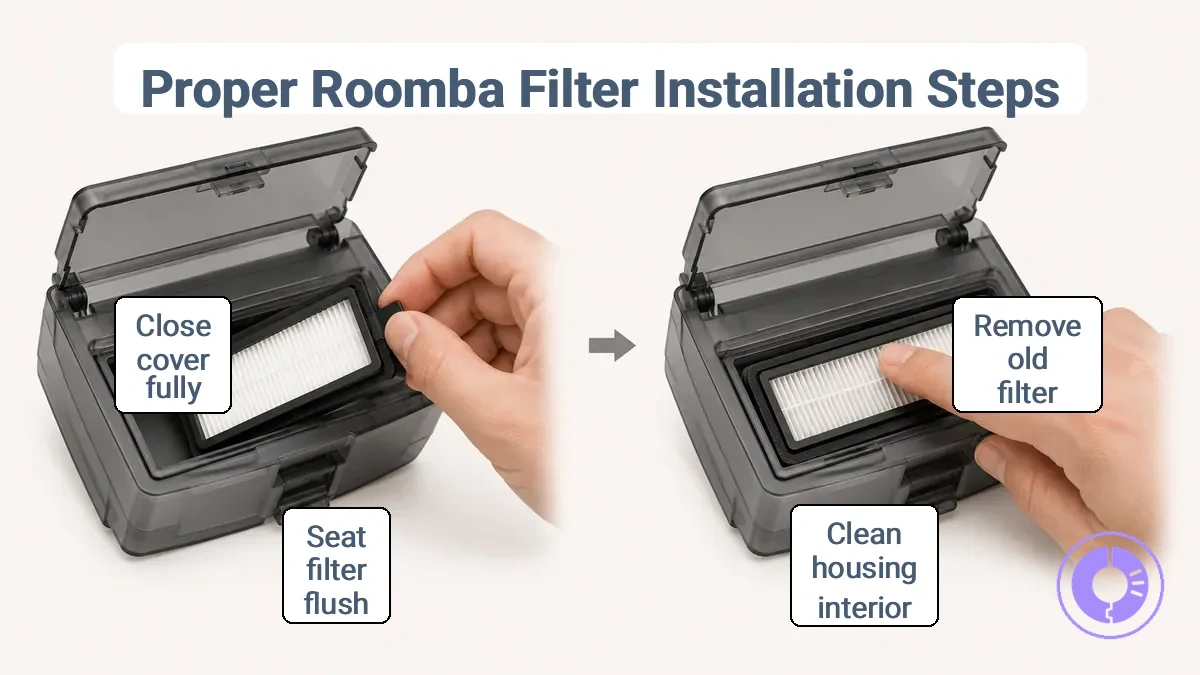
- Remove the bin from the robot and open the filter door or compartment. Check for visible debris or hair around the opening. Stop if debris prevents the door from opening fully.
- Grasp the old filter by the yellow tab (if present) or the side edge and pull it straight out. Inspect the removed filter for heavy buildup and discard it. Do not force the filter if it resists – check for obstructions.
- Wipe the filter housing interior with a dry cloth to remove loose dust or hair. Avoid pushing debris deeper into the housing. A clean housing helps the new filter seat evenly.
- Take the new replacement filter and align it with the housing slot. Ensure the filter sits flat and the edges contact the housing walls evenly. If the filter feels too tight or does not slide in smoothly, check compatibility with your model.
- Press the filter gently until it is flush against the housing back wall. The filter should not rock or tilt after seating. A flush seal can help prevent air bypass and maintain suction.
- Close the filter door or cover until it snaps shut without force. The cover should close completely; any gap indicates the filter may not be seated fully. If the cover resists, reopen and reseat the filter.
- Reinstall the bin into the robot and run a short cleaning cycle to confirm the error or performance improves. Listen for unusual air leaks around the filter door. If the post-install check reveals continued issues, repeat the seating steps.
A common mistake is forcing a filter that does not seat flush. Instead of applying extra pressure, verify compatibility and reseat before closing the cover.
Removing the old filter and inspecting the housing for debris and deformation
Remove the old filter gently, inspect the housing cavity for debris or deformation, then check before inserting a new filter.
To remove the old filter and inspect the housing for debris and deformation:
- Turn off the device and open the filter compartment.
- Gently pull the old filter out, taking care not to shake loose captured dust.
- Inspect the housing cavity for debris, dust buildup, or any signs of warping or deformation that could affect the seal or airflow.
- Dispose of the old filter in a sealed bag to minimize dust exposure.
Seating the new filter for a tight seal and stable airflow path
Flush seating means the filter sits flat against the housing with even edge contact all around, preventing bypass leaks that reduce cleaning performance and airflow stability. Verify the seal line after installation.
Confirm a tight seal and stable airflow after seating the new filter with this checklist:
- Check for any visible gaps around all four edges of the filter.
- Confirm that the filter frame makes even edge contact before engaging any latches.
- If your model uses latches, close them gently until they click; stop if you feel resistance.
- Verify that the filter does not rock or shift when lightly touched.
- Close the access panel and listen for air whistling, which may indicate a seal break.
If the filter rocks, shows a visible gap, or resists closure, remove it and reseat it, then re-check all contact points to restore seal integrity.
Post-install verification: fit confirmation and indicator reset when applicable
Post-install verification checks confirm the new filter is seated fully with unobstructed airflow, and that the reminder indicator resets if the model supports it. Run a verification check before starting the cleaning cycle.
After replacing the filter, run through this verification checklist:
- Fit confirmation: ensure the filter locks into place with no gaps.
- Airflow check: listen for normal suction or review the app for airflow feedback.
- Indicator reset (when applicable): if the model has a filter reminder, reset it after replacement.
- Early symptom detection: weak suction or debris left behind may indicate a sealing issue.
- For issues that persist after correct seating, move to the troubleshooting section rather than repeated reinstall attempts.
Filter maintenance and replacement timing: cleaning limits, hygiene, and when to replace instead
Filters have practical cleaning limits and should be replaced when airflow or sealing performance declines. Cleaning can temporarily improve pickup, but it won't restore full performance if the filter media is worn. How often cleaning remains effective depends on dust load and run cycles.
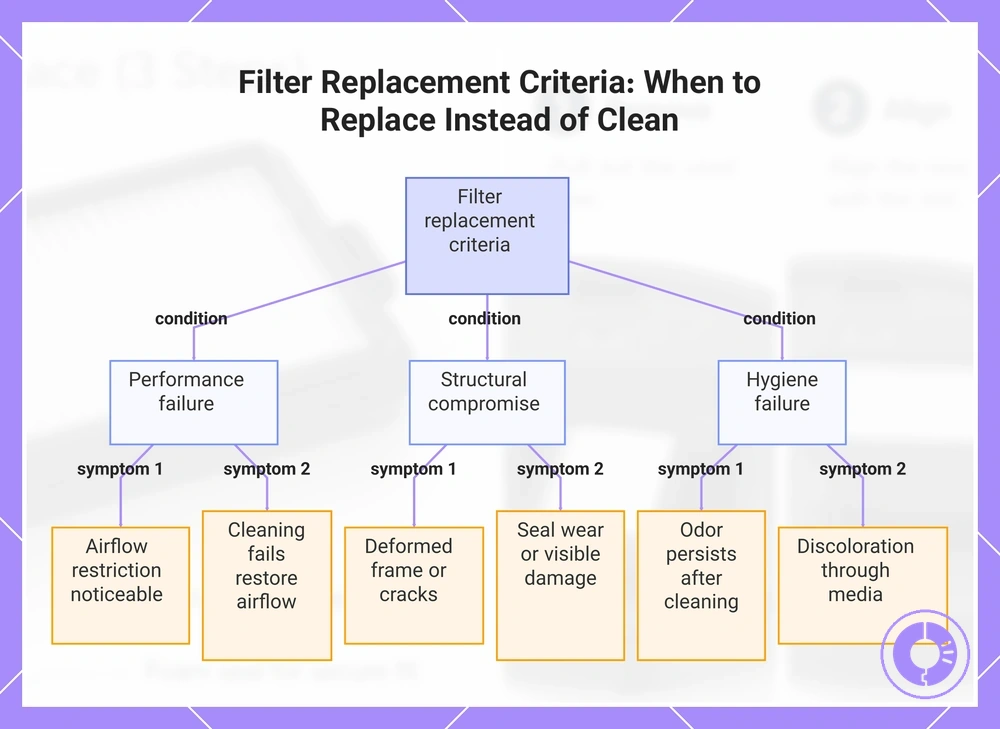
When airflow restriction becomes noticeable or you detect odor, the filter may be reaching its limit. Seal wear can cause bypass, allowing dust to escape and reducing efficiency. You can assess filter replacement frequency by checking these symptoms regularly. This checklist connects symptoms and usage patterns to replacement timing.
- Clogging or reduced airflow → Check for debris → Clean if reusable, replace if media is coated or dense.
- Odor during operation → Check for moisture or microbial growth → Replace if odor persists after cleaning.
- Deformed frame → Check for warping or cracks → Replace; deformed seals allow bypass.
- Seal wear or gaps → Check for dust escape marks → Replace to restore sealing.
- Persistent restriction after cleaning → Check if cleaning failed → Replace; media saturated.
- Discoloration or staining → Check if extends through media → Replace if cleaning does not lighten.
- Exceeded cleaning cycles → Check if performance declines after repeated cleaning → Replace if cleaning no longer restores airflow.
- Visible damage (tears, holes) → Check for structural compromise → Replace; bypass may occur.
For example, a dirty filter with normal airflow, no odor, and no seal damage may still be functional after cleaning. In contrast, a filter with a deformed frame or torn media allows bypass regardless of cleaning. Replace the filter when its structure is compromised, even if it still looks partially clean.
Practice good hygiene when servicing filters. Wash hands after touching a used filter, and clean the filter compartment to prevent debris buildup. When replacement does not improve performance, check for other blockages in the airflow path before assuming the filter is the cause.
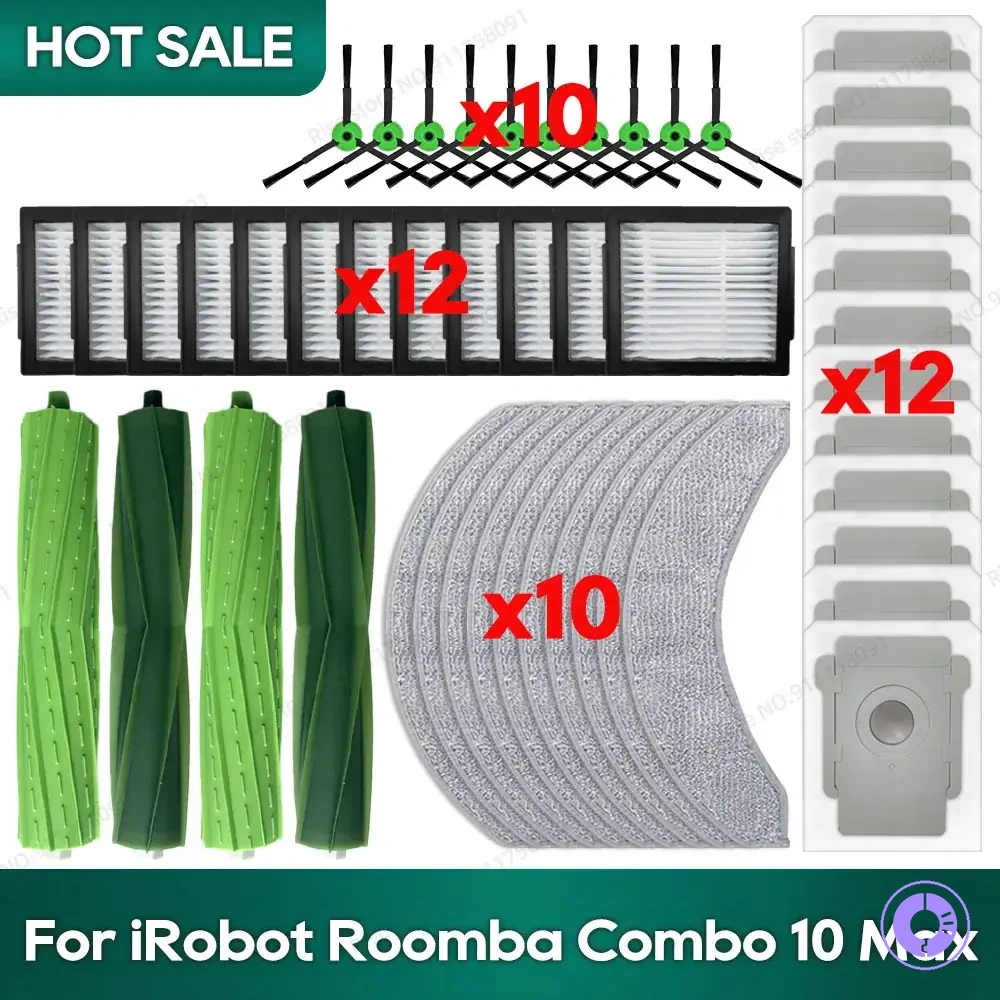
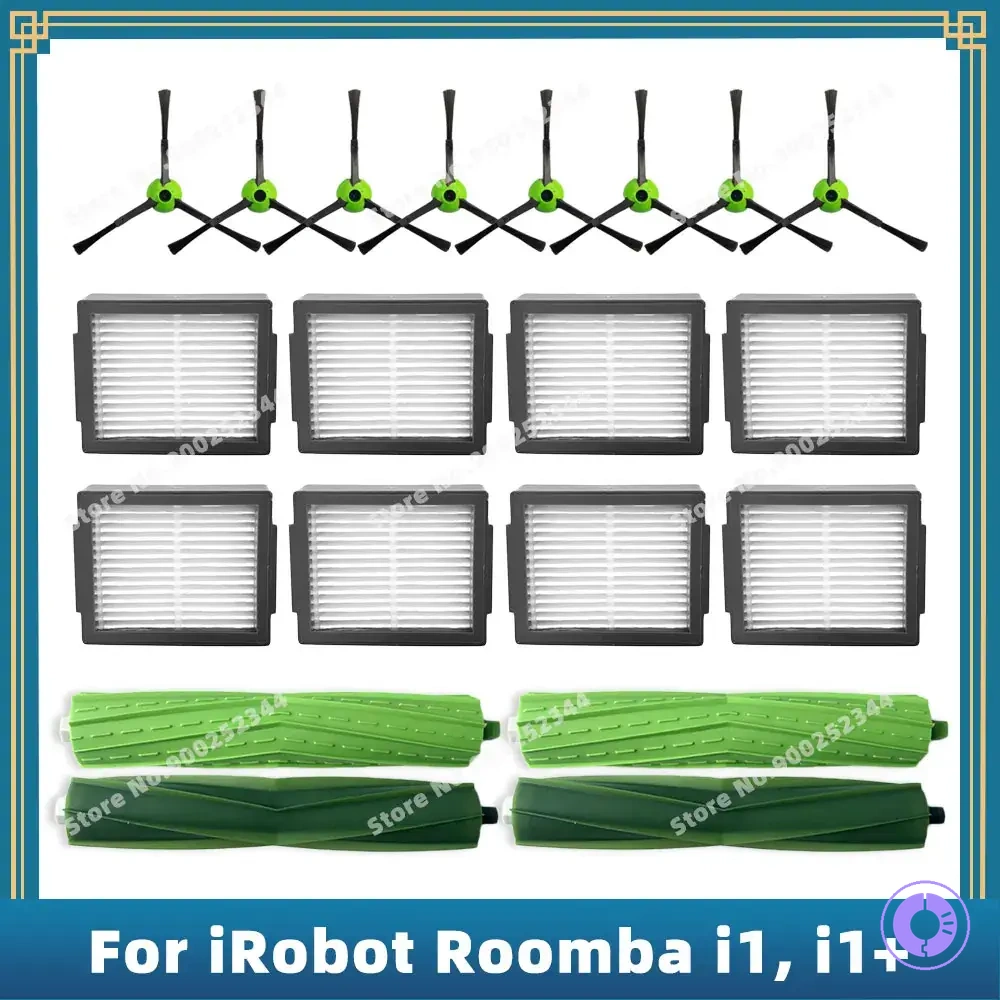
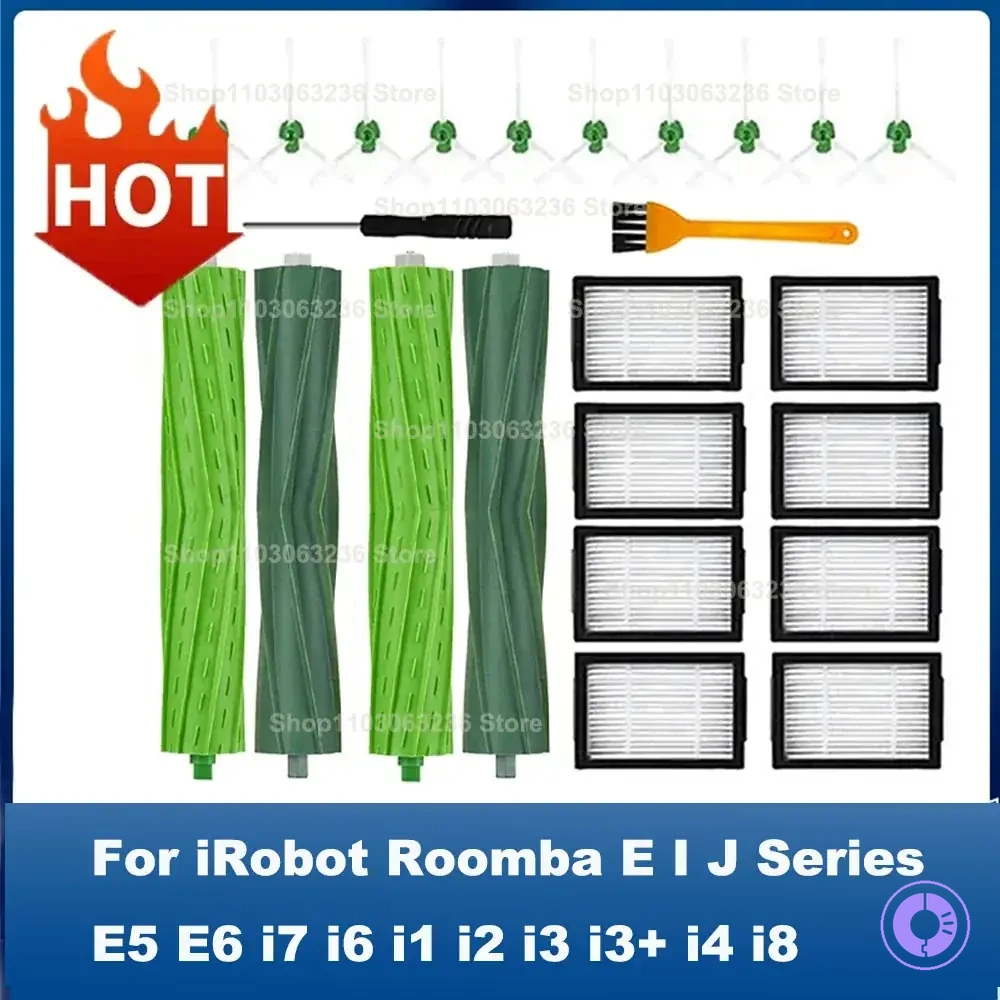
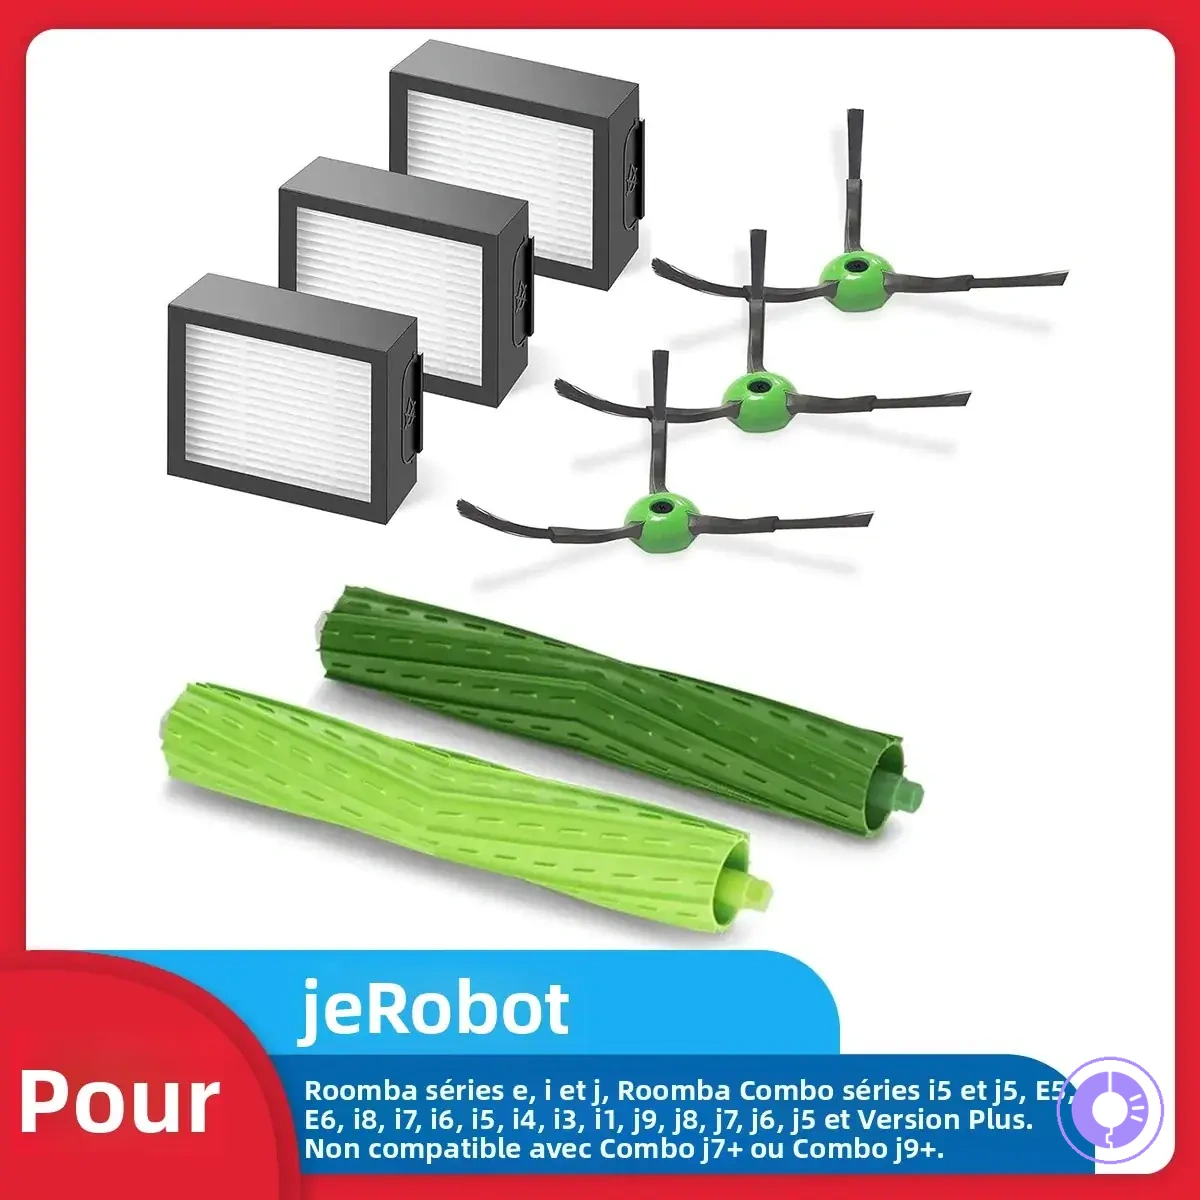
The products below are useful examples for comparing available options. Before buying, check that the compatibility criteria, key features, and product details match your needs.
This chart shows the key conditions and symptoms that indicate when a filter should be replaced rather than cleaned, based on performance, structural integrity, and hygiene.
Common fit and performance issues after replacement and how to correct them safely
Most performance issues after filter replacement come from misfit, poor sealing, clogged media, or improper seating — not sudden device failure. Persistent poor cleaning symptoms tied to filters, even with correct fit, may point to broader issues covered in related sections.
Diagnose common fit and performance issues after replacement by matching symptoms to likely causes and corrective actions. Start with fit and seal checks before proceeding.
| Symptom | Likely filter issue | Check | Safe correction |
|---|---|---|---|
| Reduced pickup with visible debris near filter area | Misfit or gap | Inspect filter seating and seal | Reseat filter; replace if seal is damaged |
| Dust or debris escaping around the filter door | Poor sealing | Check filter edges for gaps or damage | Reseat or replace filter |
| Whistling or hissing noise during operation | Improper seating or misalignment | Verify filter is fully inserted and aligned | Remove and reseat until no gaps |
| Reduced suction or pickup (no visible gaps) | Clogged media | Examine filter media for blockage | Replace filter if visibly clogged |
| Filter removal error or indicator message | Improper seating or contact | Check filter orientation and seating | Reseat until fully locked; replace if warning persists |
The fit-related symptoms in the table have a common trait: if the filter does not seat evenly or leaves a visible gap, poor sealing and dust escape are likely. Start by reseating the filter. If the seal appears damaged, replace the filter. Stop and verify compatibility before forcing a filter into place.
For clogging or restriction symptoms such as reduced pickup, the filter media may be blocked. Check the media for visible debris. If clogged, replace the filter. If the media appears clean but symptoms persist, try reseating the filter before replacing, since poor seating can mimic clogging and cause unnecessary replacements.
When fit, seal, and media condition are correct, persistent cleaning issues may come from broader causes beyond the filter. Check fit, then seal, then media condition, and correct by reseating or replacing as needed.
The products below are useful examples for comparing available options. Before buying, check that the compatibility criteria, key features, and product details match your needs.