Roomba replacement battery: choosing a compatible pack and replacing it safely
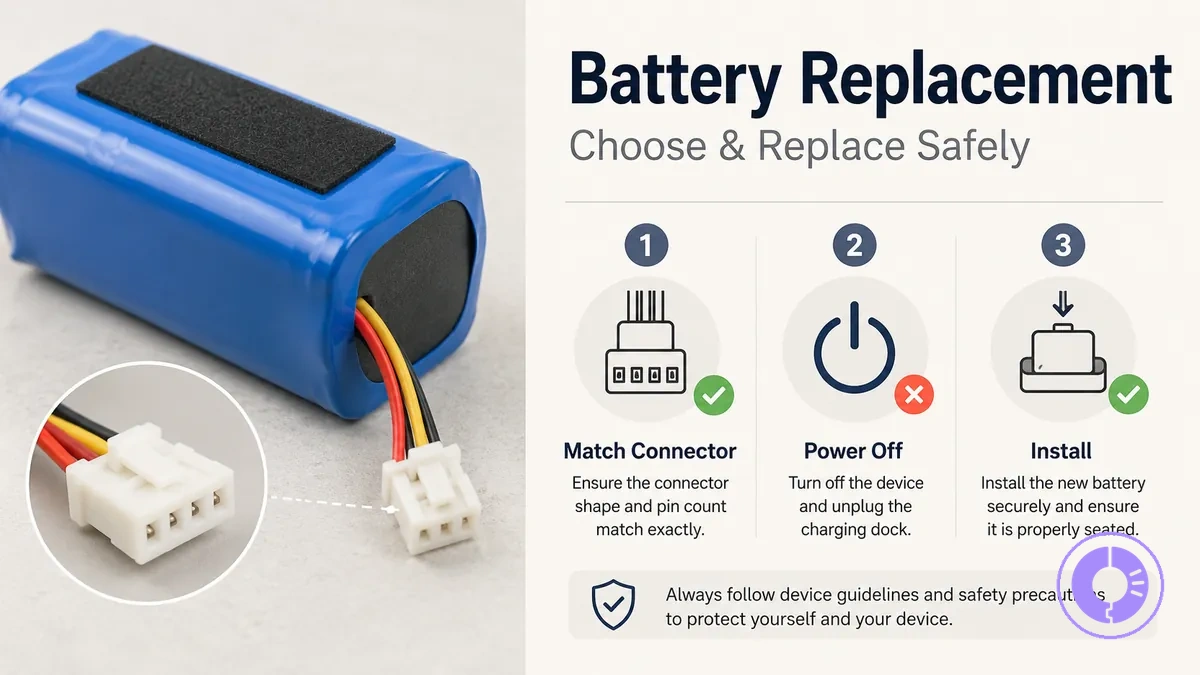
Choosing a compatible Roomba replacement battery and replacing it safely starts with identifying the correct battery pack for your specific Roomba model and following safe handling steps. The Roomba replacement battery is the power source that affects run time and how the robot's charging system responds.
Using an incompatible battery can lead to poor performance, charging errors, or damage to the robot. Mismatches in connector design, voltage class, or physical dimensions may prevent the battery from seating correctly or cause unsafe conditions. Reference the Roomba replacement parts hub for available parts.
Key verification points include:
- Voltage class — many Roomba models use 14.4 V, but confirm for your series.
- Connector shape and pin layout — these vary between model families.
- Physical compartment dimensions — some packs are thicker or wider and may not fit.
- Battery chemistry — NiMH and lithium packs have different charging profiles.
What a Roomba replacement battery pack is and when replacement is the right fix
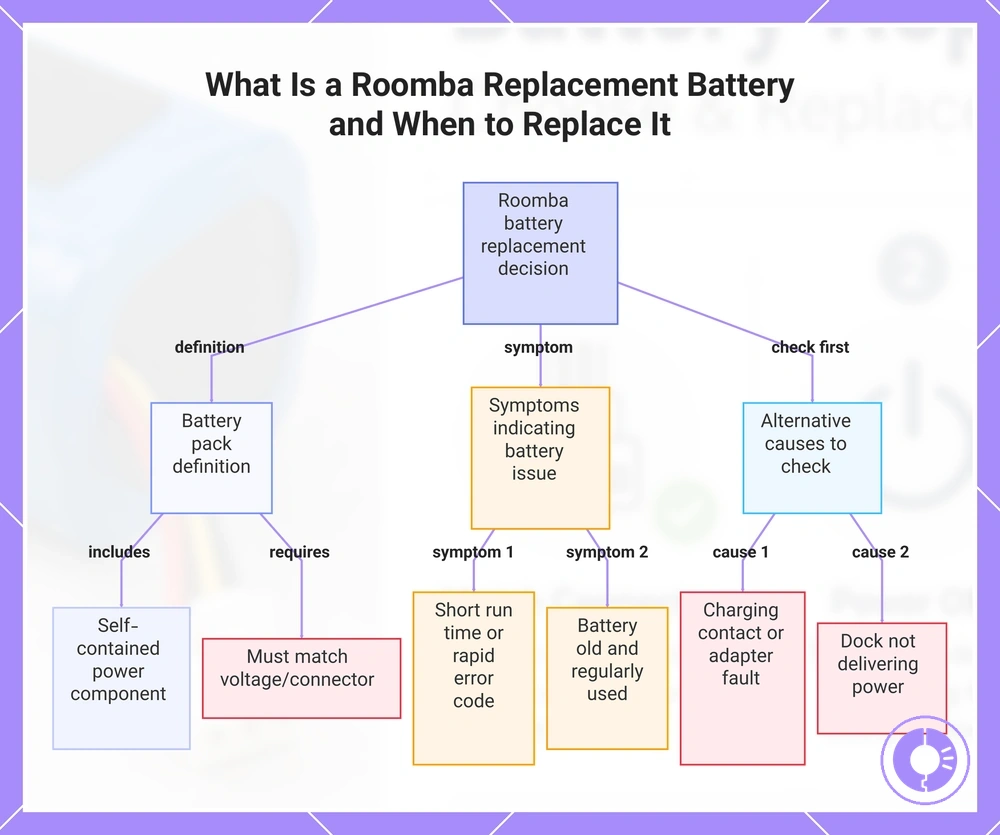
A Roomba replacement battery pack is a self-contained power component you can swap into a compatible robot when the original battery no longer holds a usable charge. This pack uses a specific connector and voltage rating that must match the robot model, and it is typically secured by screws under the bottom cover. Knowing what this part is and when to replace it helps avoid safety risks from mismatched components or unnecessary purchases when the real issue lies elsewhere.
If a Roomba shows symptoms like short run time, failure to power on, or repeated charging errors, the battery pack is a likely cause.
However, these symptoms can appear when the charging contacts, dock, or power supply are not working correctly. Before deciding to replace the battery, separate cases where the battery is the problem from those where it may be fine.
A common boundary cue is a 'won't charge' complaint. This can involve non-battery causes such as dirty charging contacts, a faulty power adapter, or a dock that is not delivering power. Checking these items first can prevent buying a replacement battery that won't solve the issue. For guidance on when a battery replacement is typically needed, see battery replacement timing.
- Battery is likely the issue: The robot runs for only a few minutes before stopping.
- Battery is likely the issue: The battery indicator shows a rapid error code.
- Battery is likely the issue: The battery pack is several years old and has been used regularly.
- Battery may be fine: The robot does not charge at all, but the charging contacts are clean and the dock shows a solid power light. In this case, the charger or dock may be the problem.
If the symptom pattern matches age or run-time loss, a replacement battery pack is often the right fix. If the symptom is a complete failure to charge, check the charging system first. Always verify the battery pack’s voltage and connector compatibility before purchasing to ensure safe operation.
This chart defines the Roomba replacement battery pack, lists symptoms that indicate a battery issue, and highlights charging system checks to perform before deciding to replace.
Battery types and model families that affect Roomba battery compatibility
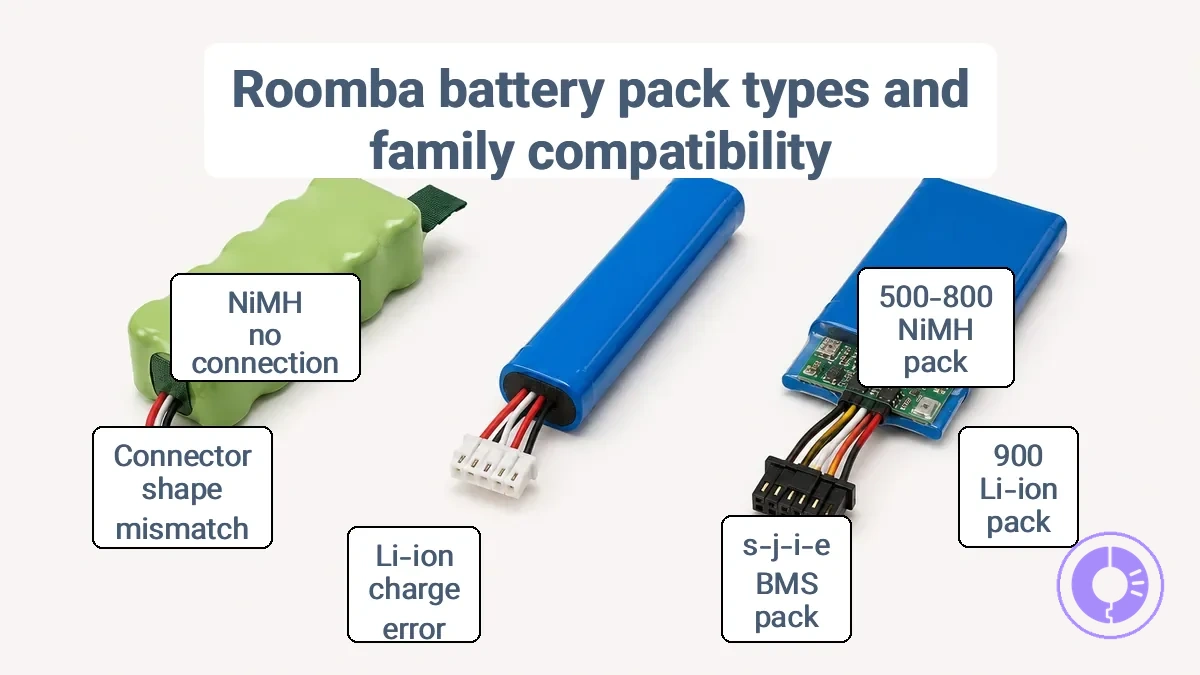
Roomba battery compatibility depends mainly on the model family and the battery pack type it was designed for. Matching chemistry or capacity alone does not ensure fit.
Across Roomba families, the main constraints that change are the connector shape, the nominal voltage range the charging system expects, and the physical size of the battery compartment.
| Roomba family | Pack type / form | Connector cue | Voltage class cue | Common misfit risk |
|---|---|---|---|---|
| 500, 600, 700, 800 series | Typically NiMH pack, rectangular | Small tab connector with keying | 14.4 V nominal | Li-ion pack may not charge correctly; connector shape may differ |
| 900 series | Typically Li-ion pack, slim | Wider connector with polarity key | 14.4 V nominal | NiMH pack may trigger charging errors |
| s, j, i, e series | Typically Li-ion pack, integrated BMS | Proprietary connector with multiple pins | 14.4 V nominal | Older NiMH packs may not physically connect |
Checking the physical connector and the label on the existing pack can help confirm fit.
Battery chemistry and rating basics that must match your Roomba
For safe operation, the battery pack's chemistry, voltage class, and capacity limits must match your specific Roomba model.
- Chemistry – If your Roomba originally used a NiMH battery, stick with NiMH; switching to a different chemistry can cause charging system issues.
- Voltage class – The replacement battery must match the original voltage rating — 14.4 V for many models. A mismatch can keep the robot from powering on or charging properly.
- Capacity limits – Using a battery with a capacity (mAh) above your model's stated limits may lead to charging issues or prevent normal operation. Check your model's documentation for any capacity restrictions.
Check these ratings on the battery label or in your Roomba's documentation. If unsure, go with a replacement that matches the original specifications.
Compatibility signals that determine which Roomba replacement battery fits your model
Whether a compatible Roomba replacement battery pack fits depends on connector match, voltage class, physical footprint, and mounting alignment. A misfit increases the risk of poor electrical contact, charging faults, or repeated battery failure. Check these signals before buying.
Each Roomba series typically uses a specific connector keying and nominal voltage rating. Voltage class and physical size must match the original pack so the robot charges safely. Use the battery compatibility checklist to verify these details before ordering.
Some models secure the battery compartment with screws; check that the replacement pack fits the compartment layout. Do not force a connector or pair a battery pack with a different voltage class from the original. Such mismatches can prevent charging or damage the robot.
The image below shows connector and compartment alignment as a fit cue for your Roomba model.
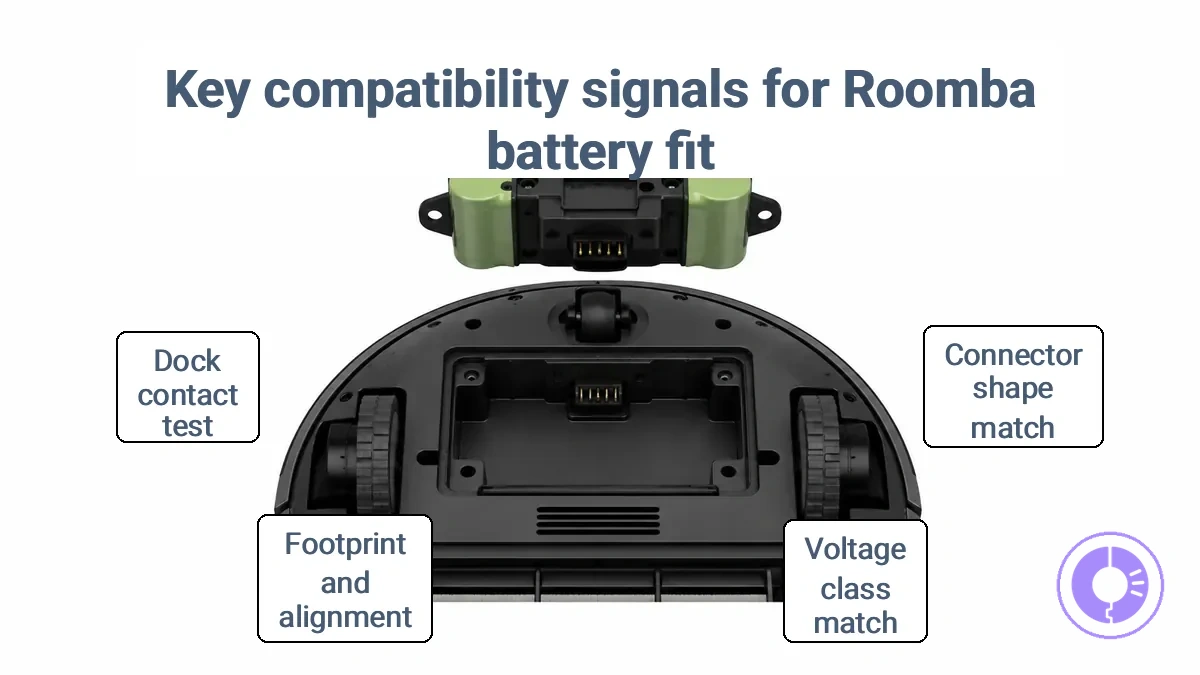
Roomba battery pack connector and compartment alignment as a fit cue.
| Signal | What to confirm | Pass / fail indicator |
|---|---|---|
| Connector shape and keying | Match the pack connector to the robot connector; no force needed | Connector slides fully into place; fails if it does not seat or requires excessive pressure |
| Voltage class | Check label voltage matches original pack voltage | Same nominal voltage; fails if voltage differs by more than a small margin |
| Physical footprint and mounting holes | Place pack in compartment; check screw holes and clearance | Pack sits flat and screw holes align; fails if it rocks or holes do not line up |
| Charging dock contacts | After installing, place Roomba on dock and observe charging indicator | Indicator lights or app confirms charging; fails if no response or error code appears |
Battery Connector Type, Keying, and Polarity Checks
Visually compare the connector shape and label markings, then perform a non-destructive fit check to confirm connector type, keying, and polarity. This helps ensure compatibility with the charging dock and avoid electrical damage.
Check the connector for keying (designed to fit one way), polarity markings or wire colors, and physical pin alignment. If the model uses a specific pin configuration, such as 2-pin or 3-pin, the replacement must match that shape. The checklist below helps verify each point before insertion.
If markings, keying, or polarity cues do not match, stop installation. Do not modify, splice, or bypass protections. An incorrect connection may cause short circuits, charging errors, or permanent damage to the Roomba’s electronics.
- Compare the connector shape and keying with the original battery pack.
- Confirm polarity markings (+, -) or wire colors (red for positive, black for negative) match.
- Perform a non-destructive fit check: try to insert without force; the connector should seat easily.
- If the connector fits but polarity is reversed or markings are absent, stop and do not proceed.
Voltage, capacity, and battery pack form factor matching
Start by matching the voltage class and physical fit when choosing a replacement Roomba battery pack.
The replacement pack must use the same nominal voltage (for example, 14.4V or 18V depending on the model) and have a compatible connector with correct polarity keying. Using a different voltage can prevent charging or cause overheating if the BMS or charger is not designed for it.
Once voltage and fit are confirmed, the capacity rating can vary within limits.
- Must match: Voltage class, connector type, polarity keying, screw hole alignment. Failing to match any of these can lead to charging errors, physical damage, or unsafe operation.
- Can vary within limits: Capacity (Ah) provided voltage class stays the same. Higher capacity may increase runtime, but also adds weight and can slightly slow charging.
Decision-focused quality and reliability checks for replacement batteries
A Roomba replacement battery's reliability depends more on build quality signals and protection features than on capacity claims alone. Verify these cues before you buy.
The checklist separates good signals from red flags by focusing on common failure modes: poor pack construction, missing thermal or overcurrent protection, or a warranty that offers no recourse. The battery quality and reliability checks criteria provide further detail on each item.
- Pack build consistency — Check that the housing, screws, and connector keying match the original, as misaligned contacts or loose fit can cause intermittent charging or arcing.
- Labeling and rating clarity — A clear voltage, capacity, and chemistry mark suggests controlled production, while missing or mismatched ratings may indicate a repackaged or substandard cell.
- Protection circuit presence — Look for explicit mention of overcharge, over-discharge, or short-circuit protection, as packs without these circuits are more likely to fail unsafely.
- Warranty or return policy — A reasonable defect warranty signals manufacturer confidence, while no warranty or a very short window increases your risk if the pack fails soon after installation.
Red-flag block — avoid these signals: A pack that feels lighter than the original, uses unmarked cells, or lacks documented protection circuitry may be a low-quality rebuild that can fail early or behave unsafely during charging.
A battery that is technically compatible but built with lower-grade cells can pass initial checks yet degrade rapidly or trigger error codes on the dock.
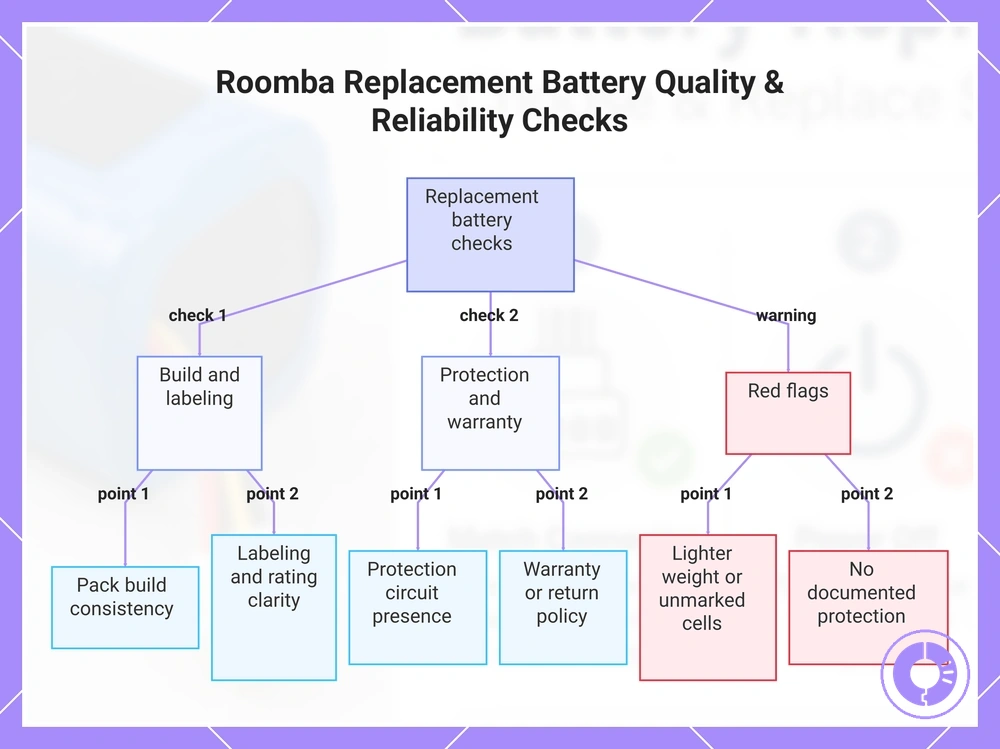
This chart shows the key checks and red flags to evaluate a Roomba replacement battery's quality and reliability before purchase.
Battery Safety Precautions for Handling, Installation, and First Charge
Handle a replacement battery pack with care to prevent short circuits, overheating, and damage; it stores a lot of energy and carries more risk than swapping other Roomba parts.
Inspect the battery pack for visible damage before using it, and verify compatibility with your Roomba model.
Improper handling—such as using incompatible chargers, exposing the pack to high temperatures, or allowing metal objects to contact the terminals—can cause overheating, leakage, or fire. The following practices reduce the risk of these issues:
- Do not disassemble, puncture, or modify the battery pack.
- Keep the battery pack away from heat sources, direct sunlight, and temperatures above 60°C (140°F).
- Avoid short circuits by keeping the battery terminals covered with non-conductive tape when not in use.
- Use the charger specified for the battery pack; verify the voltage and connector polarity match.
- Charge the battery pack before first use if stored for an extended period, and only charge within the recommended temperature range.
- Monitor the charger indicator during charging; if an error code appears or the pack becomes hot, stop charging immediately.
- Stop charging if the battery pack becomes swollen, leaking, or emits an unusual odor.
- Dispose of damaged or spent batteries according to local hazardous waste regulations; do not discard with household trash.
Warning: Never charge a swollen or leaking battery. Instead, place it in a non-flammable container away from combustible materials and contact your local disposal service.
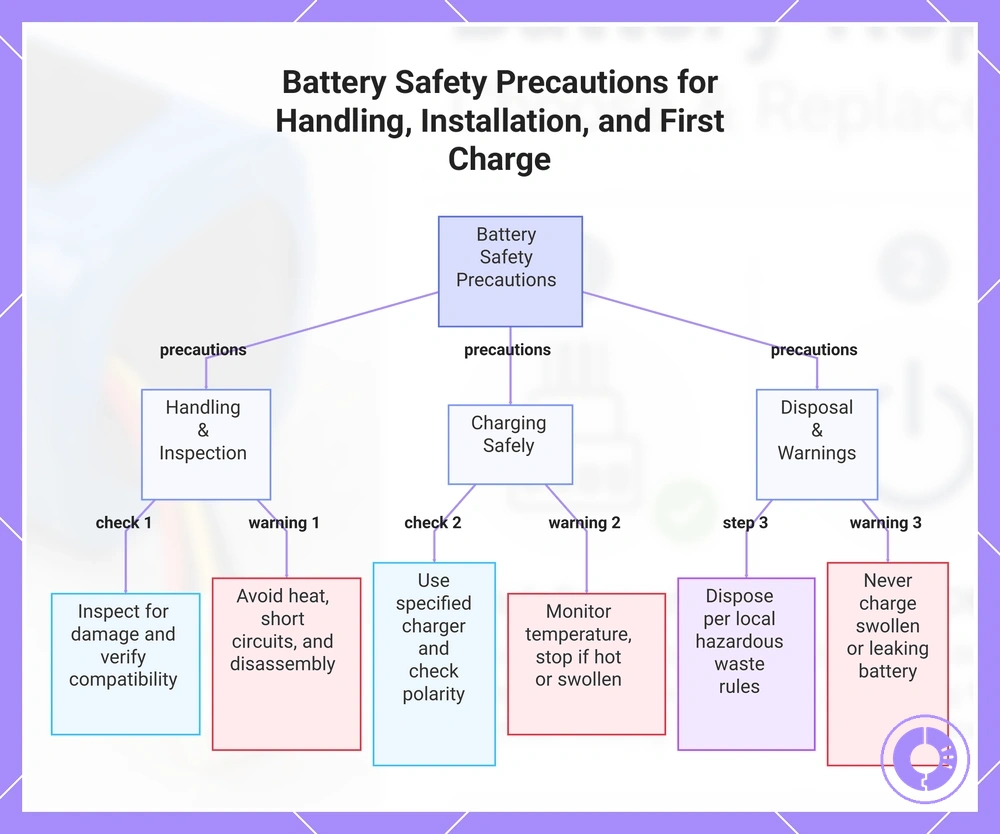
This chart summarizes key safety precautions for handling, inspecting, charging, and disposing of a Roomba battery pack.
What to Do If the Old or New Battery Is Swollen, Leaking, or Hot
If the battery pack is swollen, leaking, or unusually hot, do not install or charge it. This may indicate internal damage that could lead to a short circuit, fire, or chemical leakage. Before buying a replacement battery, check that it shows no swelling, damage, or corrosion.
Work in a well-ventilated area and wear protective gloves and eyewear. If the battery still retains heat, allow it to cool before handling.
- Stop using and charging the battery pack immediately.
- Move the battery to a non-flammable surface or fireproof container.
- Place the container in a cool, dry location away from heat sources and children.
- Do not attempt to repair or reuse a damaged battery pack.
- Dispose of the battery at an authorized e-waste facility; do not throw it in household trash.
Warning: A swollen or leaking battery pack can ignite or release harmful chemicals.
Safe Storage and Disposal of Roomba Replacement Batteries
Store your Roomba battery pack in a cool, dry place away from heat and metal objects. Cover the terminals with non-conductive tape to prevent short circuits.
How you store the battery can affect its lifespan and safety. Extreme temperatures can degrade the battery chemistry, while contact with conductive materials may cause a short circuit. Keep the battery pack in a stable environment with moderate temperatures.
- Cover the battery pack terminals with electrical tape to prevent short circuits.
- Keep the battery away from flammable materials such as paper, cloth, or plastic.
- Store the battery in a location with stable temperature to avoid thermal extremes.
- Do not place the battery in direct sunlight, near heaters, or in freezing conditions.
Warning: If the battery pack becomes swollen, leaking, or unusually hot, it indicates internal damage. Do not charge or use it. Place it in a non-flammable container and dispose of it through an appropriate recycling program.
Preparation and tools for a safe Roomba battery swap
Gather the correct tools before starting a safe Roomba battery swap. Proper preparation—including organizing the workspace and fasteners—helps prevent damage to screw threads, the bottom cover, and the battery connector, and reduces the chance of mistakes.
Caution: Stop and verify that the robot is powered off and disconnected from the charging dock before starting. A powered robot can cause injury or damage to the electronics when removing the battery.
- Power off the robot and disconnect it from the charging dock.
- Place the robot on a stable, level work surface.
- Gather the necessary tools: a Phillips screwdriver and a small container for screws.
- Locate the screws that secure the bottom cover and note their positions.
- Keep the screws organized by placing them in a container.
- Ensure the work area is well-lit for a clear view of the battery compartment.
- Note the orientation of the battery connector. Consider taking a reference photo for reassembly.
- Verify that the replacement battery matches the original in voltage, chemistry, and connector type before proceeding.
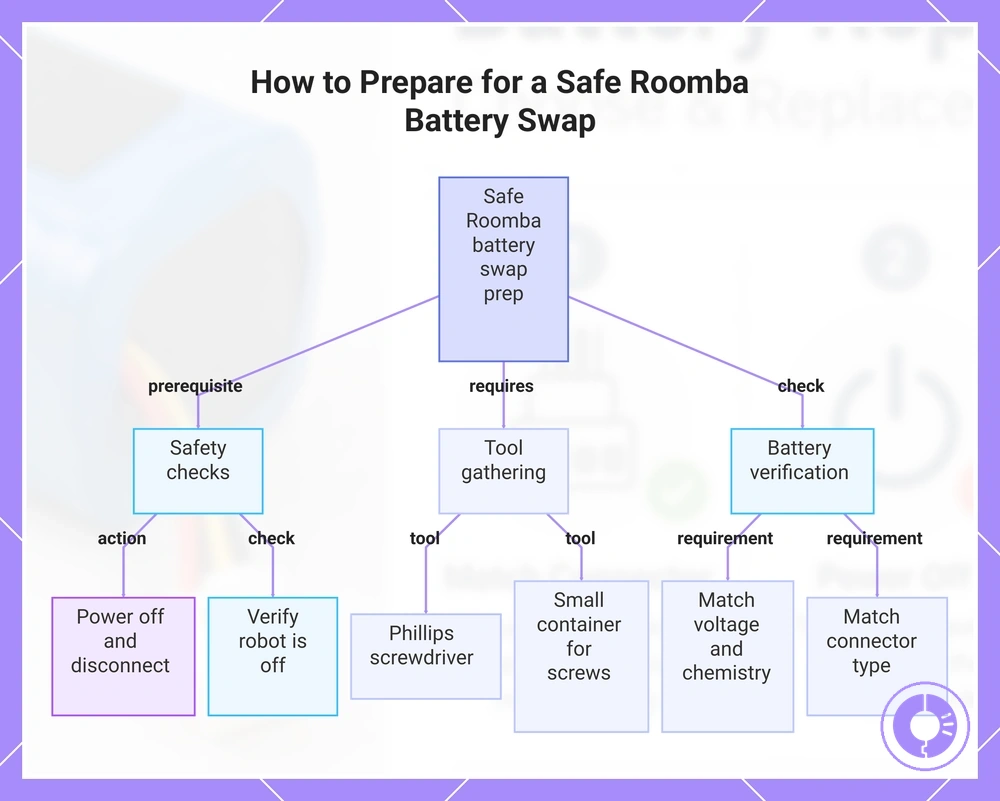
This chart shows the essential safety checks, required tools, and battery verification steps for a safe Roomba battery swap.
Finding the battery compartment and correct screws for your Roomba series
To access the battery compartment, locate the bottom cover panel on the underside of your Roomba. Using a properly fitting Phillips screwdriver on the correct screw type helps avoid damaging the fastener or housing. A quick safety check before proceeding can prevent stripping.
Stop and verify: If the screwdriver does not seat fully into the screw head, do not force it. Select a different driver tip or check the head condition—using the wrong driver can strip the screw and block access.
- Turn the Roomba over onto a padded surface to protect the top panel.
- Locate the battery compartment: look for a recessed panel on the underside, often near the center or rear of the chassis.
- Examine the screws securing the panel. Many Roomba series use Phillips-head screws, but the exact size and type can vary by model.
- Select a Phillips screwdriver that fits the screw head without wobble. A snug fit reduces the risk of stripping the fastener.
- If a screw head shows wear or rounding, do not force the driver. Instead, place a rubber band between the driver and the head for extra grip, then turn carefully to avoid further damage.
- Turn each screw counterclockwise using steady, even pressure. Do not tilt the driver as this can damage the screw head or the surrounding plastic.
- Remove the bottom cover to expose the battery pack. Note the orientation of the battery connector and any keying (alignment tabs) before disconnecting.
- Disconnect the battery connector by pulling straight out from the socket; avoid pulling on the wires. The compartment is now accessible for battery replacement.
Safe battery replacement steps for Roomba battery packs
The safe battery replacement sequence for Roomba battery packs involves verifying connector alignment, cable routing, and polarity to reduce the risk of short circuits, reversed polarity, or pinched cables during the swap.
The image shows the battery pack, connector, and compartment alignment for safe removal and installation.
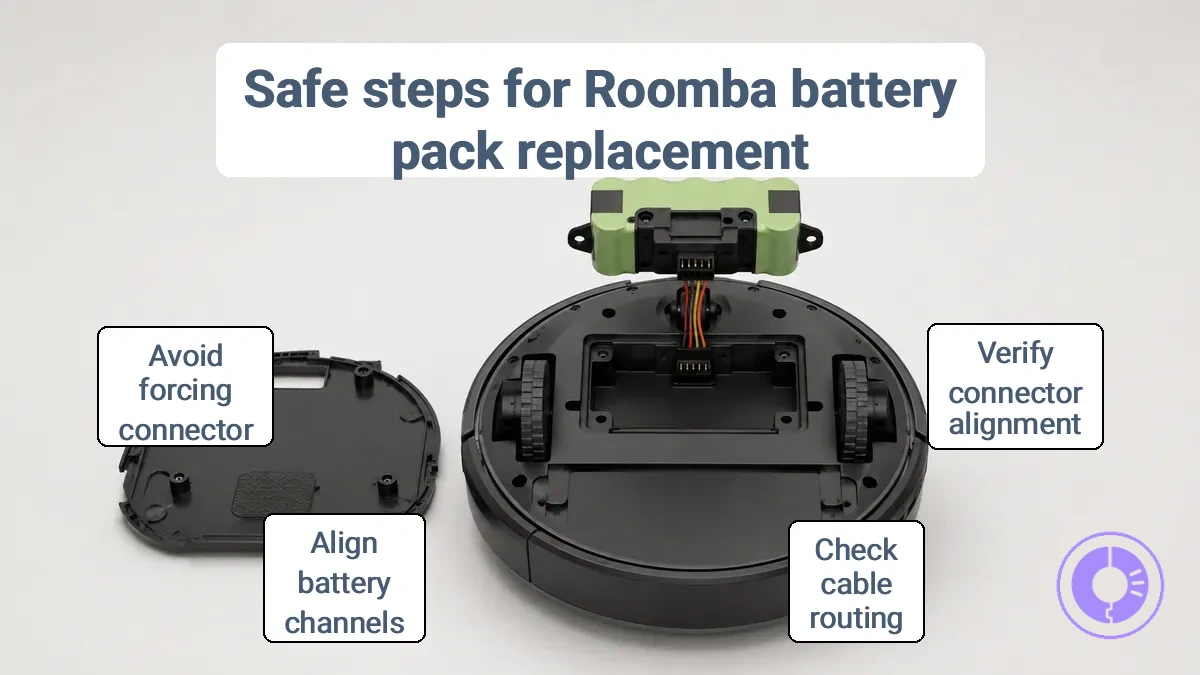
Stop and verify: If you meet resistance when disconnecting or connecting the battery, stop and check the connector alignment and cable path. Forcing the connection can damage the pins or battery compartment.
- Place the robot upside down on a flat, stable surface.
- Use a Phillips screwdriver to remove the screws securing the bottom cover.
- Lift off the bottom cover to expose the battery compartment.
- Locate the battery connector and press the release tab to disconnect the battery pack from the robot.
- Remove the old battery from the compartment.
- Insert the replacement battery into the compartment, aligning the channels on the battery with the guides in the compartment.
- Connect the battery connector to the robot until it clicks into place. If the connector does not seat easily, stop and check the orientation and cable routing.
- Replace the bottom cover and tighten the screws with the Phillips screwdriver.
Remove the old battery without stressing the connector or wiring
Start by locating the screws securing the bottom cover. Before removing the cover, make sure the robot is powered off and disconnected from the charging dock.
Caution: Do not pull the wires directly when disconnecting the battery. Use only the connector body or designated grip points to avoid damaging the cable or terminals.
- Turn the robot over and locate the bottom cover (usually secured by several Phillips screws).
- Remove the screws and set them aside in a safe place.
- Lift the bottom cover to expose the battery compartment and the connector.
- Identify the battery connector—it may have a locking tab or latch depending on the model.
- Press the tab (if present) or grip the connector body firmly, then pull straight out—do not twist or lever the connector.
- Remove the screws or clips securing the battery pack (typically Phillips screws).
- Lift the battery pack out of the compartment by its edges or any handles (if present)—avoid touching exposed contacts or wiring.
- Inspect the compartment for debris or corrosion before installing the replacement battery.
Install and secure the new battery pack with correct screw fit
Place the new battery pack flat in the battery compartment and align the connector before securing the cover. Stop and verify if the cover does not seat flush.
Caution: If the cover does not seat flush after the screws are snug, stop and remove the battery pack. Recheck the pack alignment and connector routing before trying again. Forcing the cover can damage the battery compartment or the connector.
- Place the new battery pack into the battery compartment, making sure the connector faces the correct direction and the pack sits flat.
- Connect the battery connector to the robot’s internal connector, confirming that the keying and polarity match before closing the compartment.
- Align the bottom cover over the battery compartment, checking that no wires are pinched and the cover edges match the housing.
- Insert the first screw into a corner hole and turn it by hand until snug. Do not tighten fully yet.
- Insert the remaining screws in a diagonal or cross pattern to distribute pressure evenly.
- Tighten each screw with a Phillips screwdriver in small increments, working in the same diagonal order.
- Stop tightening as soon as the screw head contacts the cover surface. Over-torquing can strip the threads or crack the plastic.
- Verify the cover is flush with the housing along all edges. If the cover lifts or gaps appear, remove the battery pack and recheck its seating.
Reassemble the Roomba and confirm no pinched cables or loose panels
Reassembly verification ensures cables are routed cleanly, panels sit flush, and fasteners are secure.
A panel that does not seat fully may indicate a pinched cable or misaligned component. If the bottom cover or any panel does not sit flush, stop and re-check the routing and seating before applying force.
Caution: Forcing a panel that does not sit flush can damage cables or components. Stop and re-check if you encounter resistance.
- Confirm all cable connectors are fully inserted and latched. A loose connector can cause intermittent power or error codes.
- Verify that no cables are trapped under the battery compartment or between the chassis and the bottom cover.
- Check that the bottom cover aligns with all screw holes and sits flush against the chassis before tightening screws.
- Using a Phillips screwdriver, ensure all screws are present and tightened evenly to a firm stop—do not overtighten.
- Press each panel (bottom cover, battery door, bumper) to confirm no gaps or movement. If any panel rocks, re-check mounting points.
- Manually rotate the drive wheels to verify they spin freely without scraping or binding. Uneven resistance may indicate a trapped cable.
- Check that the front bumper moves freely and returns without sticking; binding can occur if cables are pinched near the bumper sensor harness.
- Reinstall the battery pack and verify that the battery compartment door closes without force. A door that does not latch may indicate a misrouted cable under the pack.
Post-Replacement Checks for Charging Behavior, Run Time, and Reliability
After replacing your robot's battery, a few checks can help confirm it charges safely and delivers stable performance before daily use. These checks can indicate whether the battery is correctly installed and compatible with the charging system.
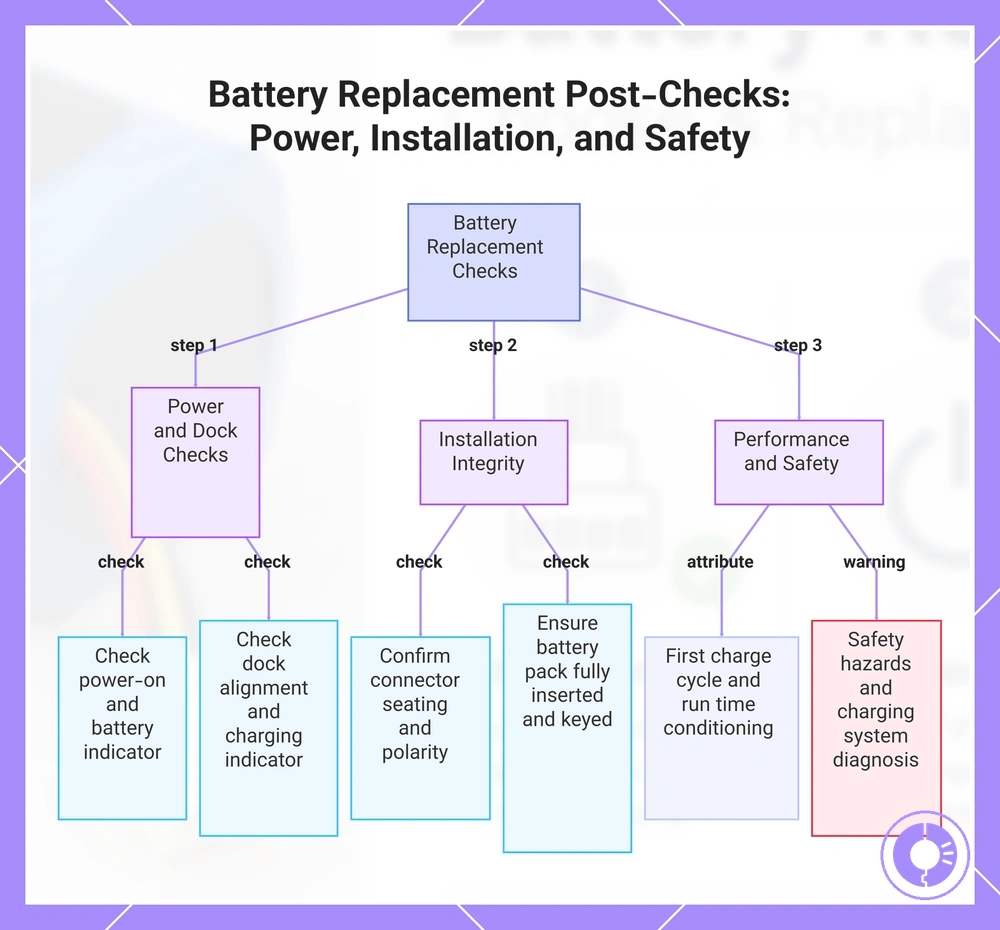
When you first power on the robot after installing the replacement battery pack, check that it turns on promptly and the battery indicator responds correctly. Place the robot on its dock and watch for proper alignment of the charging contacts; the dock's indicator should signal a charging state. If the robot fails to initiate charging, inspect the connector and dock contacts for dirt or misalignment. Before tightening the bottom cover screws with a Phillips screwdriver, confirm the connector is fully seated and polarity is correct. A common issue is an incompletely seated battery pack, so ensure it is keyed correctly and fully inserted into the battery compartment.
The first full charge cycle may run longer or shorter than expected depending on the battery chemistry, capacity, and the robot's charging algorithm. Run time often improves after several charge-discharge rounds as the battery conditions during initial cycles. If the robot stops charging prematurely, repeatedly errors on the dock, or exhibits unusually short run time from the start, the problem may lie not with the battery but with the charging system, dock contacts, or the robot's internal charging circuitry. A careful inspection of the charging path from dock power supply to the connector inside the battery compartment is warranted before concluding the battery is defective.
Stop using the battery immediately if you notice swelling, excessive heat during charging, or repeated error codes that persist after reseating the connector. These symptoms may indicate a safety hazard or a serious mismatch in voltage or chemistry ratings. Do not ignore these signs or continue charging. If the battery passes the initial visual and performance check but still triggers errors, the cause is often an incompatibility between the battery pack and the robot's charging system rather than a faulty replacement.
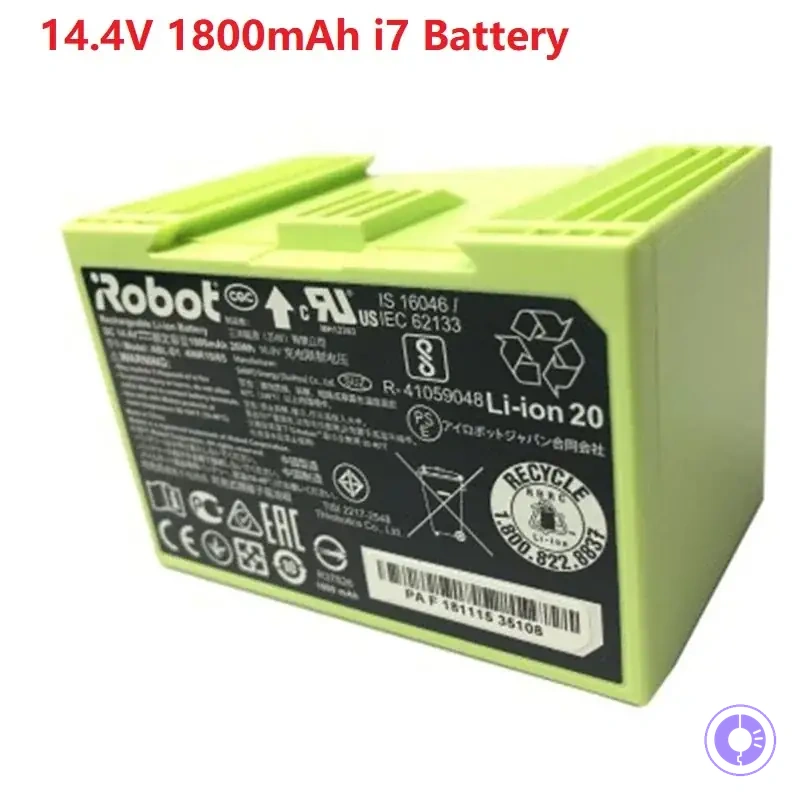
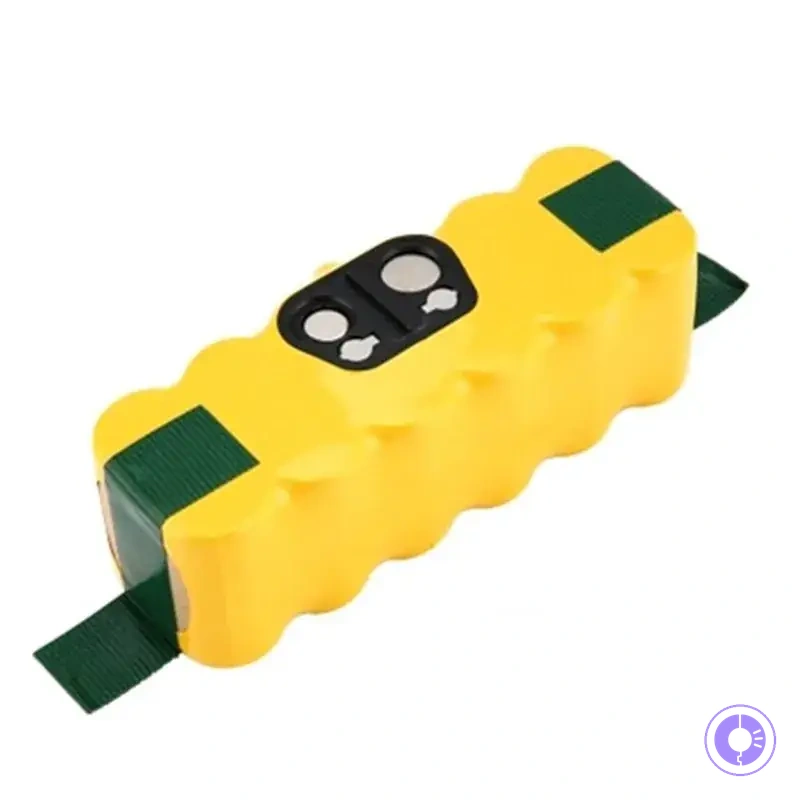
The products below are useful examples for comparing available options. Before buying, check that the compatibility criteria, key features, and product details match your needs.
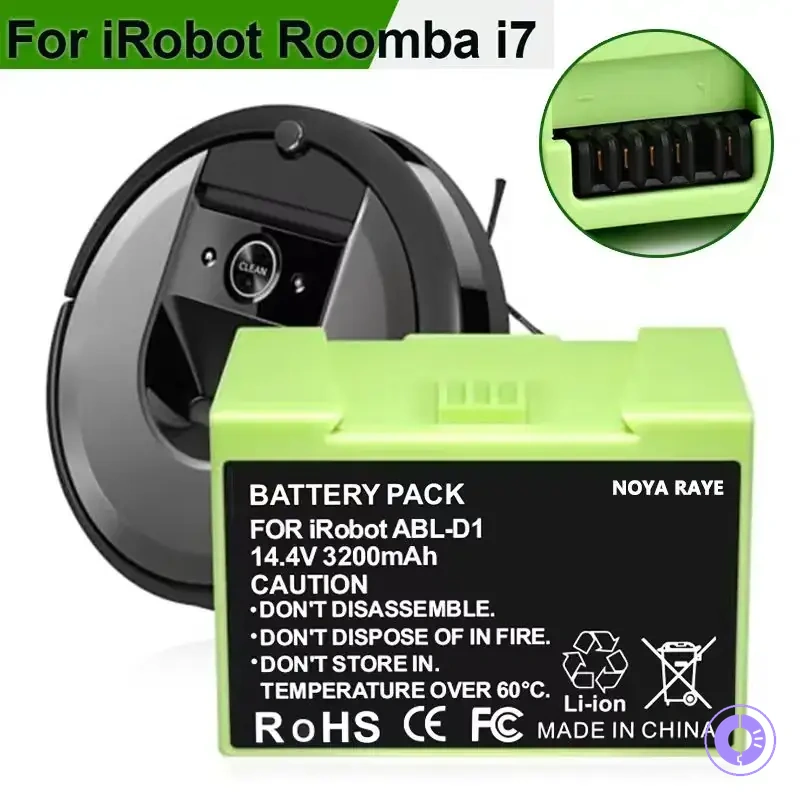
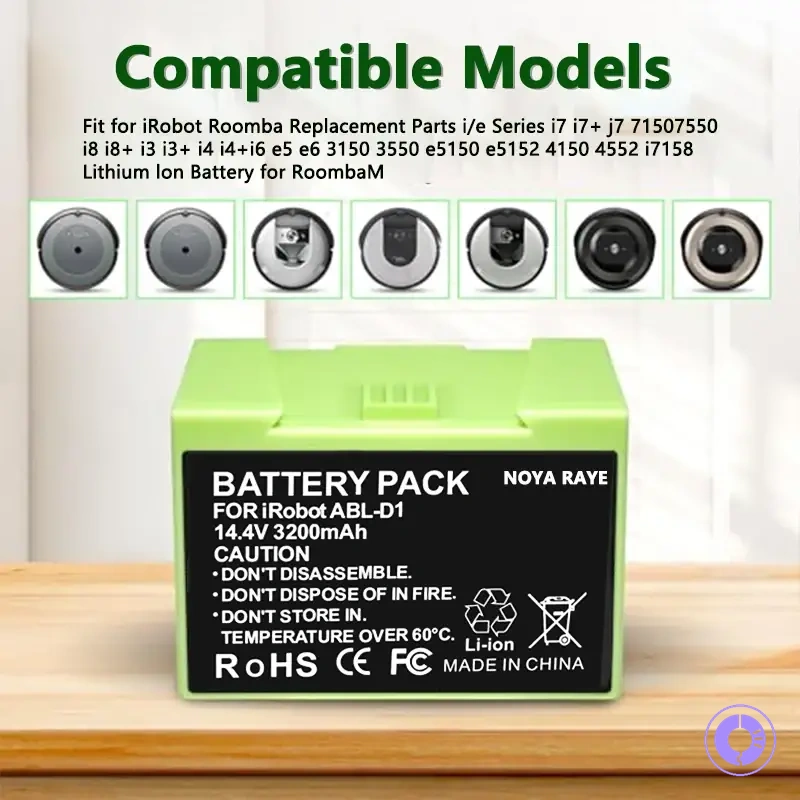
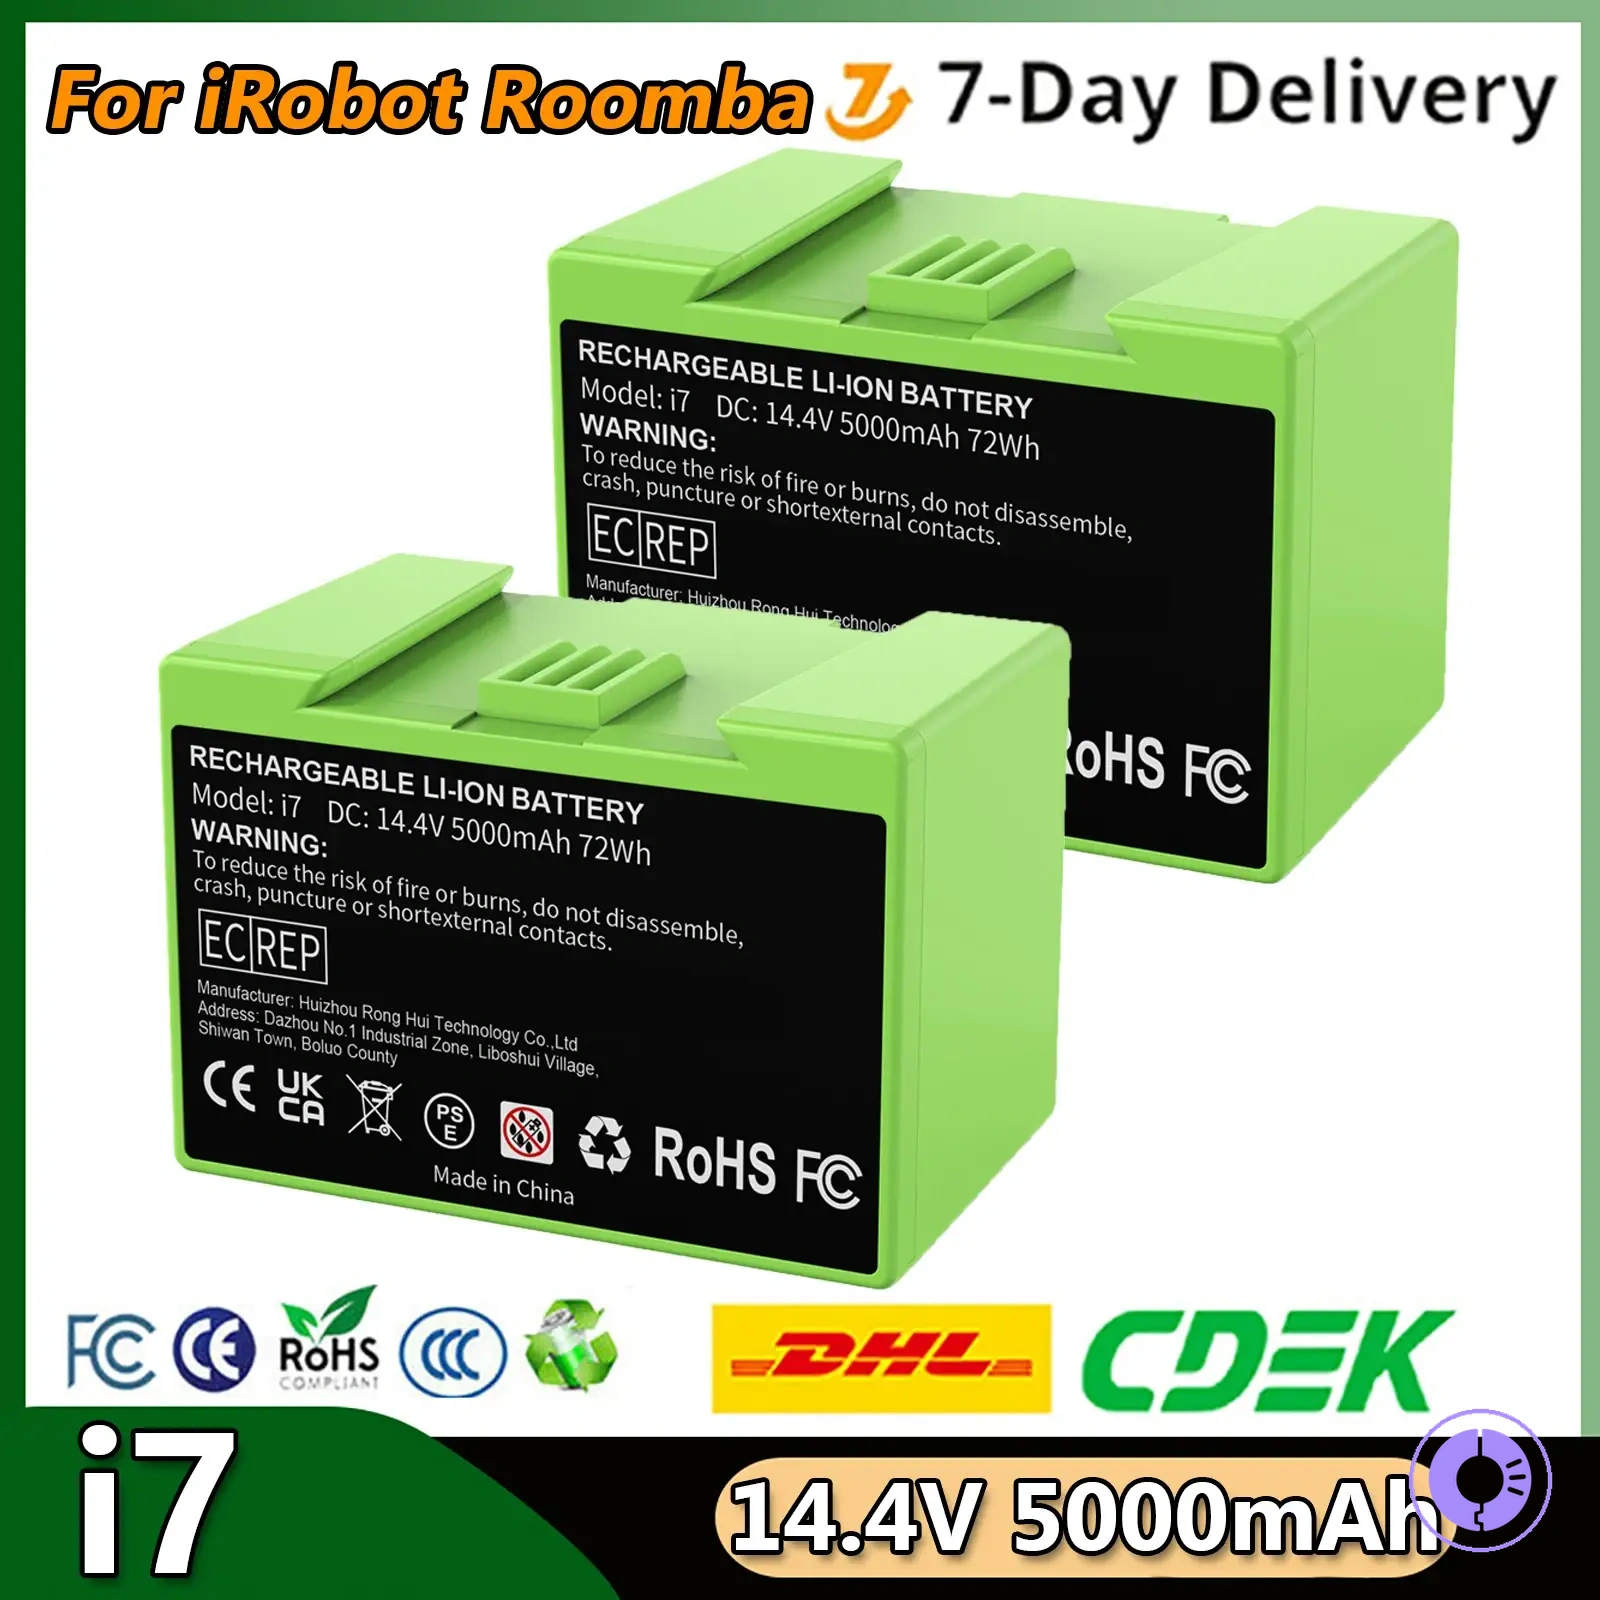
This chart outlines the essential checks after replacing your robot's battery, including initial power and dock tests, installation verification, and performance monitoring with safety warnings.
First-charge and initialization checks that reduce false “bad battery” conclusions
First-charge and initialization checks help avoid false “bad battery” conclusions by checking indicator behavior, dock contact cleanliness, and battery temperature. Before the first charge, verify correct installation: use a Phillips screwdriver to remove the bottom cover, confirm the connector is fully seated in the battery compartment, then replace the cover and tighten the screws.
During the first few minutes, a brief blinking pattern on the indicator is typically normal as the charger identifies the battery. Slight warmth that builds gradually is also typical, especially if the battery was deeply discharged.
Abnormal signs include:
- The indicator stays off entirely.
- An error code appears immediately.
- The battery becomes hot to the touch within the first few minutes.
If any abnormal sign appears, stop charging and inspect the dock contacts for debris or corrosion; re-seat the connector inside the battery compartment if needed.
After the first 5–10 minutes, when the indicator shows a steady charge pattern and the battery remains comfortably warm, let the initial charge cycle complete uninterrupted. A full cycle may take several hours. Stop charging if an error persists or the battery is excessively hot; then remove the battery pack and re-check the connector and dock alignment.
The replacement battery may need to be returned for compatibility verification if the same behavior appears during the second charge cycle or if an error code persists after a full charge. Some first-charge hesitations may resolve after one full cycle, but persistent issues often point to a connector or contact problem rather than a faulty battery pack.
When a new battery will not fix charging issues
If a verified compatible battery still does not charge, the problem is often with the dock, charging contacts, or power path, not the battery pack itself. Since the battery is rarely the issue, start by checking the dock and contacts.
Check the charging dock and the robot's contacts. Clean both sets of metal strips with a dry cloth. Make sure the dock is plugged into a working outlet and its indicator light is on. If the robot rocks on the dock, the contacts may misalign, preventing charging even if the battery and dock are functional.
Signs of a power-path problem include a flashing or absent dock light, charging that stops after a few seconds, or no response on the dock. Error codes may also appear. These cues suggest a contact, cable, or dock issue. If you recently installed the battery, check that the connector inside the battery compartment is fully seated and that polarity matches the connector's keying.
If cleaning the contacts and checking the dock do not resolve the issue, inspect the dock cable and try a different outlet. Avoid disassembling the robot unless you have the proper tools. For persistent problems, see the what to replace when it won’t charge guide. Battery replacement is not the default fix when contacts are dirty or compatibility is unverified.
The products below are useful examples for comparing available options. Before buying, check that the compatibility criteria, key features, and product details match your needs.
Dock, charging contacts, and power path checks before replacing the battery again
Before replacing the battery, safely perform these external checks: verify dock power, contact cleanliness, seating alignment, and indicator light behavior. A dock LED that does not light up when the robot is docked suggests a possible power path interruption.
When the robot is connected, a normal dock shows a steady or blinking light. If the dock LED stays off, the power supply or the dock itself could be faulty.
- Clean both sets of charging contacts — on the robot and the dock — with a dry cloth until they are shiny. Dirt and grime can block the electrical connection even if the dock appears powered.
- If the contacts are clean but the robot still does not charge, check the seating alignment: the robot must rest fully against the dock contacts without being pushed too far forward. Misalignment is a common cause of intermittent charging.
Observe the robot's behavior when docked: if the power light turns orange briefly and then goes off, the charging circuit may be unable to hold the connection. This likely points to an issue with the dock's internal switching components rather than the battery. If the robot shows no response at all even with a clean dock and proper seating, the battery may need replacement. Stop at this point: do not proceed to internal disassembly unless the external checks are all clear and the robot still fails to charge.
Safely perform the replacement using the correct tools and following your model's instructions, then verify contact cleanliness and seating. If charging issues persist, consult a qualified technician.
Charging-related error codes and the next diagnostic path
Charging error codes narrow the likely problem area to the dock’s power supply, the contact alignment, or the battery pack itself.
The indicator pattern (steady red, blinking amber, or no response) provides the first clue; see error codes linked to charging and power for a detailed breakdown of what each signal class typically means.
To choose your next safe step, use this compact mapping from error signal class to likely area and recommended check. Exact behavior may vary by model family.
- Dock power indicator off or intermittent — Likely area: dock power supply or cable connection. Next safe check: verify mains power and cable integrity; surface inspection only.
- Charging starts then stops within seconds — Likely area: battery pack or dock contact pins. Next safe check: clean both dock and battery contacts with a dry cloth; ensure full insertion.
- Battery fails to reach full charge (slow or stuck) — Likely area: battery management system or aging battery cells. Next safe check: run a calibration cycle if supported; stop if the battery shows swelling or heat.
Caution: All checks listed here are limited to surface-level inspection. Do not attempt to open the battery pack or probe high-voltage contacts. If unsure, consult a professional.
If the error persists after surface-level checks, a replacement battery is the next diagnostic step.